


3-3
3.1.2 Lighting the Fryer
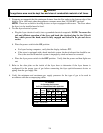
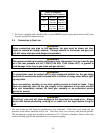
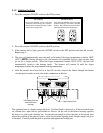
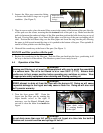
1. Press the computer ON/OFF switch to the OFF position.
Honeywell
ON
OFF
Honeywell
ON
OFF
For Non-CE Fryers
After placing the ON/OFF switch in the OFF
position, turn the gas valve knob to the OFF
position. Wait 5 minutes, then turn the knob
to the ON postion and proceed with Step 2.
For CE Fryers
Placing the ON/OFF switch in the OFF
position also turns off the gas valve. Wait five
minutes before continuing with Step 2, which
will also turn on the gas valve.
2. Press the computer ON/OFF switch to the ON position.
3. If the burners fail to light, press the ON/OFF switch to the OFF position and wait 60 seconds.
Repeat step 2.
4. The fryer will automatically enter the melt cycle mode if the frypot temperature is below 180ºF
(82ºC). (NOTE: During the melt cycle, the burners will repeatedly fire for a few seconds, then
go out for a longer period.) When the frypot temperature reaches 180ºF (82ºC), the unit will
automatically switch to the heating mode. The burners will remain lit until the frypot
temperature reaches the programmed cooking temperature.
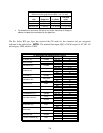
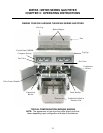
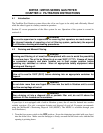
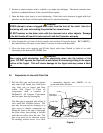
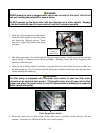
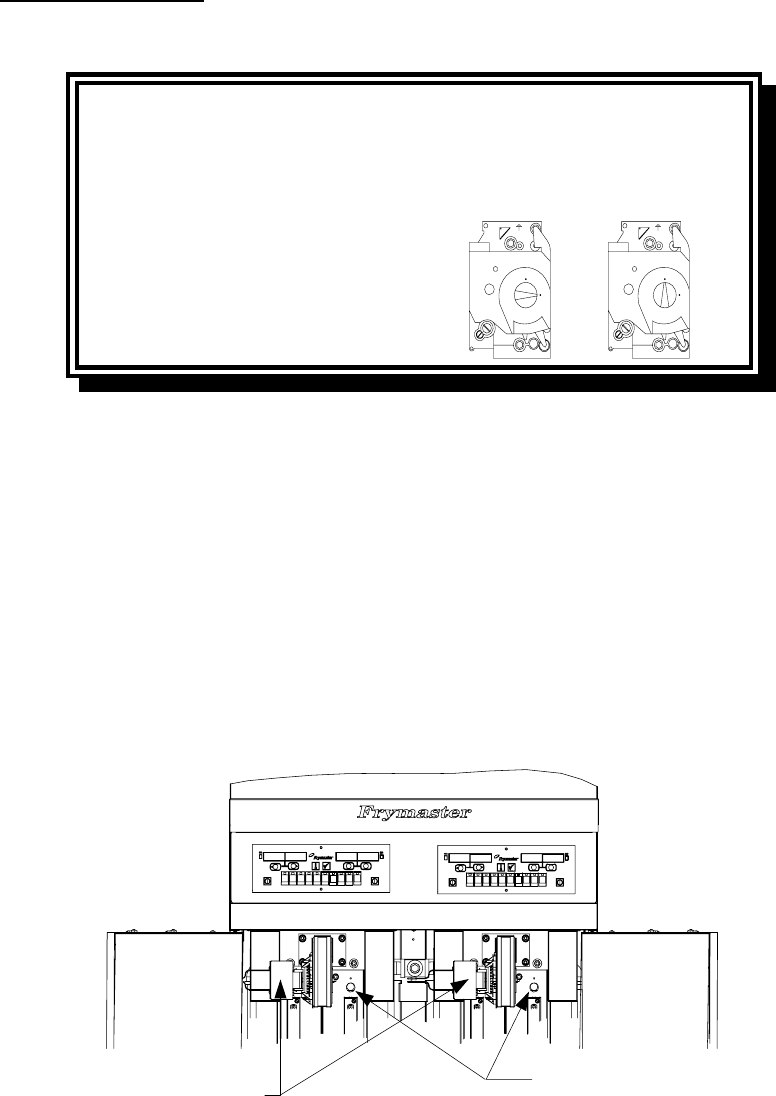
5. After the burners have been lit for at least 90 seconds, observe the flames through the burner
viewing ports located on each side of the combustion air blower.
Right Viewing Ports
Left Viewing Ports are
behind the motor
housings.
234
DEF GHI JKL MNO PQR VWX
56 8
YZ-
09
+
*
STU
7
ABC
1
234
DEF GHI JKL MNO PQR VWX
56 8
YZ-
09
+
*
STU
7
ABC
1
The optimum burn is a bright orange-red glow. If a blue flame is observed, or if there are dark spots
on a burner face, adjust the air gas mixture as follows: On the side of the blower housing opposite
the motor is a plate with a locking nut. Loosen the nut enough to allow the plate to be moved, then
adjust the position of the plate to open or close the air intake opening until a bright orange-red glow
is obtained. Carefully hold the plate in position and tighten the locking nut.