


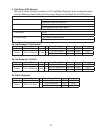
32
E. Float Switch Check and Cleaning
1. Float Switch Check
1) Remove the front panel, then make sure the power switch is in the "ON" position.
2) Move the control switch to the "DRAIN" position.
3) Engage the safety switch and allow the evaporator and reservoir to drain.
4) Disengage the safety switch, then move the power switch to the "OFF" position and the
control switch to the "OFF" position.
5) Turn off the power supply.
6) Disconnect F/S connector and check F/S continuity. Both UF/S and LF/S should be
open. Check continuity between F/S common (BK wire) and UF/S (R wire). Next,
check continuity between F/S common (BK wire) and LF/S (DBU wire). If both are
open, continue to step 7. If either are closed, follow the steps in "IV.E.2. Float Switch
Cleaning." After cleaning F/S, check UF/S and LF/S again. Replace if necessary.
7) Reconnect F/S connector.
8) Move the power switch to the "ON" position.
9) Turn on the power supply.
10) Move the control switch to the "ICE" position.
11) Engage the safety switch.
12) Once the reservoir is full and GM starts, disengage the safety switch, then move the
power switch to the "OFF" position and the control switch to the "OFF" position.
13) Turn off the power supply.
14) Remove F/S connector and check F/S continuity. Both UF/S and LF/S should be closed.
Check continuity between F/S common (BK wire) and UF/S (R wire). Next, check
continuity between F/S common (BK wire) and LF/S (DBU wire). If either are open,
follow the steps in "IV.E.2. Float Switch Cleaning." After cleaning F/S, check UF/S and
LF/S again. Replace if necessary.
15) Reconnect F/S connector.
16) Move the power switch to the "ON" position and the control switch to the "ICE" position.
17) Replace the front panel in its correct position.
18) Turn on the power supply to start the automatic icemaking process.