


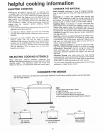
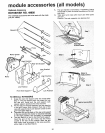
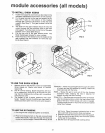
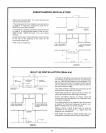
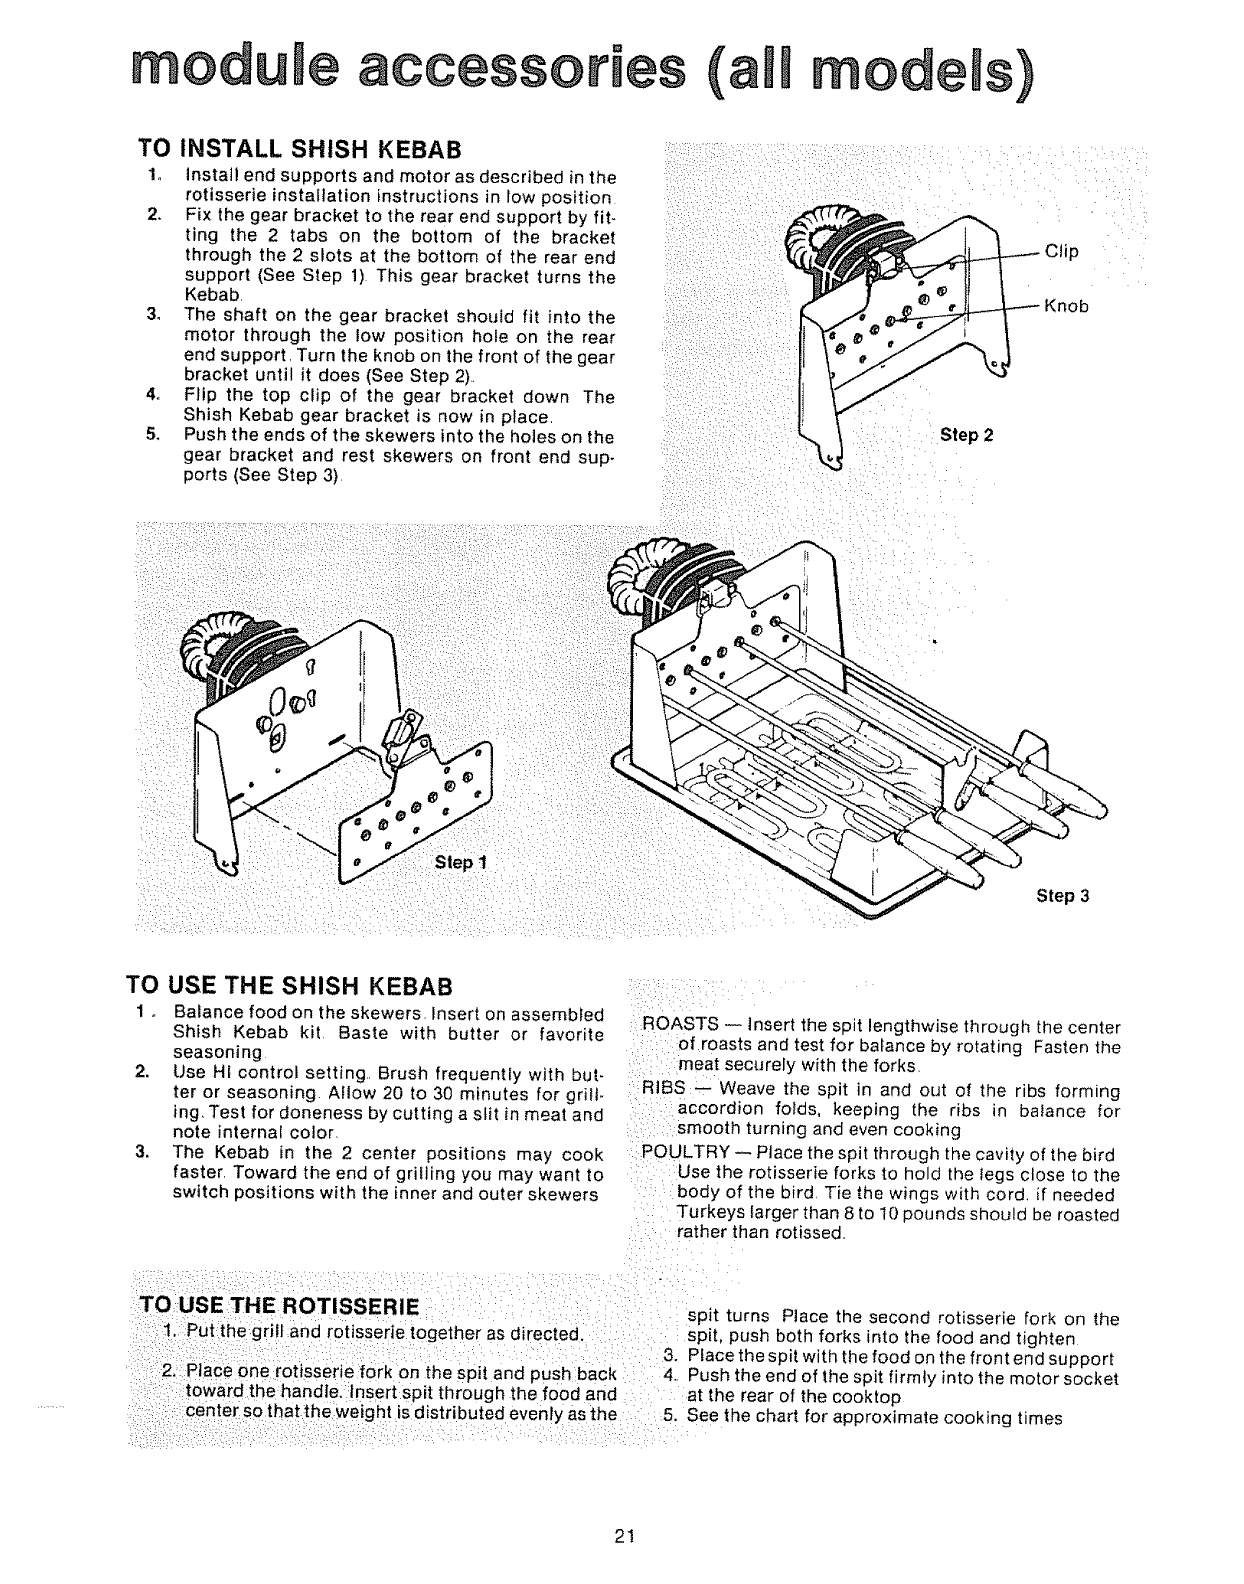
TO INSTALL SHtSH KEBAB
1o Instat! end supports and motor as described in the
rotisserie installation instructions in low position
2, Fix the gear bracket to the rear end support by fit-
ting the 2 tabs on the bottom of the bracket
through the 2 slots at the bottom of the rear end
support (See Step 1). This gear bracket turns the
Kebab,
3, The shaft on the gear bracket should fit into the
motor through the low position hole on the rear
end support, Turn the knob on the front of the gear
bracket until it does (See Step 2).
4o Flip the top clip of the gear bracket down The
Shish Kebab gear bracket is now in place,
5. Push the ends of the skewers into the holes on the
gear bracket and rest skewers on front end sup-
ports (See Step 3),
Clip
Knob
Step 3
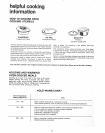
TO USE THE SHISH KEBAB
1 o Balance food on the skewers, insert on assembled
Shish Kebab kit, Baste with butter or favorite
seasoning
2, Use Ht control setting,, Brush frequentfy with but-
ter or seasoning. Allow 20 to 30 minutes for grill-
ing, Test for doneness by cutting a slit in meat and
note internat color,
3. The Kebab in the 2 center positions may cook
faster. Toward the end of grilling you may want to
switch positions with the inner and outer skewers
• Li• ::•i •: : i ¸ •
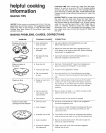
ROASTS -- Insert the spit lengthwise through the center
:i: : of roasts and test for batance by rotating Fasten the
:imea t securely with the forks.
::RIBS:-- Weave the spit in and out of the ribs forming
ii:_i :i accordion folds keepng the ribs in balance for
:smooth turning and even cooking
i POULTRY -- Place the spit through the cavity of the bird
:Use the rotisserie forks to hold the {egs close to the
_ :ibody of the bird. Tie the wings with, cord, if needed
Turkeys larger than 8 to 10 pounds should be roasted
rather than rotissed..
i
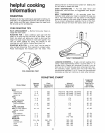
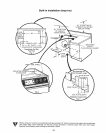
TO:USE THE ROTISSERIE :: : i : ::: : sp t turns P ace the second rot sser e fork on the
he:grill and r0tisserie:together as d reCteal :: : t push both forks nto the food and t ghten
: 3. Place the spit w th the food on the front end support
=/:2. Ptace One rotisser e:fork on the Sp t and push back :: :4.. Push the end of the sp t f rm y nto the motor socket
t through the food and : .... :at the rear of the cooktop
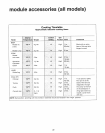
..... enters0that:theweight is distributed evenly as thel ::5. See the chart for approximate cooking times
2!