


2-8
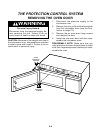
REMOVING/ADJUSTING THE INTERLOCK SWITCHES
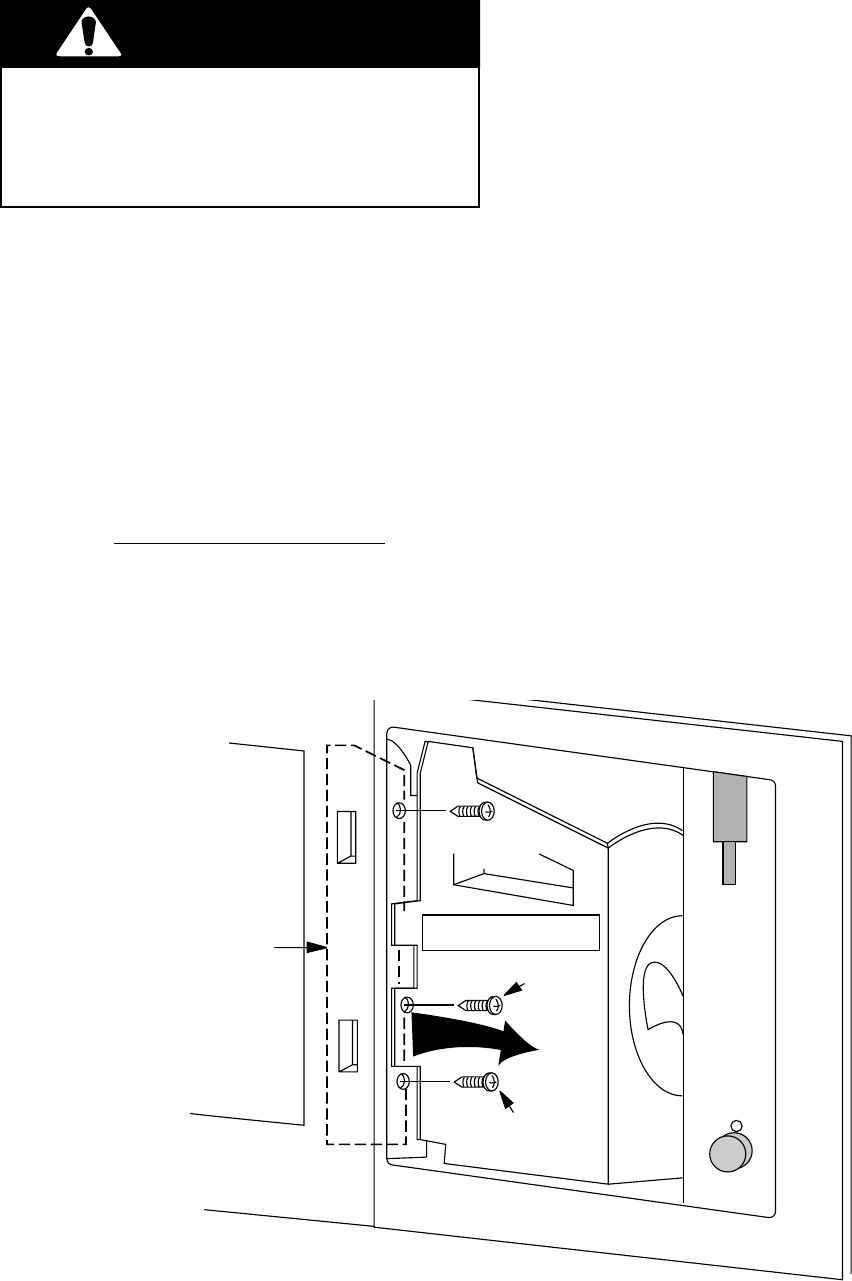
WARNING
Personal Injury Hazard
Disconnect from the electrical supply be-
fore servicing the unit. Failure to do so
could result in death or electrical shock.
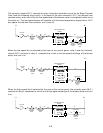
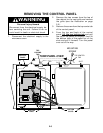
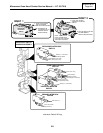
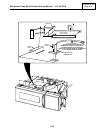
5. Remove the center screw from the fan
cover and fold the cover back so you can
access the switches (see the illustration
below).
6. Remove the two mounting screws from
the interlock switch assembly, and posi-
tion the assembly so you can easily ac-
cess the switches and wiring.
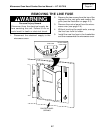
7. Refer to inset 1 in the illustration on the
next page for the secondary interlock
switch, or inset 2 for any of the other
switches mounted on the interlock switch
housing assembly, and remove the switch
from the housing as shown.
8. One at a time, pull the wire connectors off
the defective switch, and reconnect them
to the same terminals on the replacement
switch.
9. Snap the new switch into place on the
switch housing.
10. Mount the interlock switch assembly and
then reassemble the microwave oven.
NOTE: If any adjustments are necessary, re-
fer to page 2-10.
REMOVING A SWITCH
1. Disconnect the electrical supply to the
microwave oven.
2. Remove the two screws from the top of
the cabinet for the vent grille and remove
the grille (see the illustration on page
2-3).
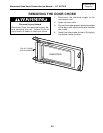
3. Remove the screw from the top center tab
of the control panel (see page 2-6).
4. From the top and back of the control
panel,
lift the top locking tab and pull
the top of the panel out slightly, then lift
the bottom tabs of the panel out of the
slots and pull it forward. Set the panel
inside the oven cavity while you work.
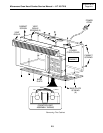
FAN COVER
COVER
SCREW
INTERLOCK
SCREW
INTERLOCK
SCREW
FOLD
BACK
INTERLOCK
SWITCH
HOUSING