Care & Cleaning
7. When the oven is cool, LOC will no longer
be displayed and the door may be opened.
8. Wipe out the oven interior with a damp
cloth. If soil remains it indicates the cycle
was not long enough.
To Cancel Self-Clean Cycle:
1. Press CANCEL pad.
2. If LOC is NOT displayed, open oven door.
If LOC is displayed, allow oven to cool.
To Delay the Start of a Self-Clean Cycle:
1. Follow steps 1-4 above.
2. Press the STOP TIME pad. STOP TIME
will flash.
3. As STOP TIME flashes, press the appro-
priate number pads to enter the time you
wish the oven to stop.
4. DELAY CLN and LOC will be displayed.
5. When the delay period is completed and
cleaning begins, CLEANING, LOC and
the clean time will be displayed.
12
Cleaning Procedures
CAUTION:
➢
Be sure appliance is off and all
parts are cool before handling or
cleaning. This is to avoid damage
and possible burns.
➢ To prevent staining or discoloration,
clean appliance after each use.
➢ If a part is removed, be sure it is
correctly replaced.
BROILER PAN AND INSERT
➢ Place soapy cloth over insert and pan;
let soak to loosen soil.
➢ Wash in warm soapy water. Use scour-
ing pad to remove stubborn soil.
➢ Broiler pan and insert can be cleaned in
dishwasher.
BRUSHED CHROME
(
SELECT
MODELS
)
➢ When cool, wash with soapy water, rinse
and buff the surface.
➢ For heavier soil, use a mild abrasive
cleaner such as baking soda or Bon
CAUTION:
➢
It is normal for parts of the range to
become hot during a clean cycle.
➢ To prevent damage to oven door, do
not attempt to open the door when the
LOCK indicator word is displayed.
➢ Avoid touching cooktop, door, window,
or oven vent area during a clean cycle.
➢ Do not use commercial oven cleaners
on the self-clean oven finish or around
any part of the oven as they will dam-
age the finish or parts.
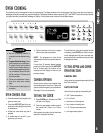
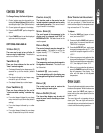
CLEAN PAD
Use to set a self-clean cycle. (Only one
oven may be cleaned at a time. Both ovens
will lock when either is being cleaned.)
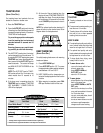
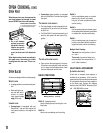
1. Clean oven
frame, door
frame (area
outside of
gasket) and
around the
opening in the door gasket with a nonabra-
sive cleaner such as Bon Ami*. These
areas are not exposed to cleaning tem-
peratures.
2. Remove oven racks. If racks are left in
during a clean cycle, it may impair function
and they will discolor. Turn off the oven
light and close door.
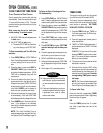
3. Press CLEAN pad.
4. Press the AUTO SET pad for 3 hours of
cleaning time, press again for 4 hours and
again if 2 hours of clean time is desired.
5. CLEANING and LOC plus the clean time
will appear in the display and both ovens
will lock.
6. When the clean cycle is complete,
CLEANED will be displayed. LOC will
remain on until the oven has cooled (approx.
1 hour).
❚ To prevent damage to oven door, do not
attempt to open either oven door when
the LOC indicator word is displayed.
❚ During the cleaning process, the kitchen
should be well ventilated to help elimi-
nate normal odors associated with clean-
ing. Odors will lessen with use.
❚ It is normal for flare-ups, smoking or
flaming to occur during cleaning if the
oven is heavily soiled. It is better to clean
the oven regularly rather than to wait until
there is a heavy buildup of soil.
❚ Wipe up excess grease or spillovers to
prevent flare-ups. For ease in cleaning,
the bake element in the upper or lower
oven can be lifted slightly (1 inch).
NOTES:
❚ As the oven heats and cools, you may
hear sounds of metal parts expanding
and contracting. This is normal and will
not affect performance.
❚ Wipe up sugary and acidic spillovers such
as sweet potatoes, tomato or milk-based
sauces prior to a self-clean cycle. Porce-
lain enamel is acid resistant, not acid
proof and may discolor if spills are not
wiped up before a self-clean cycle.
❚ A white discoloration may appear after
cleaning if acidic or sugary foods are not
wiped up before the clean cycle. This
discoloration is normal and will NOT af-
fect performance.
* Brand names for cleaning products are registered trademarks of the respective manufacturers.


