


143
SECTION 3 - SERVICING COMPONENTS
4. Heater specifications
PS310/360-series electric ovens use 18 heating
elements in 3 banks (6 elements per bank).
208V elements are used for ovens with a 208V
supply.
240 volt elements are used for ovens with a 220, 230
or 240V supply. 240V elements are also used on
ovens with a 416V or 480V supply (connected in se-
ries).
380V elements are used for ovens with a 380V
supply.
All heaters are connected in Delta.
Each element is stainless-clad and has a 4-7/8/
124mm cold (unheated) end next to the connect-
ing leg.
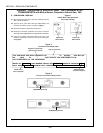
Individual element electrical data
Volts Watts Ohms Connection
208V 1350W 32W Parallel
220V 1134W 42.7W Parallel
230V 1239W 42.7W Parallel
240V 1350W 42.7W Parallel
380V 1350W 107W Parallel
416V 1013W 42.7W Series
480V 1350W 42.7W Series
5. Checking the Heating Elements
The most common problems encountered with electric
heaters are:
Open or bad connections.
Open, shorted or grounded heating elements.
To troubleshoot the heating elements, disconnect all
leads from ALL of the elements in the bank. Then,
check each element with a digital multimeter set to
6. Changing Heating Elements
NOTE: Wires going from the mercury contactors to
the heating elements are rated at #12 gauge TAGT,
482°F/250°C. DO NOT, under
any circumstances, use
a wire of lesser rating or quality.
NOTE: All lugs and connections are rated at 600°F/
316°C. All heating elements are double-nutted. The
rear of each heating element is held to other elements
by a spacer bracket. The only way the element can be
changed is by removing the entire bank from the oven.
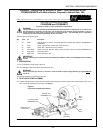
To remove the element bank:
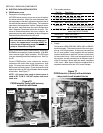
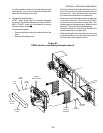
1. Remove the 4 bolts holding the bank of element to
the oven. See Figure 80.
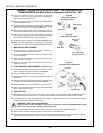
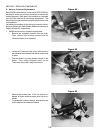
2. Remove the 9 electrical leads going to the element
bank. See Figure 81.
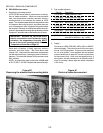
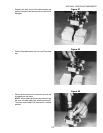
3. Gently work the bank of elements out of the oven.
Be careful not to pinch the wires between the frame
of the oven and the side plate of the heating ele-
ments. See Figure 82.
4. Remove the bank of elements and place them on
the floor. The entire bank may now be serviced.
5. Remove the element jumper wires and element cover
if individual elements need replacement.
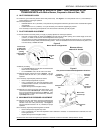
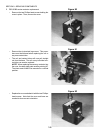
NOTE: The spacer brackets MUST be reinstalled be-
fore assembling the element bank back into the oven.
These brackets keep the elements from touching each
other during use. See Figure 82.
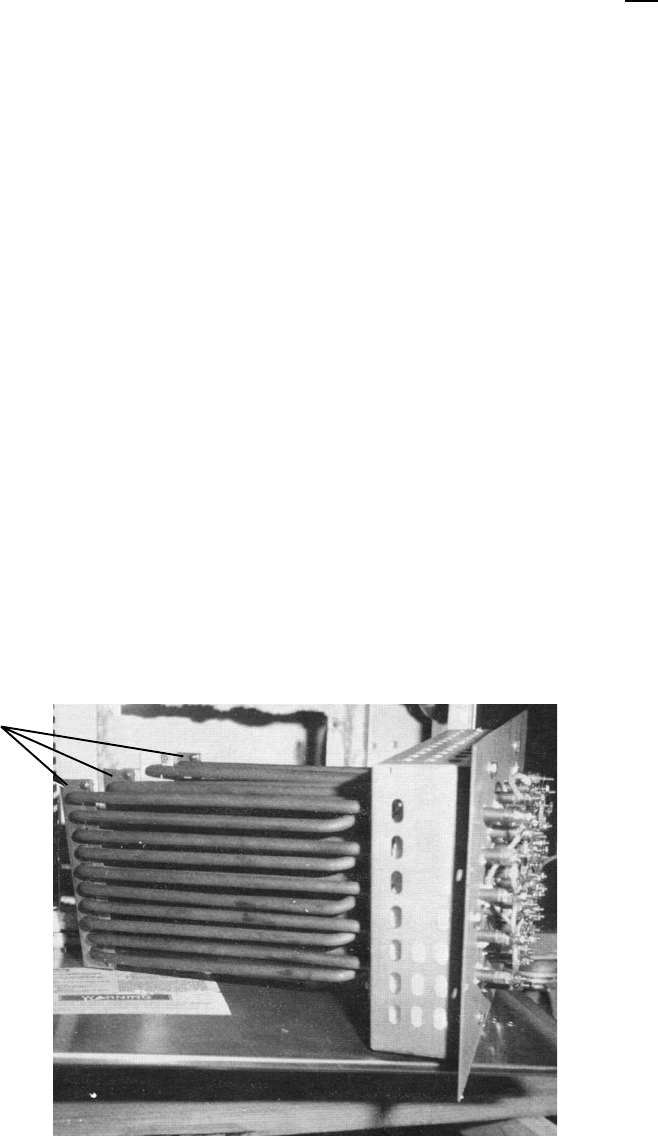
Figure 82
Element bank removed - spacer bracket visible
Spacer
brackets
Ohms (W). Correct ratings are shown in the table in
the preceding section. Zero reading on the ohm scale
indicates an open or shorted element.
It is also possible to check for an open element using
an ampmeter. Any current through the element indi-
cates that the element is not open.