


4
35Instructions for the Installer
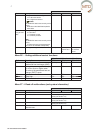
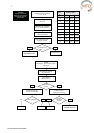
A
C
B
D
B
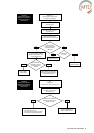
E
G
F
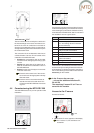
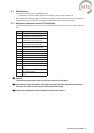
Left-hand version
Designated as L
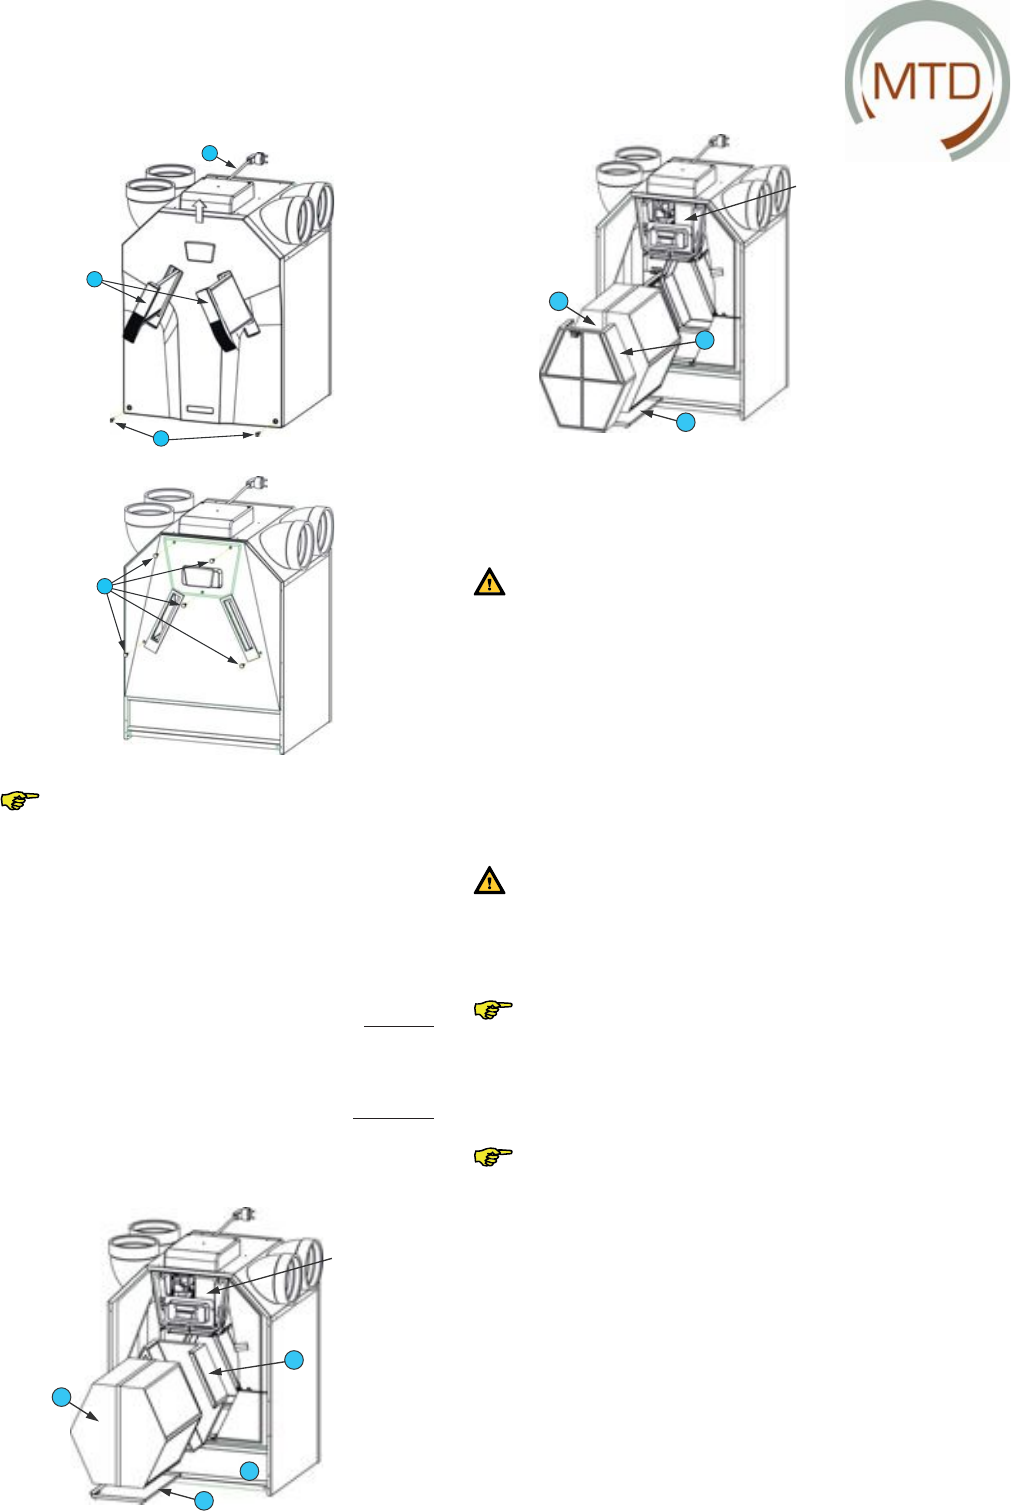
E
G
F
Right-hand version
Designated as R
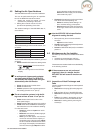
Then:
• Remove the heat exchanger (F) from the drain
plate (G).
Caution!
There may still be water in the heat ex-
changer!
• Clean the heat exchanger (F), if necessary.
– Immerse the heat exchanger in warm wa-
ter (max. 40° C) to clean.
– Finally rinse the heat exchanger thorough-
ly with warm tap water (max. 40° C).
– Hold the heat exchanger with both hands
at the green side surfaces and shake out
all the water.
Caution!
On no account should aggressive or sol-
vent-based cleaning agents be used.
Do not install the heat exchanger yet
(the fans can be removed, inspected and
cleaned, if necessary, in the following
steps).
If an enthalpy heat exchanger is in-
stalled, observe the corresponding in-
struction.
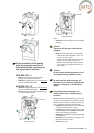
Do not install the heat exchanger yet if the fans
are also to be inspected. The following section
describes how to remove, inspect and clean the
fans, if necessary, after the heat exchanger:
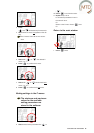
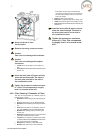
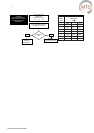
• Remove the plastic plate (I) in front of the PCB
panel by loosening the two screws.
• Loosen the connectors (J) and the earth cable
(J) at the PCB panel and remove the cables with
the two grommets (K) completely.
• Remove the complete fan casing (L) by pressing
in the tabs (M).
• Remove the inlet neck (N) by pressing in the
tabs around the fan casing.
• Clean the fans (O).
During installation of the sealing
plate, its underside must fi rst be
inserted behind the raised edge so
that a good seal is achieved.
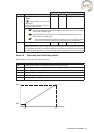
MTD-ERV 350 – L
• Pull the tape (E) to remove the heat ex-
changer (F) and the drain plate (G).
• Remove the bypass duct (H) on the left-hand
version of the MTD-ERV 350.
MTD-ERV 350 – R
• Remove the bypass duct (H) on the right-hand
version of the MTD-ERV 350.
• Pull the tape (E) to remove the heat exchanger
(F) and the drain plate (G).