


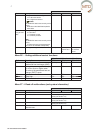
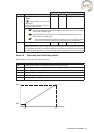

4
36 Instructions for the Installer
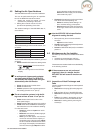
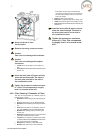
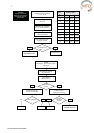
I
J
K
N
O
M
L
Use a soft brush to clean
the fan blades.
Remove dust using a vacuum cleaner.
Caution!
Take care not to damage the fan blades.
Caution!
Take care not to damage the tempera-
ture sensor.
• Install all the parts again in the reverse or-
der.
• Carry out the self-test described under P76, see
section 4.4.
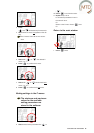
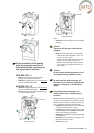
Install the drain plate (G) again correctly
under the heat exchanger. The holes in
the drain plate must be on the side of
the condensation drain.
Install the drain plate (G) again correctly
under the heat exchanger. The holes in
the drain plate must be on the side of
the condensation drain.
Tighten the screws to a maximum
torque of 1.5 Nm. This corresponds
to roughly level 2 of a normal screw
drill.
euqrot mumixam a ot swercs eht nethgiT
of 1.5 Nm. This corresponds to roughly
level 2 of a normal screw drill.
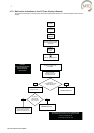
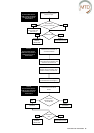
4.6.2 Filter Cleaning, if Preheater is Fitted
The fi lter of the preheater (if installed) must be
cleaned every 4 years.
• Remove the mains plug (A) from the plug sock-
et.
• Pull the fi lters (B) out of the MTD-ERV 350.
• Remove the front plate by removing the screws
(C).
• Push the front plate in the direction of the ar-
row and remove it from the MTD-ERV 350.
• Remove the sealing plate by removing the
screws (D).
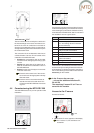
• Remove the plastic plate (I) in front of the PCB
panel by loosening the two screws.
• Loosen the connectors (J) and the earth cable
(J) at the PCB panel and remove the cables with
the two grommets (K) completely.
• Remove the cable (P) of the PCB panel.
• Remove the bottom (Q) of the preheater.
– The bottom is secured in the electronic
carriage by 4 tabs. Two tabs are located on
the front side (visible) and two on the rear
side (not visible).
• Clean the fi lter using a brush.
• Remove any caked soiling with a damp cloth.
• Install all the parts again in the reverse order.
• Carry out the self-test described under P76, see
section 4.4.