


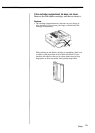

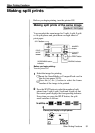

• If CompactFlash cannot
be inserted easily, do not
force it in, but remove it,
check the CompactFlash
insertion orientation and
retry insertion from the
beginning.
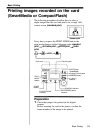
• The image recorded in
CompactFlash should be
printed as it was
recorded using an
Olympus digital camera.
Proper display and
printing performances
are not guaranteed for
images that have been
retouched and saved on
a PC or that have been
recorded with another
brand of digital camera.
• Never attempt to insert
or remove
CompactFlash while the
ACCESS/CHARGE
indicator on the
operation panel is
blinking.
Basic Printing
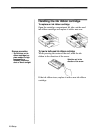
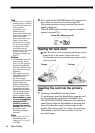
If an error is displayed (-E-) during insertion, retry
insertion from the beginning.
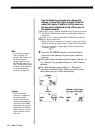
To remove
CompactFlash, press the EJECT button. If the display
does not go out, refer to "Troubleshooting" on page 40.
If the EJECT button is already pressed in the low
position, press it once to return it to the high position
then press it again to eject.
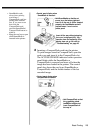
While the card is being
ejected, the error display (-E-) may appear at times.
Even if this happens, remove the card. (The error
display may also appear if the card is not removed
after ejection, but this is not a malfunction.)
Notes
• Always use Type I (with
a capacity of no more
than 160 MB) or Type II
(with a capacity of 340
MB) Compact Flash.
• SmartMedia cards
always have priority,
even when a
CompactFlash card has
already been inserted
first. If you want to use
data from the
SmartMedia card, press
the SmartMedia/
CompactFlash button to
select it.
• Keep the card cover open
while CompactFlash is
inserted in the printer.
Cautions
Doing so could
destroy the
CompactFlash
formatting, making it
unusable.
26