


2
2 - 14
6. Checking for Leakage After Repair
W-2WAY ECO-i SYSTEM
Outdoor Unit Repair Procedures
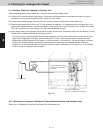
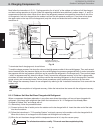
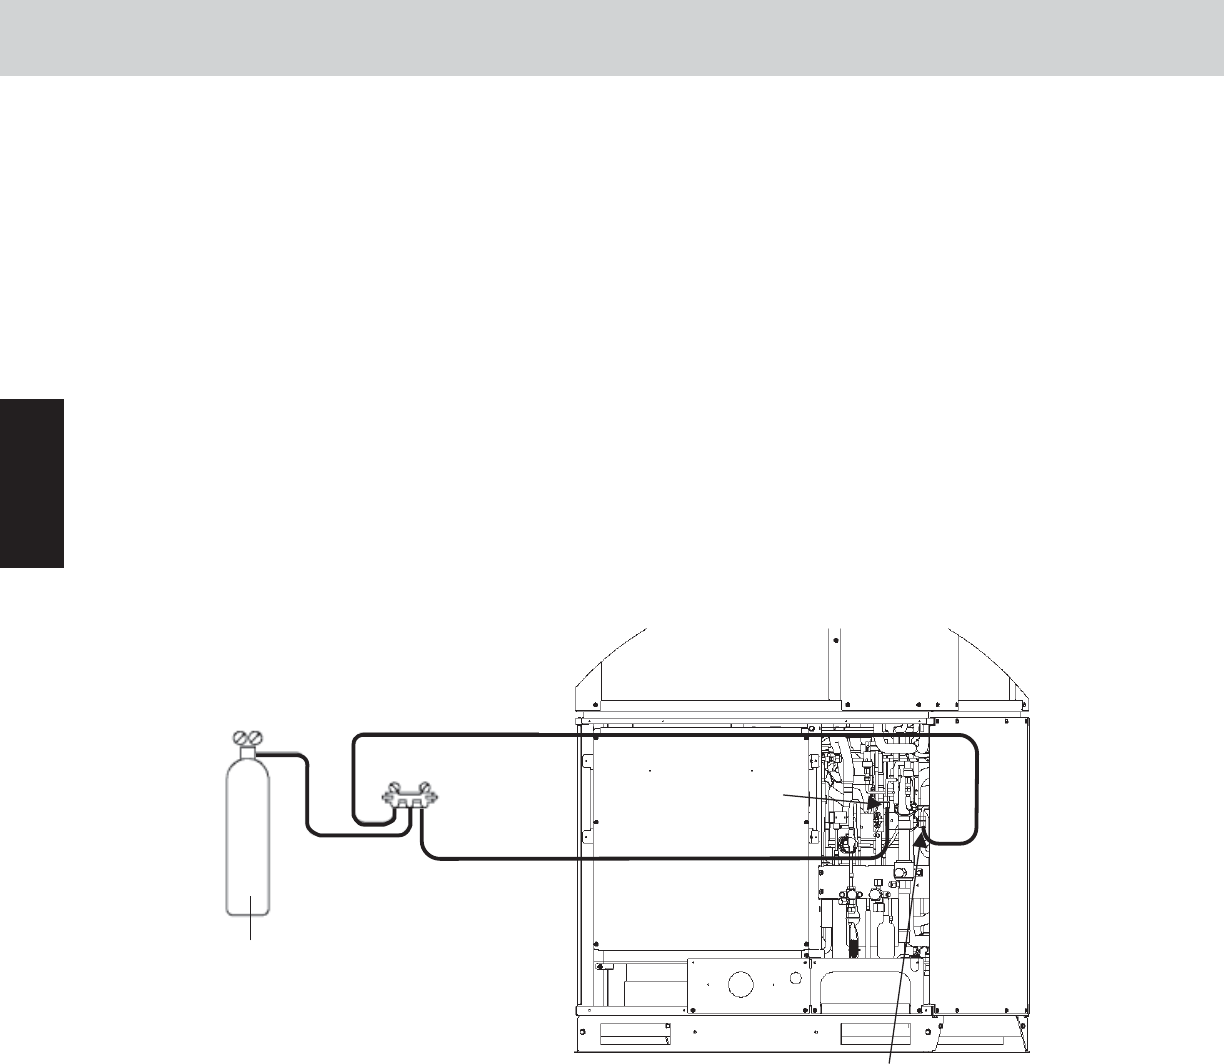
6-1. Pressure Check for Leakage of Outdoor Unit
After completing repair of the outdoor unit, carry out the following leakage check.
(1) Check that all service valves for gas tubes, liquid tube, and balance tube in the repaired outdoor unit (units
necessary to carry out the pressurized leak check) are fully closed.
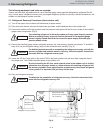
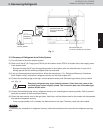
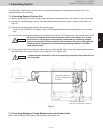
(2) Connect the manifold gauge valves to the high- and low-pressure outlet ports of the outdoor unit.
(3) Feed nitrogen gas into the circuit until 72.5 psi pressure is reached. If it is apparent that the nitrogen gas is not
entering the repaired section, interrupt the feeding. Short-circuit the AP pins (CN102) on the outdoor unit control
PCB, turn on power to run the outdoor unit, then resume feeding nitrogen.
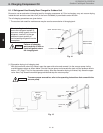
(4) Apply soapy water to the repaired part (such as a newly brazed part), and briefly inspect for any leakage. If there
are any leaks, bubbles will show on the tubing surface.
* To continue the air-tight check after the brief leak inspection, turn on power while short-circuiting the AP pins.
Again feed nitrogen gas to obtain a system pressure of 72.5 psi. Then measure both the outdoor ambient
temperature and the pressure in the system. Leave the system in this state for 1 full day and night, and again
measure the outdoor ambient temperature and pressure (to determine any reduced values). During the
inspection, it is recommended that an awning or cover be used to shield the unit in case of rain. If no problem
is found, purge all nitrogen from the system.
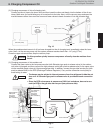
6-2. Checking for Leakage in Refrigerant Tubing Between Indoor and Outdoor Units
Refer to the “Installation Instructions” that came with the outdoor unit.
Low-pressure outlet port
(For 5/16" (7.94mm)-dia. connector)
Nitrogen gas
Lo Hi
Manifold
gauge
High-pressure outlet port
(For 5/16" (7.94mm)-dia.
connector)
Fig. 12