


2
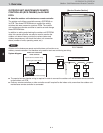
2 - 33
W-2WAY ECO-i SYSTEM
Outdoor Unit Repair Procedures
10. Compressor
(6)
(7)
(8)
(9)
(10)
(12)
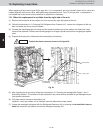
(13) Follow the instructions in “7. Evacuating System” and apply vacuum to the outdoor unit where the compres-
sor was replaced.
CAUTION
CAUTION
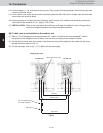
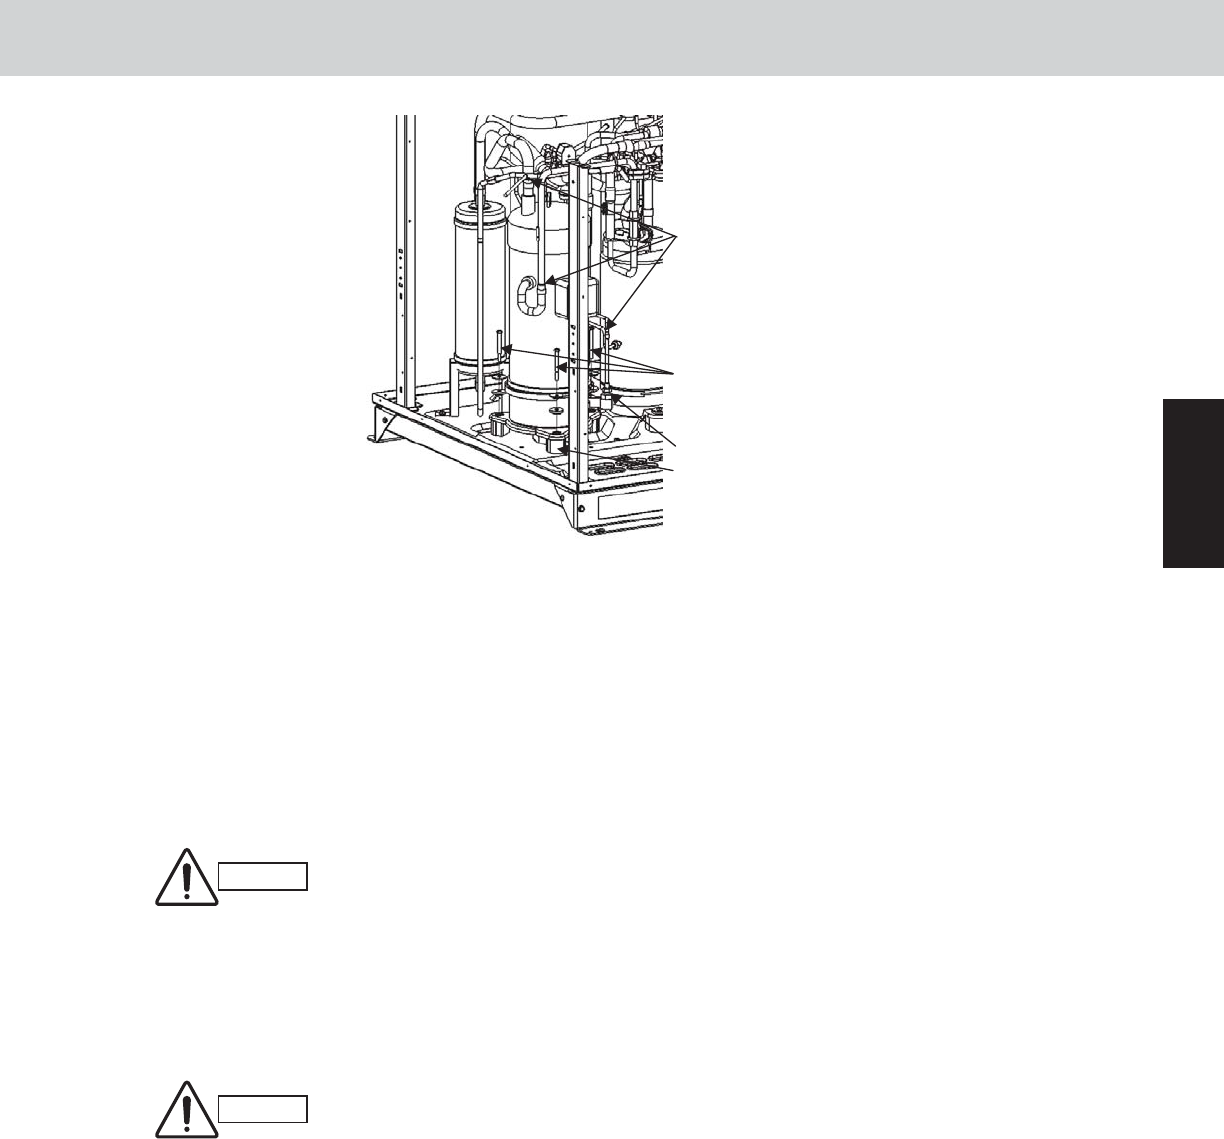
Fig. 28
Cushioning
rubber guide
Brazing
locations (3)
Front view
Bolt
1
Protect the oil
equalizer tube
connectors
Washer:
Rubber washer: 1
(1 each at the 3 locations)
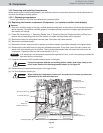
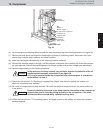
Set the remaining cushioning rubber beneath the new compressor leg at the locations shown in the figure 28.
Remove the bolts which are temporarily fastening the 2 pieces of cushioning rubber, and anchor the 3 com-
pressor legs using the bolts, washers, and rubber washers.
Insert the pre-shaped tube assembly at the 3 brazing locations indicated.
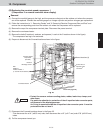
Connect the manifold gauge to the high- and low-pressure outlet ports at the outdoor unit where the compres-
sor was replaced. Connect the manifold gauge to a nitrogen cylinder and perform nitrogen gas replacement.
Perform copper brazing at the 3 brazing locations.
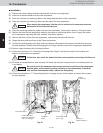
In the same way as during removal, pay particular attention to protection of the oil
equalizing tube connector parts shown in the figure 28.
An O-ring is mounted inside the oil equalizer tube connector parts. It must be pro-
tected and do not lose it.
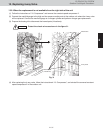
Follow the instructions in “6. Checking for Leakage After Repair” and check for leaks at the outdoor unit
where the compressor was replaced.
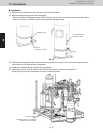
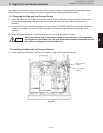
Re-install all components that were removed. Re-install the electrical component box in the same position as
it was before.
(11)
Be sure to check for looseness of the power terminal connection at the compress or
terminal plate, and to check by pulling vertically on the connections. If the termi-
nals become disconnected easily, replace the wiring Assy.