


2
2 - 30
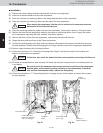
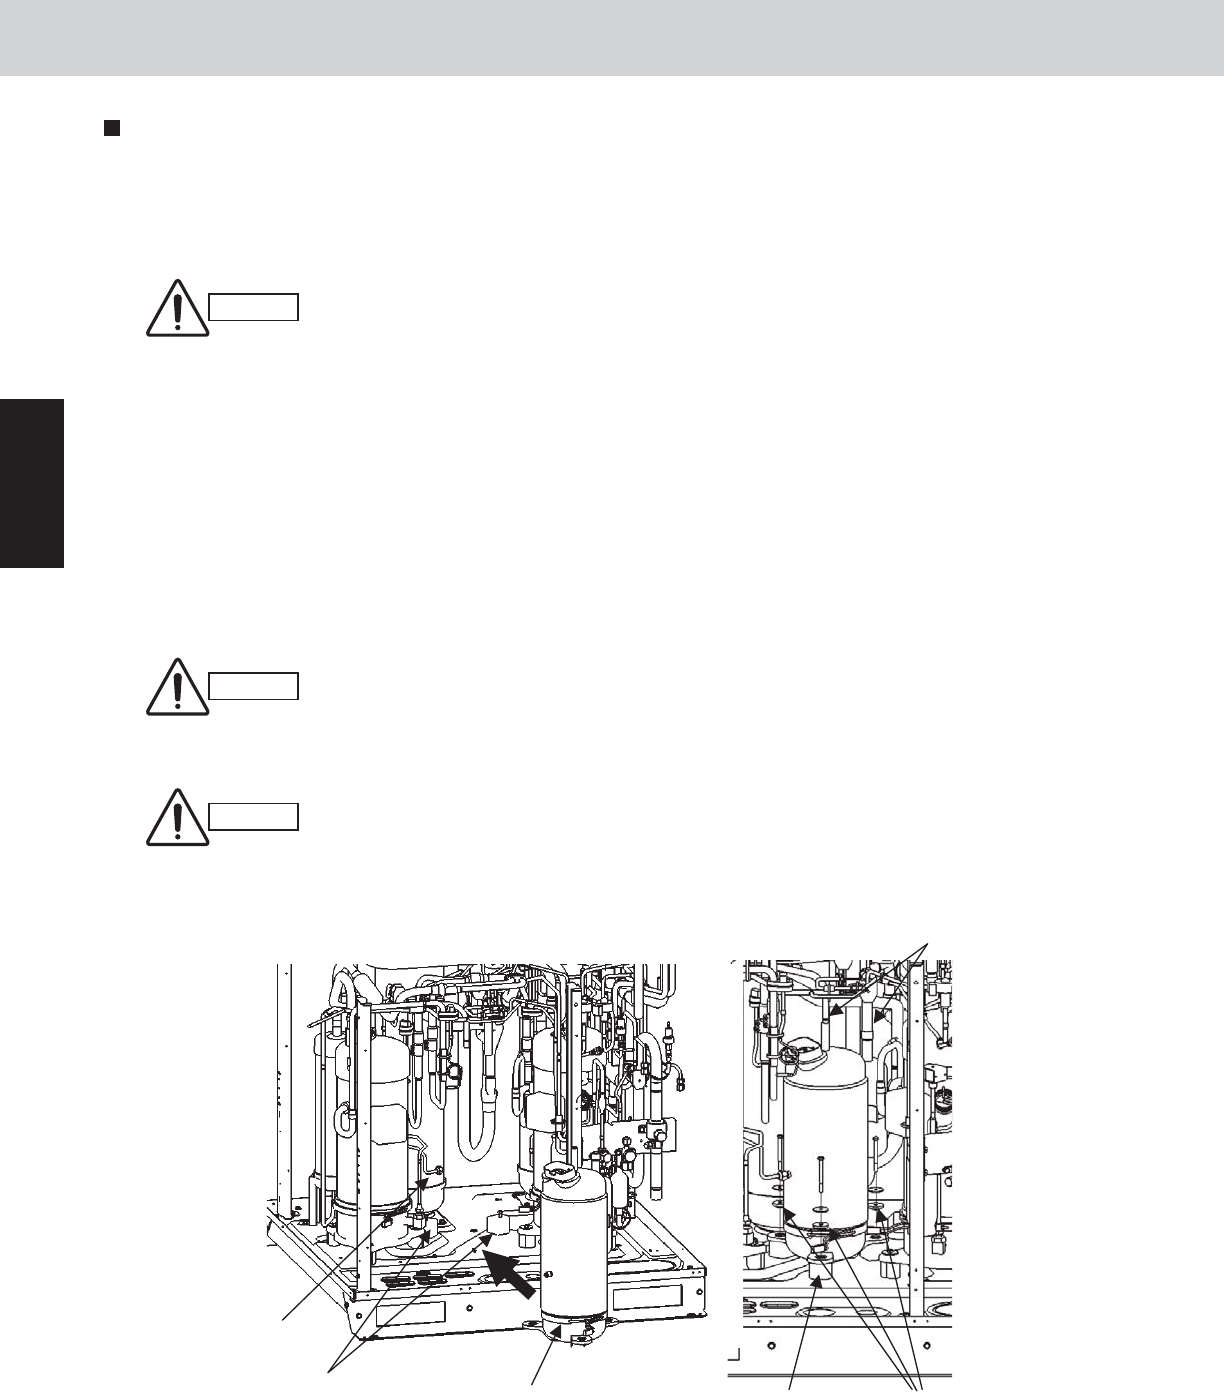
10. Compressor
W-2WAY ECO-i SYSTEM
Outdoor Unit Repair Procedures
(1)
(2)
(3)
(4)
(5)
(6)
(7)
(8)
(9)
(10)
(11)
(12)
(13)
CAUTION
CAUTION
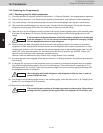
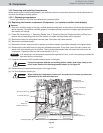
Fig. 23
Crankcase
heater
Cushioning rubber
(Inner 1 leg)
Cushioning rubber
(Temporary fastening
bolts - 2 inner legs)
Front view
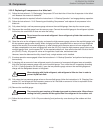
Fig. 24
Installation
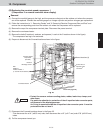
Remove the rubber stopper and tube cap (brazed) from the new compressor.
Install the crankcase heater onto the new compressor.
Place the 2 pieces of cushioning rubber in the designated positions on the compressor.
Place the 2 pieces of cushioning rubber onto the legs of the new compressor.
When setting the compressor into the unit, be careful not to cause any abnormal
deformation of the tube-with-flare-nut.
CAUTION
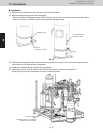
Place the remaining cushioning rubber onto the new compressor, at the position shown in the figure below.
Remove the bolts that are temporarily fastening the pieces of cushioning rubber (inner 2 legs), and anchor
the 3 compressor legs using the bolts, washers, and rubber washers.
Remove the flare nut from the new compressor, and connect the tube-with-flare-nut.
Shape the tubes and insert them at the 2 brazing locations.
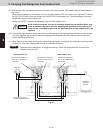
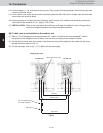
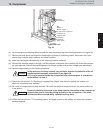
Connect a manifold gauge to the high- and low-pressure outlet ports at the outdoor unit where the compres-
sor was replaced. Connect the manifold gauge to a nitrogen cylinder and perform nitrogen gas replacement.
Perform copper brazing at the 2 brazing locations.
Follow the instructions in “6. Checking for Leakage After Repair” and check for leaks at the outdoor unit
where the compressor was replaced.
At this time, also check for leaks at the flare nut connection on the tube-with-flare-nut.
Re-install all components that were removed. Re-install the electrical component box in the same position as
it was before.
Be sure to check for looseness of the power terminal connection at the compressor
terminal plate, and to check by pulling vertically on the connections. If the termi-
nals become disconnected easily, replace the wiring Assy.
Follow the instructions in “7. Evacuating System” and apply vacuum to the outdoor unit where the compres-
sor was replaced.
Brazed
locations (2)
Bolt
Washer (1)
Rubber washer (1)
Tube-with-flare-nut