


Chapter 2
Installing Valves in the Heated Oven Valve Installation
Operating Manual 25
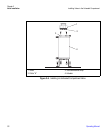
3. Grip the valve standoff by the standoff only, and slide it through the collar
allowing it to extend into the lower valve compartment.
Step 4. Connecting Gas Lines from the Solenoid Valve o the Actuator
NOTE Gas lines are much easier to connect to the actuator if the connection is made before the
actuator is assembled to the valve.
1. Locate the 1/8 in. nylon tubing supplied in the Valve Oven kit and cut it into
two equal 12” pieces.
2. Push one of the tube pieces into the lower fitting on the actuator assembly,
making sure it passes through the ferrule in the actuator fitting. Tighten the
nut and ferrule using a 3/8” open end wrench. Use a backup 3/8” open end
wrench on the mating piece that is screwed into the actuator.
3. Place the other end of the tubing into the valve solenoid fitting located on the
outside edge (Figure 2-4) of the solenoid by pushing the tubing firmly into the
fitting. It should automatically seal in place.
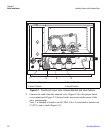
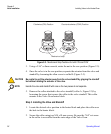
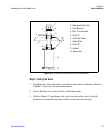
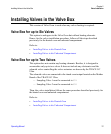
Figure 2-4. Solenoid Manifold Edges
4. Turn the actuator gas supply on. This line should now be pressurized.
1. Inside Edge Solenoids 2. Outside Edge Solenoids
1
2