


Chapter 2
Valve Installation Installing Valves in the Unheated Compartment
28 Operating Manual
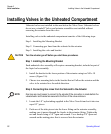
Installing Valves in the Unheated Compartment
Unheated valves are installed in the area below the Valve Oven. Unheated valves
do not use a standoff. Valves and actuator assemblies are installed without
removing the actuator from the valve.
Installing valves in the unheated compartment consists of the following steps:
Step 1. Installing the Mounting Bracket
Step 2. Connecting gas lines from the solenoid to the actuator
Step 3. Installing the valve and bracket
CAUTION Turn the actuator gas off before you start these procedures.
Step 1. Installing the Mounting Bracket
Each unheated valve assembly will require a mounting bracket, included as part of
the liquid valve assembly.
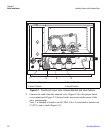
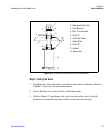
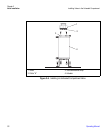
1. Install the bracket to the lower portion of the actuator using two M4 x 10
screws (Figure 2-6).
2. Choose two mounting holes in the bracket that will allow the actuator and the
valve to be oriented in a favorable direction.
Step 2. Connecting Gas Lines from the Solenoid to the Actuator
NOTE Gas lines are much easier to connect to the actuator if the connection is made before the
valve/actuator and bracket are secured to the floor of the valve enclosure.
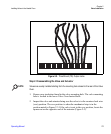
1. Locate the 1/8” nylon tubing supplied in the Valve Oven kit and cut it into two
equal 12” pieces.
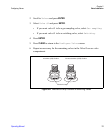
2. Push one of the tube pieces into the lower fitting on the actuator assembly,
making sure it passes through the ferrule in the actuator fitting. Tighten the
nut and ferrule using a 3/8” open end wrench. Use a backup 3/8” open end
wrench on the mating piece that is screwed into the actuator.