


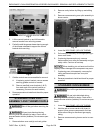


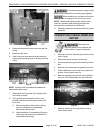
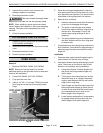
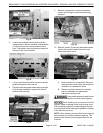

Fig. 26
8. Loosen bolts (2) securing blower to motor shaft
then remove blower.
9. If replacing blower only, proceed to last step. If
replacing motor, continue with procedure.
10. Remove mounting nuts and spacers securing
motor mounting brackets (2) to motor mount
panel.
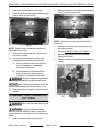
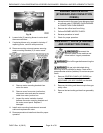
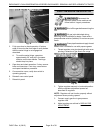
Fig. 27
A. Remove motor mounting brackets from
motor for reuse.
B. Remove cover from motor junction box,
disconnect wires and remove armored
cable from motor junction box.
C. Inspect the motor insulation located
between the motor mounting brackets and
the motor mount panel. Replace if
damaged.
11. Install motor mounting brackets and armored
cable onto replacement motor.
12. Reverse procedure to install and check for proper
operation.
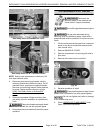
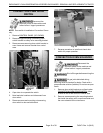
BURNER ORIFICE HOOD
(STANDARD AND CONVECTION
OVENS)
1. Access burner for the type of oven being serviced
as outlined under STANDARD OVEN BURNER
or CONVECTION OVEN BURNER.
2. Remove the orifice hood from fitting.
3. Perform BURNER NOZZLE CHECK.
4. Reverse procedure to install.
5. Check for proper operation.
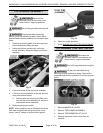
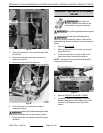
GAS SAFETY VALVE (STANDARD
AND CONVECTION OVENS)
Disconnect the
electrical power to the machine and
follow lockout / tagout procedures.
Shut off the gas before servicing the
unit.
All gas joints disturbed during
servicing must be checked for leaks. Check with a
soap and water solution (bubbles). Do not use an open
flame.
1. Remove CONTROL PANEL (30" OVENS) on
standard and convection ovens or lower the
KICK PANEL (24" & 30" OVENS) on standard
24" ovens.
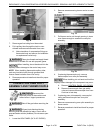
2. Remove pilot tubing and thermocouple from gas
safety valve.
3. Remove inlet and outlet gas lines from gas safety
valve.
ENDURANCE / CHALLENGER MODULAR SERIES GAS RANGES - REMOVAL AND REPLACEMENT OF PARTS
F45471 Rev. A (0615) Page 14 of 38