


REMOVAL AND REPLACEMENT OF PARTS
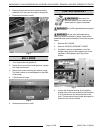
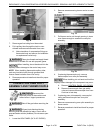
MANIFOLD COVER
Shut off the gas before servicing the
unit.
1. Pull crumb tray out.
2. Loosen set screw in the open top burner control
knobs and remove knobs.
3. Remove screws that secure manifold cover and
remove cover.
4. Reverse procedure to install.
Fig. 2
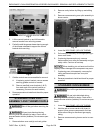
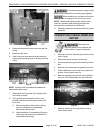
CONTROL BRACKET COVER
Shut off the gas before servicing the
unit.
1. Pull grease can out.
2. Pull knobs from thermostats.
3. If removing control bracket cover from oven with
a 12" open top burner module and 24" griddle top
module:
A. Pull crumb tray out of 12" section if installed.
B. Loosen set screw in the open top burner
control knobs and remove knobs.
4. Remove screws that secure control bracket
cover and remove the bracket.
5. Reverse procedure to install.
Fig. 3
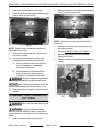
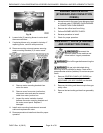
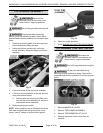
CONTROL PANEL (30" OVENS)
Disconnect the
electrical power to the machine and
follow lockout / tagout procedures.
Shut off the gas before servicing the
unit.
NOTE: Electrical power disconnect warning applies
to convection ovens.
NOTE: Removal procedure applies to standard and
convection 30" ovens.
1. Pull knob from thermostat.
2. Remove hole plug at top of control panel.
3. Remove screw and lift off control panel.
4. On convection ovens only, note lead wire
locations and disconnect from power switch.
5. Reverse procedure to install.
Convection Oven Panel Shown
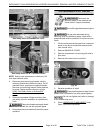
KICK PANEL (24" & 30" OVENS)
Shut off the gas before servicing the
unit.
1. Lift up on kick panel and rotate down 90°.
ENDURANCE / CHALLENGER MODULAR SERIES GAS RANGES - REMOVAL AND REPLACEMENT OF PARTS
F45471 Rev. A (0615) Page 6 of 38