


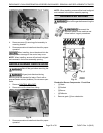
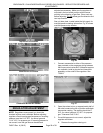
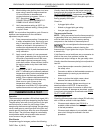
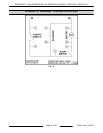
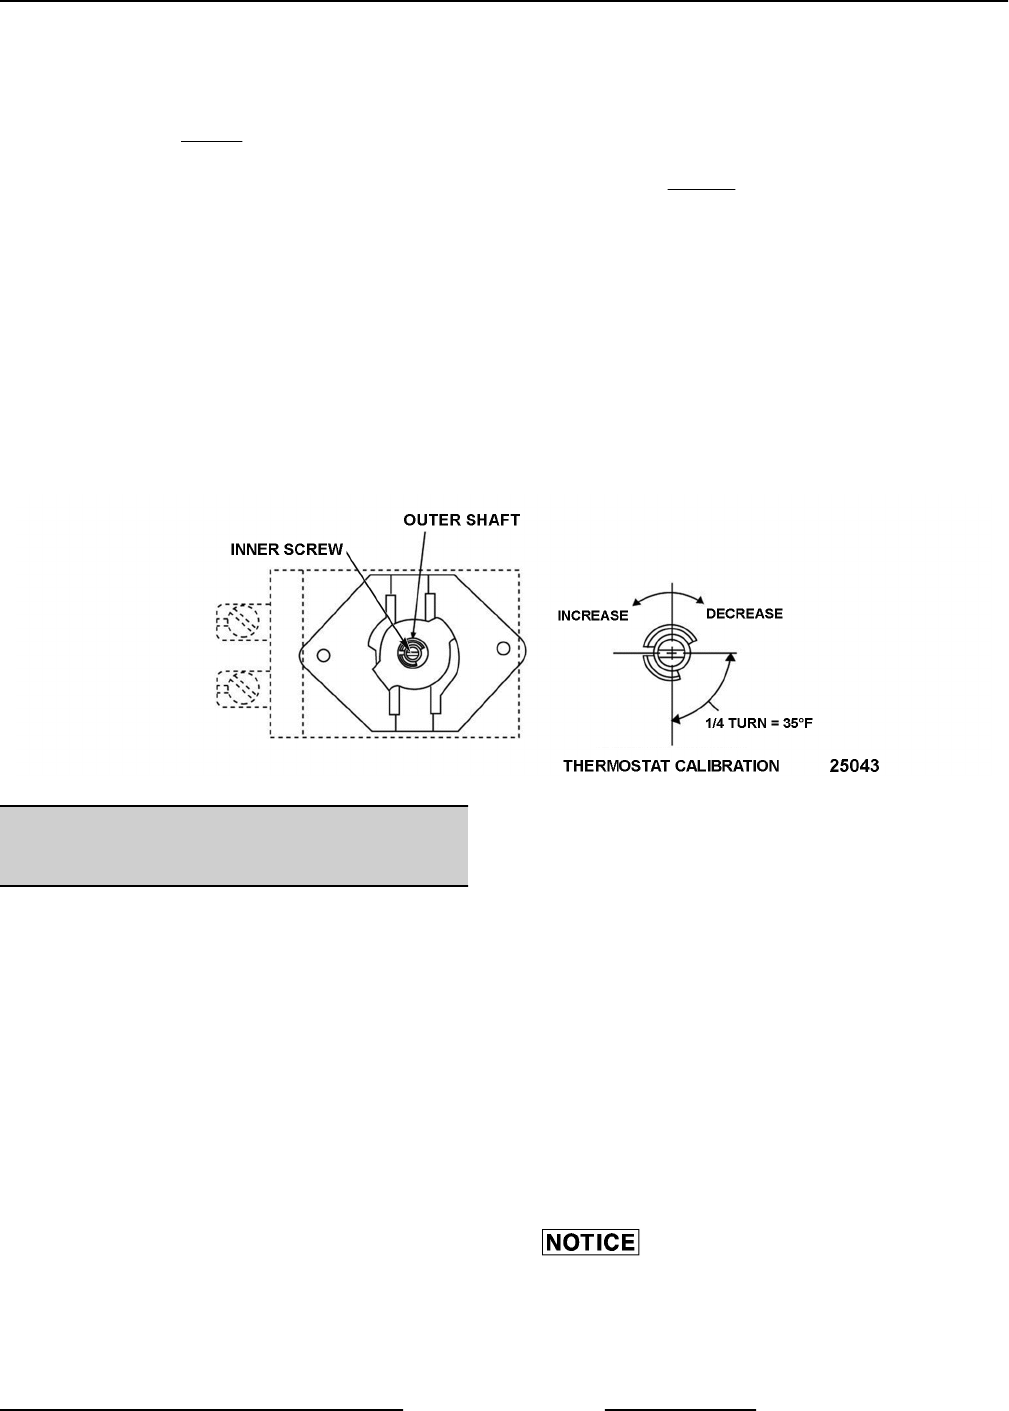
B. While holding outer shaft in place, turn inner
screw using a small flat edge screwdriver
1/8 turn clockwise to decrease and
counterclockwise to increase. 1/4 turn =
35°F. See Fig. 72 below.
C. Verify temperature at 350°F (or customers
preferred setting). Allow oven to cycle 3
times.
NOTE: You must allow the oven to cycle 3 times to
stabilize oven temperature or the calibration
adjustment may be invalid.
D. Take a temperature reading. If temperature
is within acceptable limits, continue to next
step. If temperature is not within 20°F then
re-adjust as outlined in this procedure. If 3
consecutive adjustments do not produce
acceptable results, replace thermostat and
verify calibration.
E. Apply a small amount of a non permanent
type sealer (preferably fast drying) such as
nail polish or equivalent around the inner
screw head to prevent movement during
outer shaft rotation. Allow sufficient time for
the applied sealer to dry then install knob.
See TOOLS.
F. If calibrating at 350°F, verify temperature at
400°F. If calibrating at a customer preferred
temperature setting, select one temperature
setting above the customer preferred
setting. If the customers temperature setting
is 450F, then calibrate at that temp only.
Allow oven to cycle 3 times at the
temperature setting. If actual oven
temperature is not within 20°F of the setting,
replace thermostat and verify calibration.
Fig. 72
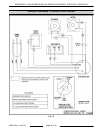
GRIDDLE THERMOSTAT-COMBO
VALVE ADJUSTMENT
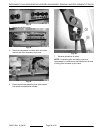
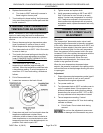
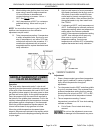
Operation
The "snap action thermostat-combo" valve is self-
regulating and the thermostat is internally connected
to the valve. When thermostat dial is set to 350°F and
the griddle is below setpoint, the valve opens to allow
gas flow and burner lights. As the griddle temperature
rises, the pressure from the sensor bulb secured to
the bottom of the griddle plate increases. Fluid in the
capillary tube expands with the temperature increase
and presses against a diaphragm in the thermostat.
When the griddle temperature reaches setpoint, the
internal valve closes to stop gas flow to burner.
When the griddle temperature decreases below
setpoint, the pressure is reduced in the capillary which
reduces the force on the diaphragm allowing the valve
to open again.
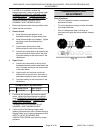
Adjustment
1. Place a thermocouple type surface temperature
probe (type K preferred) in center of griddle to
verify actual temperatures throughout
adjustment.
2. Turn thermostat knob to 350°F and allow griddle
to cycle 3 complete times. If the customer has a
preferred temperature setting that they always
operate the oven at such as 325°, 375° or 400°,
you may calibrate to that temperature instead.
3. Take a temperature reading. If actual
temperature is more than 20° from knob setting,
calibrate as follows:
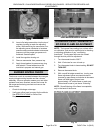
A. Pull off knob. Do not rotate knob during
removal.
Do not turn the adjustment screw more
than 3/8 turn or damage to the thermostat may occur.
ENDURANCE / CHALLENGER MODULAR SERIES GAS RANGES - SERVICE PROCEDURES AND
ADJUSTMENTS
Page 31 of 38 F45471 Rev. A (0615)