


TAMPER-RESISTANT SCREW
This appliance is equipped with a tam-
per-resistant screw to prevent removal
of the outer cover. To reduce the risk of
fire or electric shock, do not attempt to
remove the outer cover. There are no
user serviceable parts inside. Repair
should be done only by authorized ser-
vice personnel.
POLARIZED PLUG
This appliance has a polarized plug —
one blade is wider than the other. To
reduce the risk of electric shock, this
plug will fit into a polarized outlet only
one way. If the plug does not fit fully into
the outlet, reverse it. If it still does not
fit, contact a qualified electrician. Do
not attempt to defeat this safety feature
by modifying the plug in any way.
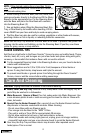
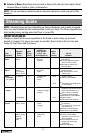
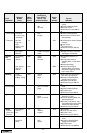
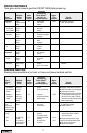
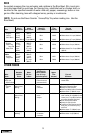
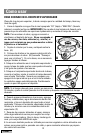
COOKING IN THE STEAMING BOWL
(See Steaming Guide for suggested cooking times,
techniques and water fill levels.)
1. Fill the Water Reservoir with cold tap water to the
appropriate fill line (LO or MAX FILL – see inset illustration).
IMPORTANT: Do not exceed the MAX FILL line. Overfilling
will prevent “Fast Steam” and increase cooking times.
NOTE: For extra flavor, you may add chicken broth or
white wine to the water in the Reservoir. Beer, red wine,
oil, extracts (i.e. vanilla) or fruit juices are not recom-
mended as they may stain or harm the plastic or heater.
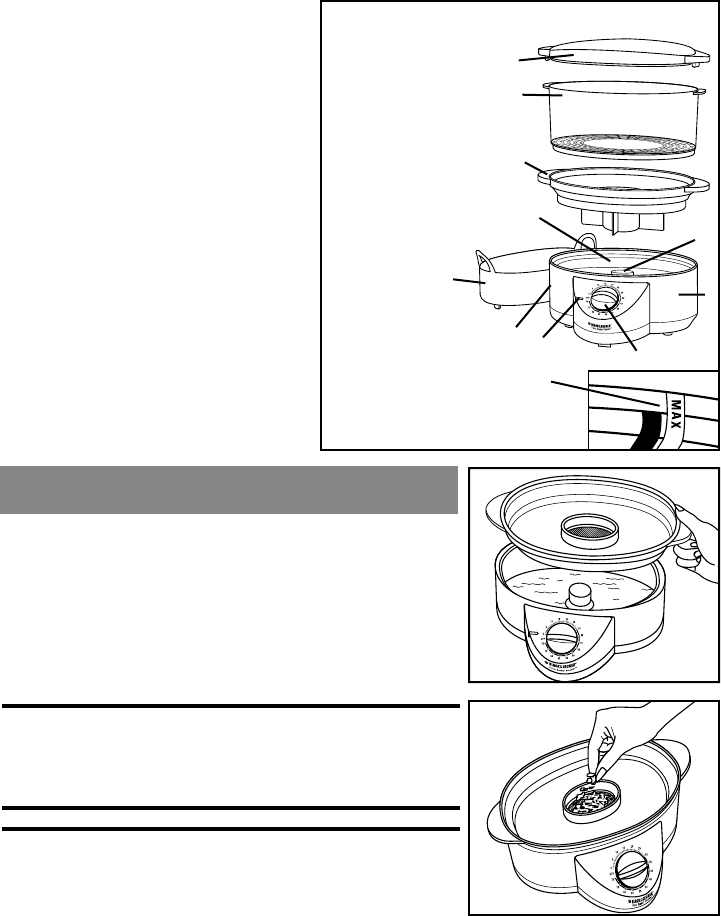
2. Hold the Drip Tray by the handle and place it into the
Base. (A)
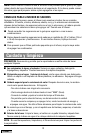
3. Place herbs or spices in the Flavor Scenter
®
Screen
for added flavor. (B) (See ”Flavor Scenter
®
Tips“). You
may use the Drip Tray without adding herbs to the Flavor Scenter
®
if you prefer.
4. Place food in the Steaming Bowl and cover it so that the Cover handles line up over
the Bowl handles and the tabs fit properly into the openings.
5. Put the Steaming Bowl onto the Base, plug in the cord and set the Timer for the desired
cooking time, up to 75 minutes. When the time is up, a bell will ring, the cooking Light will
go out, and the unit will automatically shut off. Some liquid may remain in the resevoir.
3
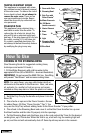
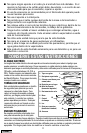
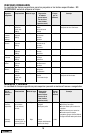
How To Use
1. Cover with Tabs
2. Steaming Bowl
3. Drip Tray with
Flavor Scenter
®
4a.Water Reservoir
4b. Fill Marks
(inside reservoir)
5. Heater Element
6. Base
7. Timer
8. Light
9. Steaming Guide
(on back of unit)
10.Rice Bowl
1
2
3
4a
5
6
7
8
9
10
A
B
4b
Cover