34
START-UP AND OPERATION
Compressor crankcase heaters must be on for 24 hours be-
fore start-up. To energize the crankcase heaters, close the field
disconnect. Leave the compressor circuit breakers off/open.
The crankcase heaters are now energized.
NOTE: Refer to Start-Up Checklist on pages CL-1 to CL-8.
Actual Start-Up — Actual start-up should be done only
under supervision of a qualified refrigeration mechanic.
1. Be sure all service valves are open (30MPA units only).
2. Using the scrolling marquee display, set leaving-fluid set
point (Set Points
COOL
CSP.1). No cooling range
adjustment is necessary.
3. Start chilled fluid pump (if not configured for cooler
pump control).
4. Turn ENABLE/OFF/REMOTE CONTACT switch to
ENABLE position.
5. Allow unit to operate and confirm that everything is func-
tioning properly. Check to see that leaving fluid tempera-
ture agrees with leaving set point (Set Points
COOL
CSP.1) or (Set Points
COOL
CSP.2), or if reset is
used, with the control point (Run Status
VIEW
CTPT).
6. Check the cooler leaving chilled water temperature to see
that it remains well above 32 F (0° C), or the brine freez-
ing point if the unit is a medium temperature brine unit.
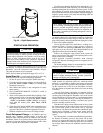
7. Recheck compressor oil level (see Oil Charge section).
Check Refrigerant Charge — All 30MPW units are
shipped with a complete operating charge of R-410A and
should be under sufficient pressure to conduct a leak test after
installation. If there is no system pressure, admit nitrogen until
a pressure is observed and then proceed to test for leaks. After
leaks are repaired, the system must be dehydrated.
All refrigerant charging should be done through the ¼-in.
Schraeder connection on the liquid line. Do NOT add refriger-
ant charge through the low-pressure side of the system. If com-
plete charging is required, weigh in the appropriate charge for
the circuit as shown on the unit nameplate. If partial charging is
required, operate circuit at full load and add charge until the
sight glass is clear of bubbles.
The 30MPA units (condenserless) are shipped with a nitro-
gen holding charge only. After chiller assembly is completed in
the field, system must be fully charged. While the unit is run-
ning at full capacity, add refrigerant until the sight glass is clear.
R-410A is the normal refrigerant.
Do not open the liquid valve until there is a charge in re-
mainder of system. A positive pressure indicates a charge in
system. With the unit operating at full load, check liquid line
sight glass to be sure the unit is fully charged (bubbles in the
sight glass indicate the unit is not fully charged).
If there is no refrigerant vapor pressure in the system, the
entire system must be leak tested. After repairing leaks, evacu-
ate the system before recharging.
Follow approved evacuation procedures when removing
refrigeration. Release remaining pressure to an approved evac-
uated cylinder.
The liquid charging method is recommended for complete
charging or when additional charge is required.
EVACUATION AND DEHYDRATION — Because the
30MP systems use polyolester (POE) oil, which can absorb
moisture, it is important to minimize the amount of time that
the system interior is left exposed to the atmosphere. Minimiz-
ing the exposure time of the oil to the atmosphere will mini-
mize the amount of moisture that needs to be removed during
evacuation.
Once all of the piping connections are complete, leak test
the unit and then pull a deep dehydration vacuum. Connect the
vacuum pump to the high flow Schraeder valve in the suction
line and liquid line. For best results, it is recommended that a
vacuum of at least 500 microns (0.5 mm Hg) be obtained. Af-
terwards, to ensure that no moisture is present in the system,
perform a standing vacuum-rise test.
With the unit in deep vacuum (500 microns or less), isolate
the vacuum pump from the system. Observe the rate-of-rise of
the vacuum in the system. If the vacuum rises by more than
50 microns in a 30-minute time period, then continue the dehy-
dration process. Maintain a vacuum on the system until the
standing vacuum requirement is met. This will ensure a dry
system.
By following these evacuation and dehydration procedures,
the amount of moisture present in the system will be mini-
mized. It is required that liquid line filter driers be installed
between the condenser(s) and the expansion devices to capture
any foreign debris and provide additional moisture removal
capacity.
CAUTION
Crankcase heaters on 30MPA units are wired into the con-
trol circuit, so they are always operable as long as the main
power supply disconnect is on (closed), even if any safety
device is open. Compressor heaters must be on for 24
hours prior to the start-up of any compressor. Equipment
damage could result if heaters are not energized for at least
24 hours prior to compressor start-up.
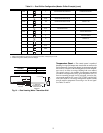
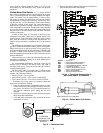
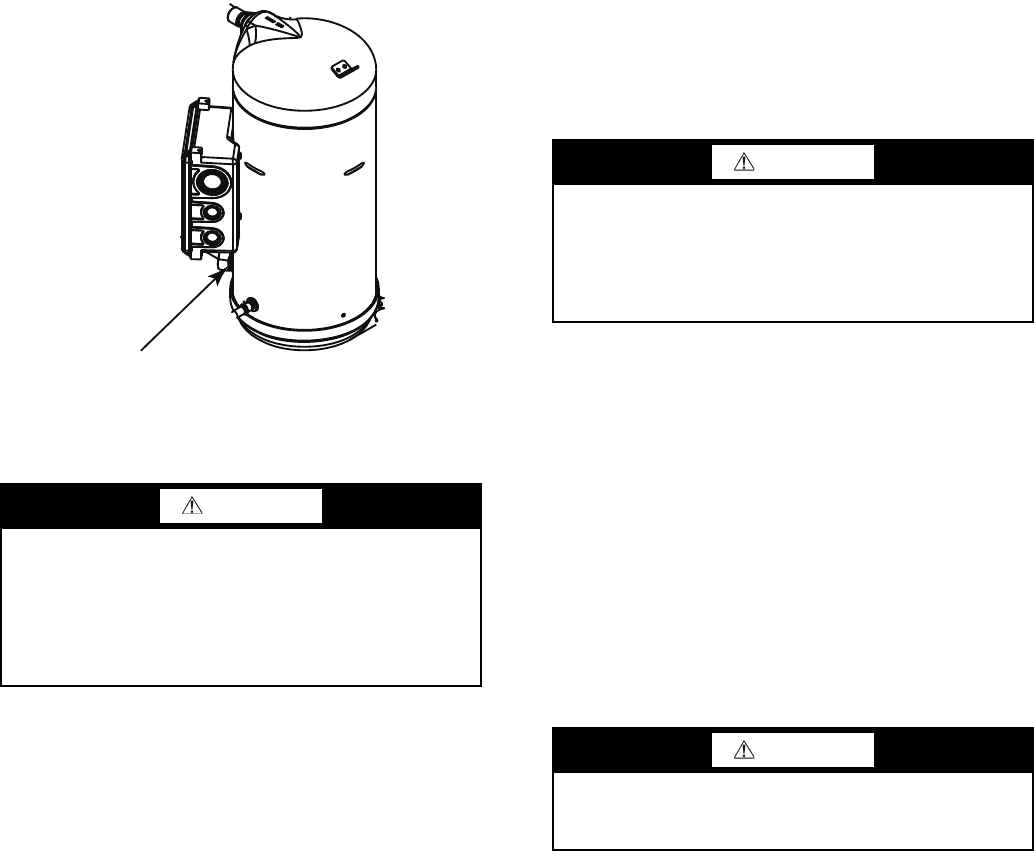
OIL SIGHTGLASS
Fig. 20 — Sight Glass Location
a30-4978
CAUTION
Never charge liquid into low-pressure side of system. Do
not overcharge. Overcharging results in higher discharge
pressure, possible compressor damage, and higher power
consumption. During charging or removal of refrigerant, be
sure water is continuously circulating through the cooler to
prevent freezing.
CAUTION
Be careful not to overcharge the system. Overcharging
results in higher discharge pressure, possible compressor
damage, and higher power consumption.


