46
Metro / Legacy Series
Trouble Shooting
Burner Set Up and Adjustment
The range was carefully set up and inspected at
the factory but some final adjustments may be
necessary once the unit is installed.
Important: ensure burner rings are assembled
properly
1. First, check to ensure there are no gas
leaks. Propane and natural gas have a very
distinct odour which is easily detected by the
human nose. If in doubt, soak each pipe joint
with soapy water and look for bubbles. Do not
use an open flame for testing.
2. Check that all controls are operating
properly by lighting each of the burners. Turn
the burners on by pushing in and turning counter
clockwise. Test them on low, medium, and high
settings.
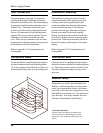
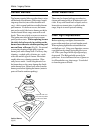
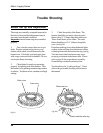
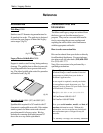
3. Check the quality of the flame. The
burners should have a steady, relatively quiet
flame with a ½” (13mm) sharp blue inner cone.
There should be no yellow flame. The outer
flame should have a 2 ½” (64mm) sharp blue
cone. (see fig 24)
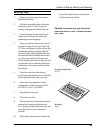
If random sparking occurs after the burner lights
or there is uneven flame from the burner or there
is flaming from under the burner trim ring, (see fig
24a) the cause is the brass burner ring is not
properly positioned on the burner base. Please
refer to page 36 for proper burner assembly .
Some ticking is normal from time to time.
You should now be “cooking with gas”. If not,
refer to the gas trouble shooting section later in
this manual.
(fig 24)
Outer cone
Inner cone
Flames uneven
Flames under the trim ring
(fig 24A)


