


– 30 –
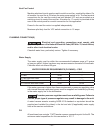
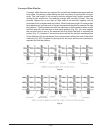
Auto Clean Hose Part Numbers To Each Chamber
Machine
Conguration
ASR Prewash
Upper
Prewash/wash
Lower
Wash
Upper
Power
Rinse
Dual
Rinse
Standard w/ ASR 949942-1
949942-2
949942-3
949942-3 949942-3 949942-5
Standard w/o ASR
Shorty w/ ASR 949942-2 949942-4
Shorty w/o ASR 949942-3
CONVEYOR ASSEMBLY
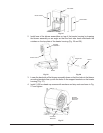
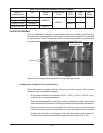
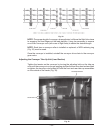
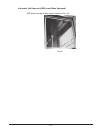
Prior to installing the conveyor, loosen the two stop nuts located on both the front
and rear take-up assemblies on the outside of the tracks located at the load end
of the machine. Thread the adjusting bolts out as far as possible moving the front
and rear conveyor guides towards the machine entrance (Fig. 31).
STOP NUTS
ADJUSTING BOLT
Fig. 31
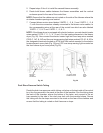
Remove the conveyor drive chain from the conveyor gear motor.
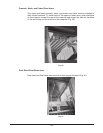
Loading and Joining the Conveyor Sections
Each dishwasher is supplied with the correct amount of conveyor. The conveyor
sections must be connected together.
• All conveyor sections are numbered: ROLL 1, ROLL 2, ROLL 3, ROLL 4, etc.;
install them in numerical sequence.
• Raise the loading platform and place a piece of cardboard under, around and
above the platform to protect it from being scratched during conveyor installation.
• Remove the chain cover on the unload end and then remove the drive chain
from the conveyor gear motor so that the conveyor sprockets are free to rotate.
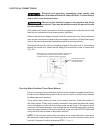
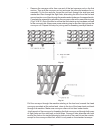
• Positiontherstsectionofconveyorinlinewiththemachineattheloadend.
Theightlinksmustleantowardstheloadendofthemachine(Fig.32).