


– 8 –
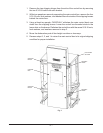
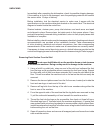
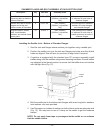
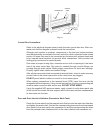
• Continue to level the center section front to back by removing the top panels
and placing level across the top of the chambers on both ends of center section
(Fig. 3).
Fig. 3
ASSEMBLY
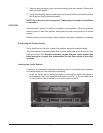
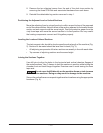
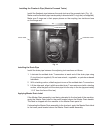
Rotating Control Box 90 Degrees
The main control box is shipped with the upper and lower shipping hinges connected
to the side of the control box. Remove the four 5/16-18 nuts, lock washers, and
washers from the inside of the shipping braces behind the control box. Use the
shipping hinges (Fig. 1) to rotate the control box 90 degrees. Do not remove the
shipping hinges until after the control box is secured to the unload section.
Pull the control box out to allow mating of center and unload sections without
interference with studs projecting from rear of control box.
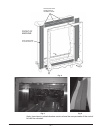
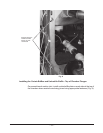
Installing Foam Tape on Chamber Flanges & Control Box Mounting Surface
Cutstripsofvinylfoamtapetotthetop,bottom,andverticalsidesofthechamber
angesontheendoftheloadandunloadsectionstomakeagoodseal.Apply
two strips of foam tape to the vertical edges of the chamber ends, two horizontally
across the top of the chamber ends, and one strip horizontally across the bottom
anges(Fig.4).Placethe foamtapeapproximately1/16”-1/8”fromtheoutside
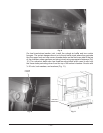
edge of the chamber. After the foam tape is applied, trim the excess tape along the
chamber edges (Fig. 5).
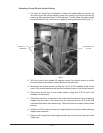
NOTE: The vertical piece of foam tape on the outer edge at the front of the
machine must be folded over ½” on the sticky side with the rolled edge of the
tape positioned towards the front of the machine (Fig. 6).