


....—_..—.— —.
The temperaturecontrolin yournew
$~~oven has been carefully adjusted
ggj;$$;$
‘~==to provide accurate temperatures.
However, if your new oven is
replacing one you have used for
several years, you may notice a
differencein thedegreeofbrowning
or the length of time required when
usingyour favoriterecipes. This is
becauseoven temperaturecontrols
have a tendency to “drift” over a
period of years.
Before attempting to have the
temperatureof your new oven
changed, be sure you have
carefully followed the baking time
and temperature recommended by
the recipe.Then,afteryouhaveused
theoven a few times and you feel
the oven is too hot or too cool,there
isa simpleadjustmentyoucan make
yourselfon the OVEN TEMP knob.
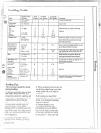
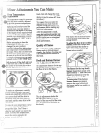
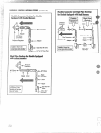
Pull the knob off the shaft and look
at the back side. There is a disc in
the
Center of the knob skirt with a
pointer opposite one of the screws.
..-------
...
‘,”
\
\
-----
_-
.-.
,
-.. -
...
Cooler
Hotter
To make an adjustment, carefully
loosen (approximately one turn),
but do not completely remove, the
fwo screws that IIOICIthe skirt to
the knob. Hold the knob blade in
one hand and the outer skirf in the
other hand.
T~]r:]isethe oven temperature,move
[hc screw opposite the pointer
toward the right. You’11hear a
click ft?l-each notch you move the
!<[?oi>.To lower the temperature,
n~ovcthe screw opposite the
llo~]~~~~t(}w;irtjthti left.
Each click will changethe oven
temperatureapproximately10°F.
(Rangeis plusor minus 60° from
the arrow.)
We suggestthat you make the
adjustmentone click from the
originalsetting and check oven
performancebefore making any
additionaladjustments.
After the adjustmentis made,
press skirt and knob together and
retighten screws so they are snug,
but be careful not to overtighten.
Re-instdl knob on range and
check performance.
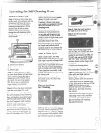
QualityofFlames
The combustion quality of burner
flames needs to be determined
visually.See Surface Cooking and
The Problem Solver sectionsin
this book.
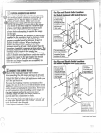
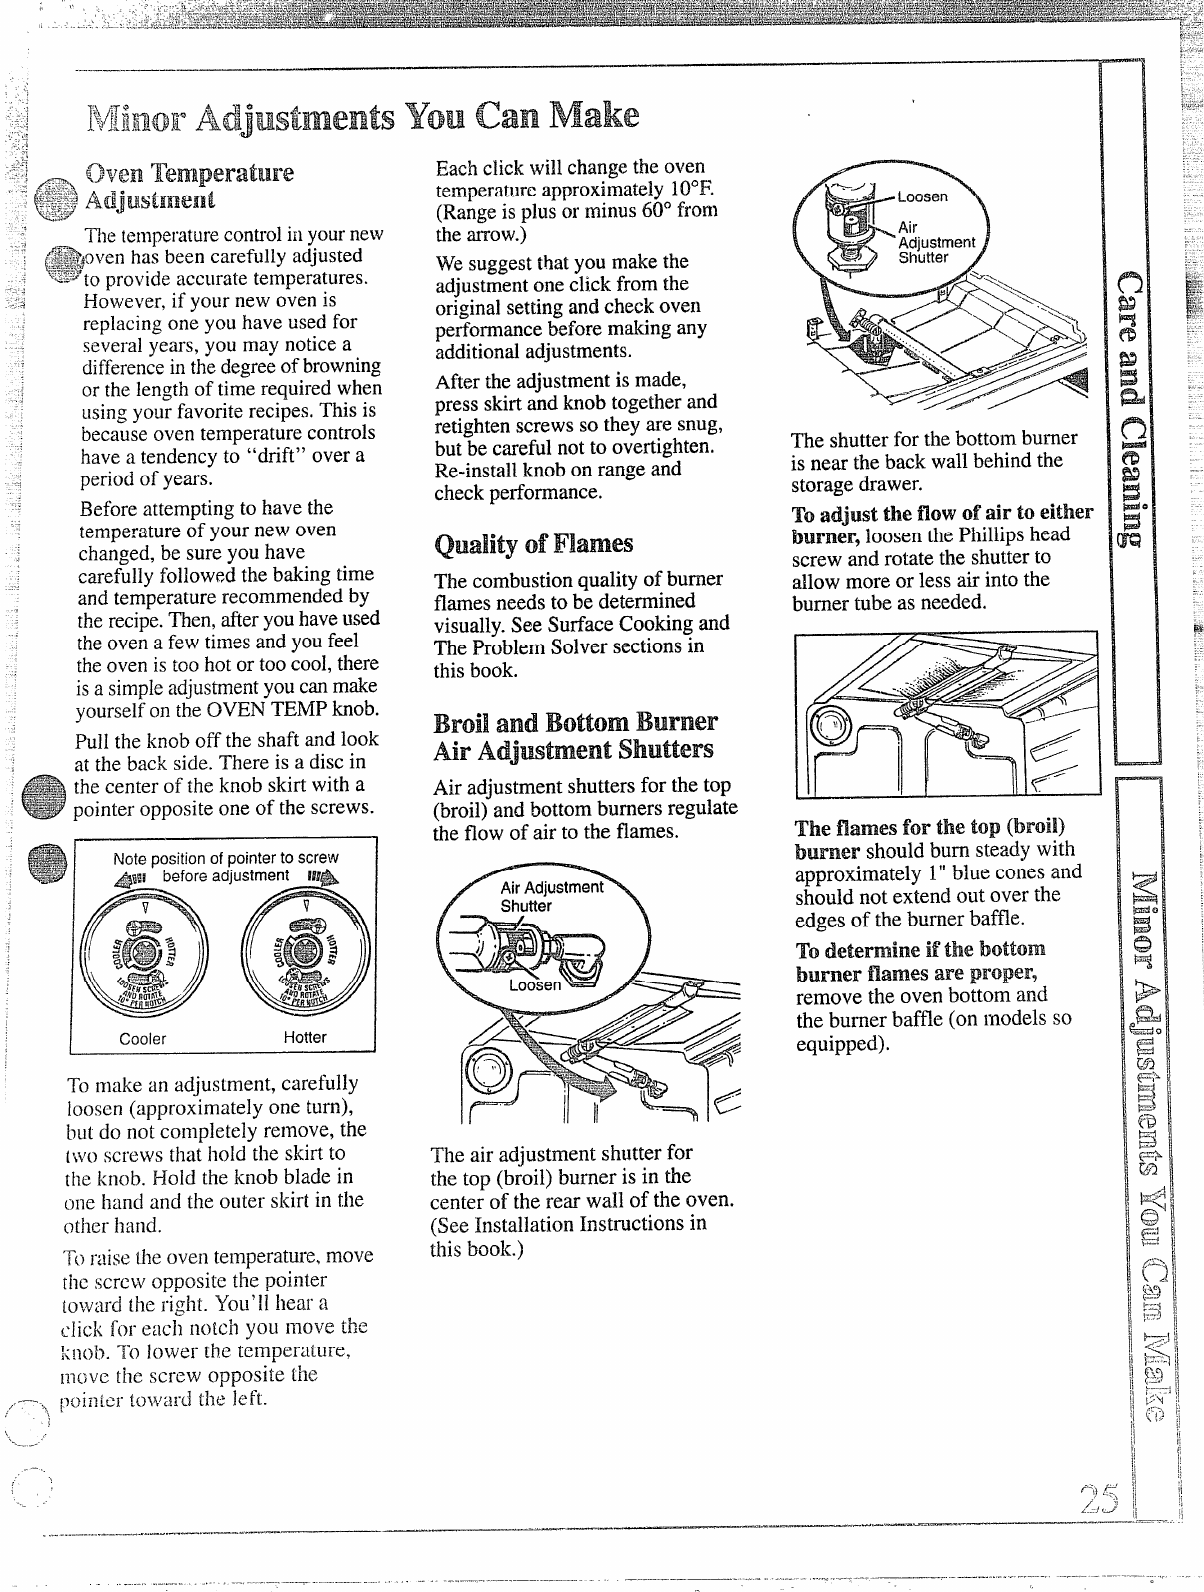
Broil andBottomBurner
Air
Adjwtment Shutters
Air adjustment shutters for the top
(broil) and bottom burners regulate
the flow of air to the flames.
,
The shutter for the bottom burner
is near the back wall behind the
storage drawer.
To
adjust the flcawofairtoeither
burner’, loosen the Phillips head
screw and rotate the shutterto
allow more or less air into the
burner tube as needed.
The
namesforthe top(broil)
burner should bum steady with
approximately 1“blue cones and
should not extend out over the
edges of the burner ba~e.
To determine if the bottom
burner
namesare proper,
remove the oven bottom and
the burner baffle (on models so
equipped).
The air adjustment shutter for
the top (broil) burner is in the
center of the rear wall of the oven.
(See Installation Instructions in
this book.)