


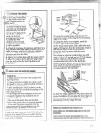
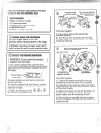

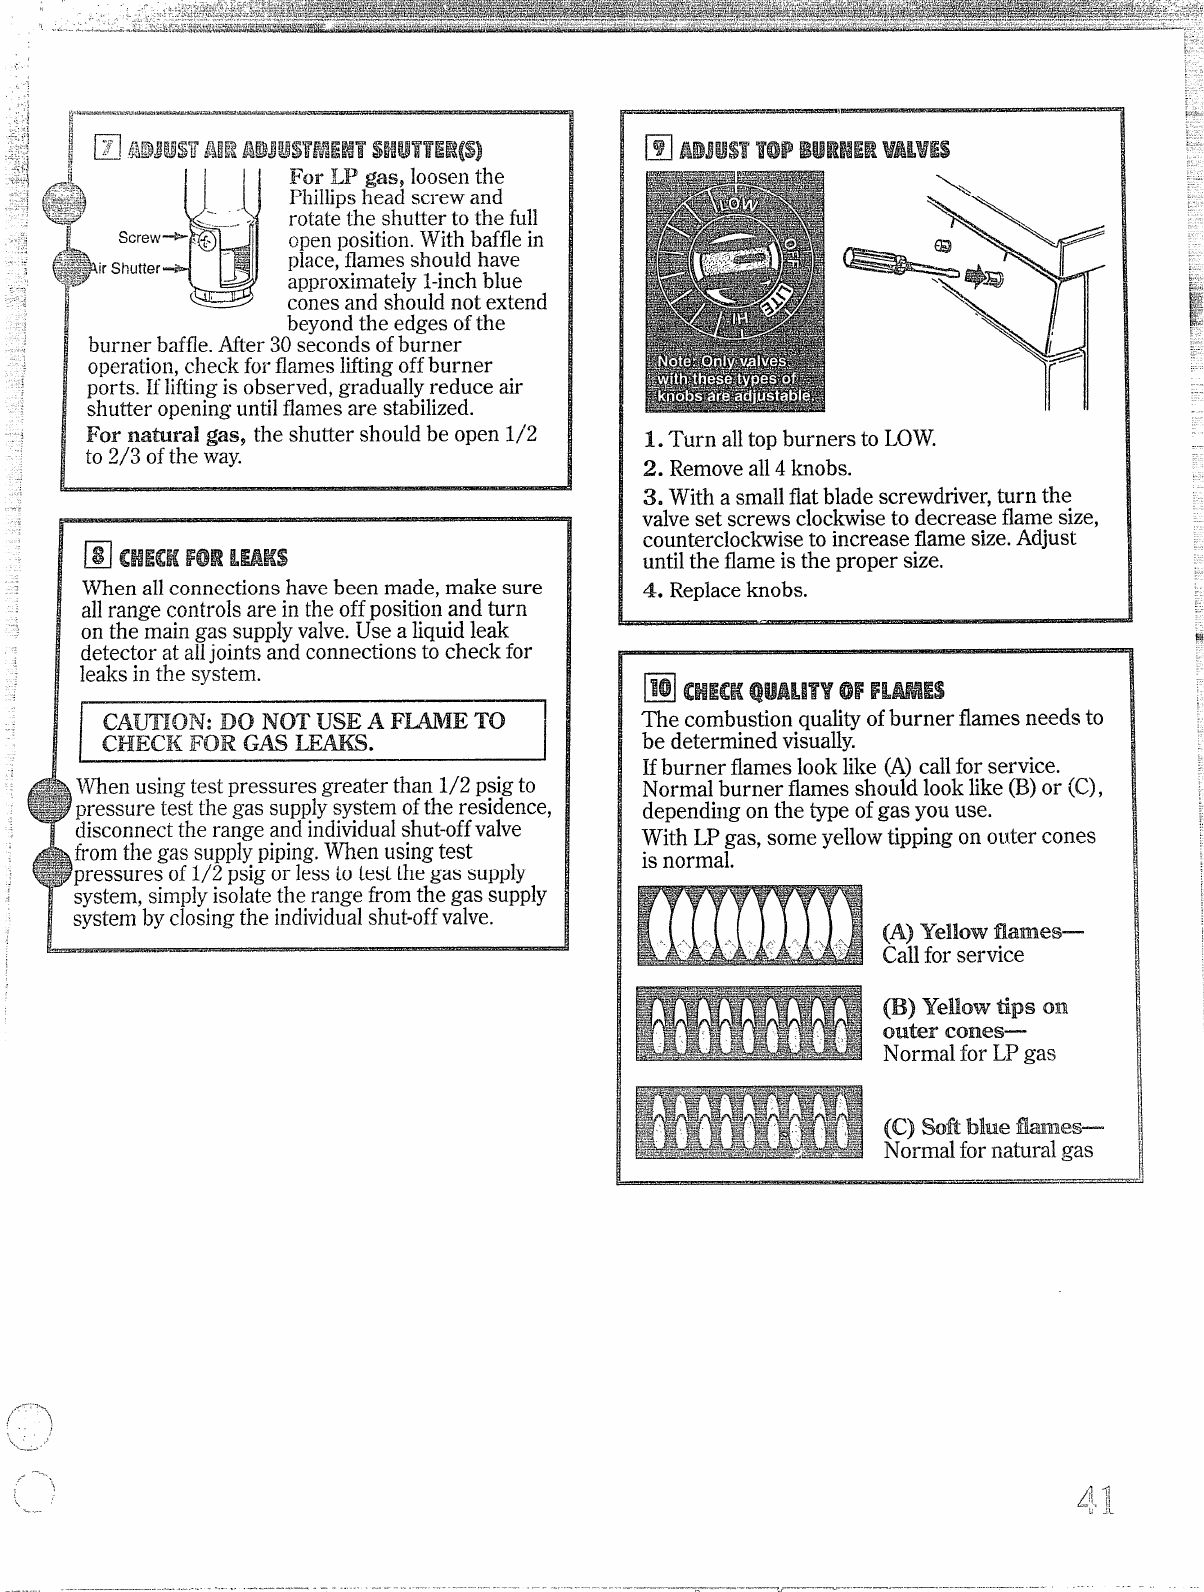
beyond the edges of the
burner baffle. Mer 30 seconds of burner
operation, check for flames lifting off burner
ports. If lifting is observed, gradually reduce air
shutter opening until flames are stabilized.
For matiral gasy
the shutter should be open 1/’2
to 2/3 ofthe way.
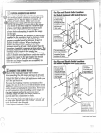
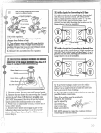
When all connections have been made, make sure
all range controls are in the off position and turn
on the main gas supply valve. Use a liquid leak
detector at alljoints and connections to check for
leaks in the system.
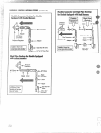
~When using test pressures greater than 1/2 psig to
pressure test the gas supplysystem ofthe residence,
disconnectthe range and individualshut-offvalve
fromthe gas supplypiping.When usingtest
~pressuresof 1/2 psig or less to test the gas supply
system,simplyisolatethe range fromthe gas supply
system by closingthe individualshut-offvalve.
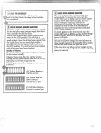
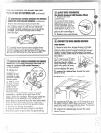
1. Turn alltopburners to LOW.
2. Removeall4 knobs.
3. With a smallflatblade screwdriver,turn the
valveset screws clockwiseto decrease flamesize,
countercloc~~se to increase flamesize.Adjust
untilthe flameis the proper size.
4. Replaceknobs.
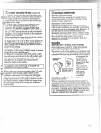
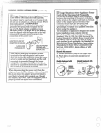
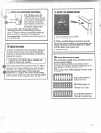
M CHECKQUAL!TYOFrLmEs
The combustionqualityofburner flames needs to
be determined visually.
Hburner flameslook like (A)callfor service.
Normal burner flames should look like @) or (C),
depending on the type ofgas you use.
With LP gas, some yellowtippingon o~~tercones
is normal.
(A) Yellow flames—
Callfor service
(B) Yeuow tips on
outer cones—
Normal for LP gas
(c) Sofi blue flm3@s—
Normalfor natiral gas