


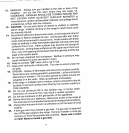

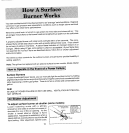
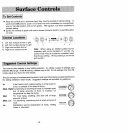
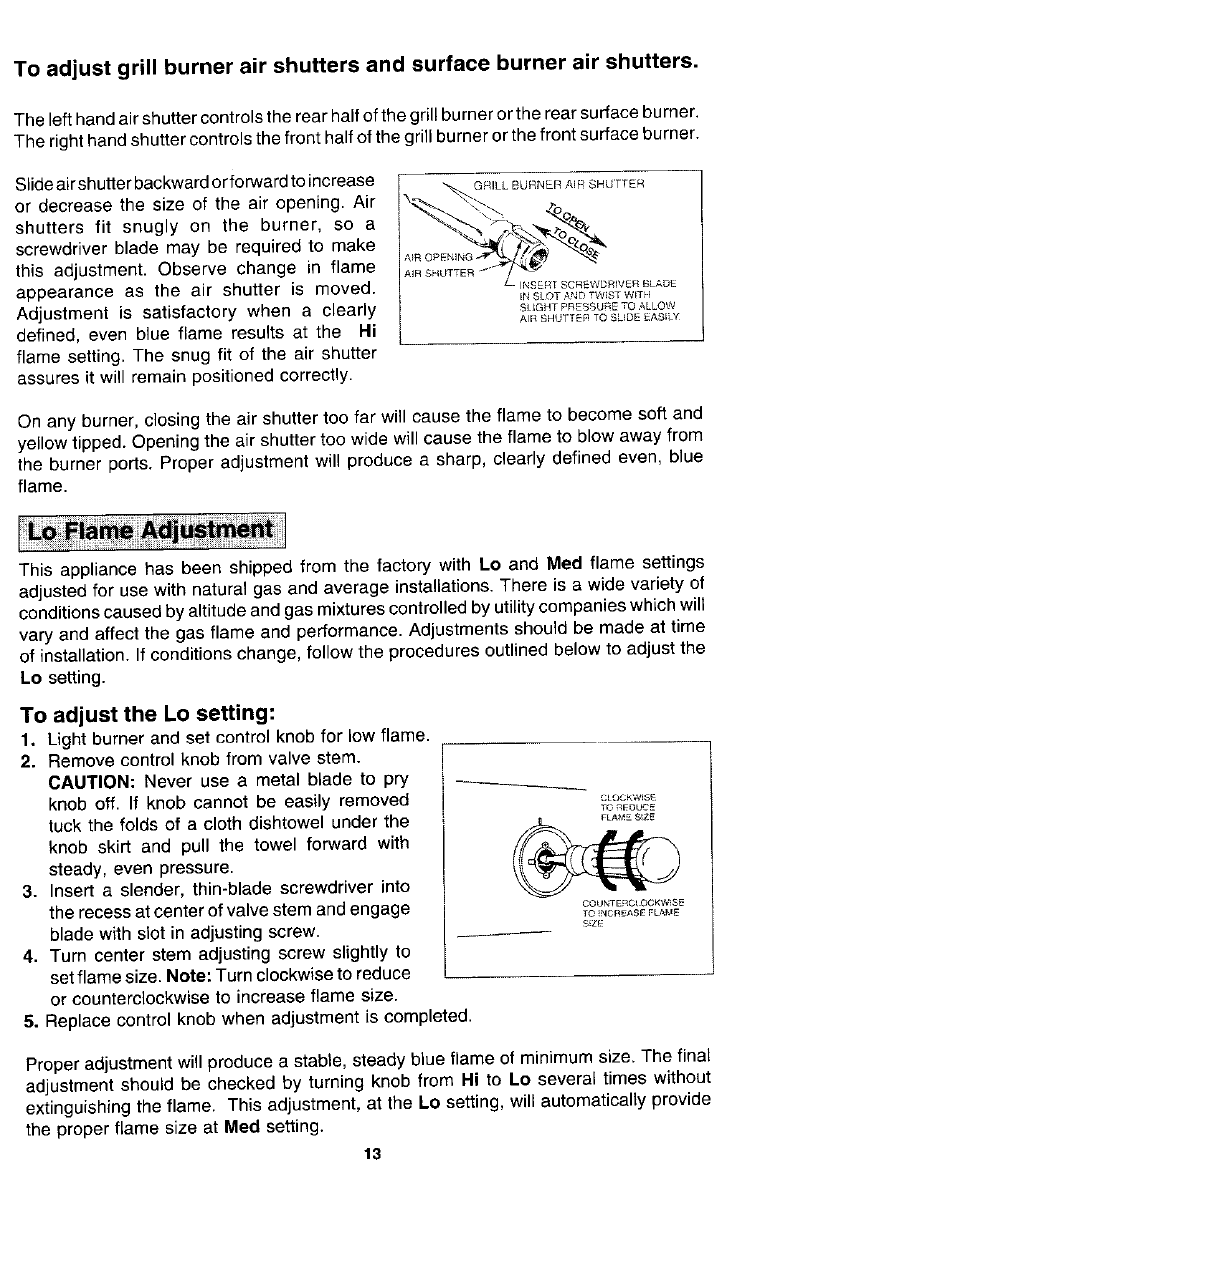
To adjust grill burner air shutters and surface burner air shutters.
The lefthandair shuttercontrolsthe rearhalfofthegrillburnerortherearsurfaceburner.
The righthandshuttercontrolsthefront halfofthegrillburnerorthefrontsurface burner.
Slideairshutterbackwardorforwardto increase _ GRILLBURNERAiRSHU'TTER
or decrease the size of the air opening. Air \"_--, _o
shutters fit snugly on the burner, so a _ >-'--_.,_.".__--,.- ,-_--_
screwdriver blade may be required to make _f? _/f____,_q_-_.
this adjustment. Observe change in flame A_RSHUTTER _" =
appearance as the air shutter is moved. E__ '_ [_'._ERTSCREWDi_IVERBLADE
IN$10T _,NDTWIST WITi !
Adjustment is satisfactory when a clearly SIkGHTPRESSURETOALLOW
AIR SHUTTER TQSLIDE EASILY
defined, even blue flame results at the Hi
flame setting. The snug fit of the air shutter
assures it will remain positioned correctly.
On any burner, closing the air shuttertoo far will cause the flame to become soft and
yellowtipped. Openingthe air shutter toowide willcause the flame to blow awayfrom
the burner ports. Proper adjustmentwill produce a sharp, clearly defined even, blue
flame.
This appliance has been shipped from the factory with Lo and Med flame settings
adjustedfor use with natural gas and average installations.There is a wide variety of
conditionscausedby altitudeand gasmixturescontrolledby utilitycompanieswhichwill
vary and affect the gas flame and performance.Adjustmentsshouldbe made at time
of installation.If conditionschange, follow the proceduresoutlinedbelowto adjust the
Lo setting.
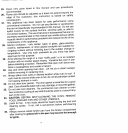
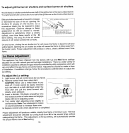
To adjust the Lo setting:
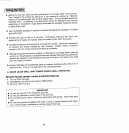
1. Light burnerand set control knob for lowflame.
2. Removecontrol knob from valve stem.
CAUTION: Never use a metal blade to pry
knob off. If knob cannot be easily removed cL._._,.._._._
T_ REOUCE
tuck the folds of a cloth dishtowel under the f_.., _,_=_;,M_s_z_
knob skirt and pull the towel forward with //,///_"__
steady, even pressure.
3. Insert a slender, thin-blade screwdriver into
the recessatcenterofvalvestem andengage COU_TE_C_OO_,W_SE
TO_NCREA£EFLAME
bladewith slot in adjustingscrew, s,z_
4. Turn center stem adjusting screw slightly to
setflamesize.Note:Turn clockwiseto reduce
or counterclockwiseto increaseflame size.
5. Replacecontrol knob when adjustmentis completed.
Properadjustmentwillproducea stable, steady blue flame of minimumsize. The final
adjustment should be checked by turning knob from Hi to Lo several times without
extinguishingthe flame. This adjustment,at the Lo setting,will automatically provide
the proper flame size at Mealsetting.
13