


34
CDVX Series Direct Vent Gas Fireplace
20012253
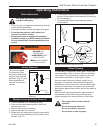
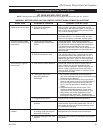
The conversion of this appliance from one
gas to another must be carried out by an
authorized service provider.
1. Disconnect power to the unit and shut off the gas sup-
ply.
2. Remove window frame assembly.
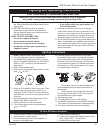
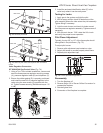
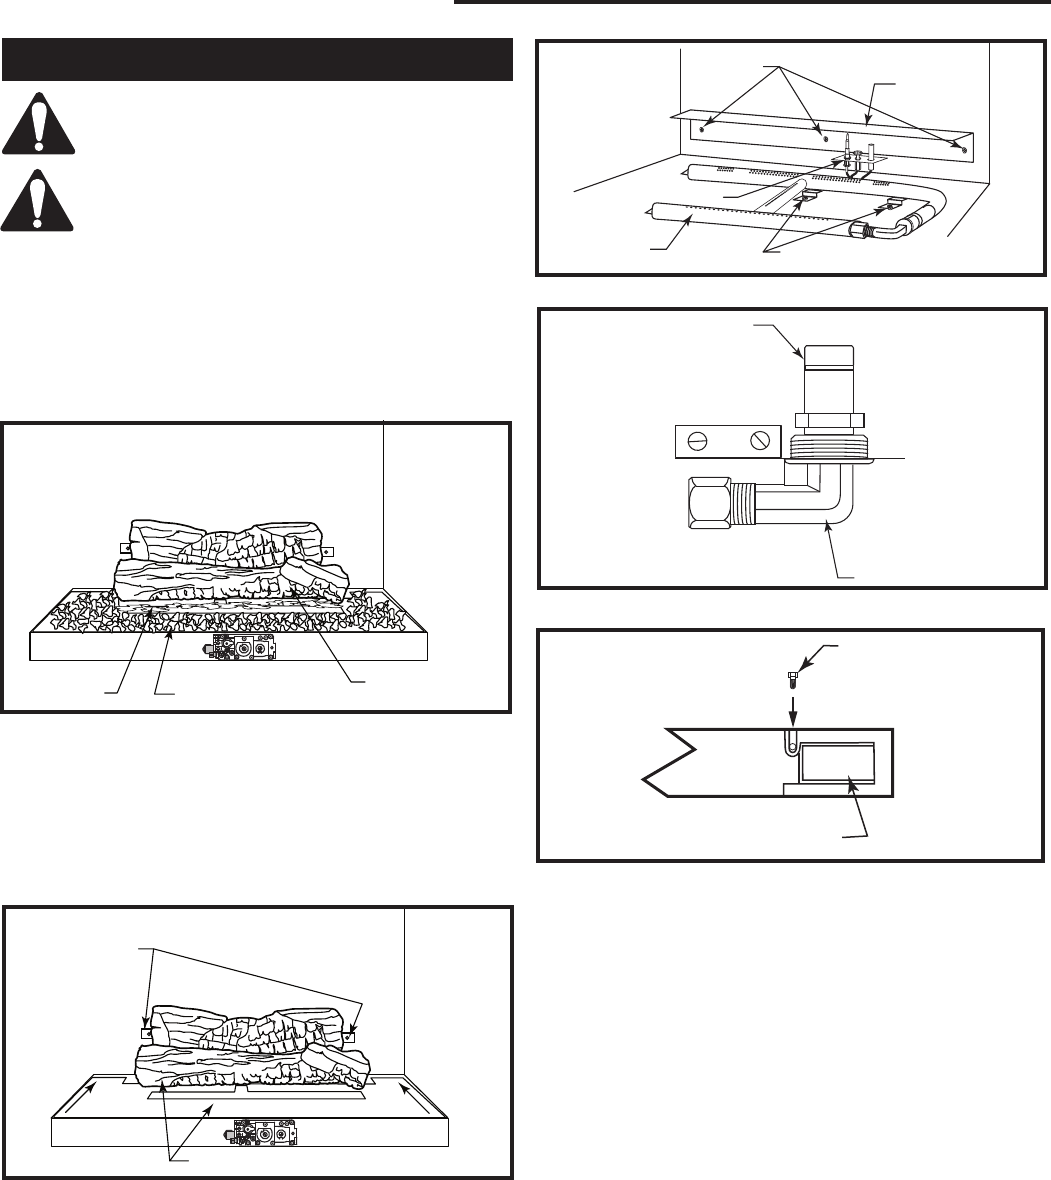
3. Remove the lava rock and ember material. (Fig. 67)
Fuel Conversion Instructions
Front Log
Lava Rock
Ember
Material
CO134
Fig. 67 Remove lava rock and ember material.
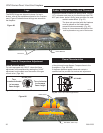
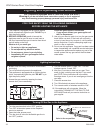
4. Push the log support towards the back of the fireplace
and lift out the front log mounting assembly. (Fig. 68)
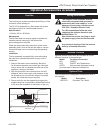
5. Remove the two (2) screws securing the rear log to
the back of the firebox. Remove the three (3) screws
securing the rear log support to the back of the fire-
box. (Fig. 69)
Remove
Screws
Log Support & Front Log
CO135
Fig. 68 Remove rear log and log support and front log.
Rear Log
Support
Remove
Screws
Burner Tube
Remove Screws
Pilot Assembly
FC114
Fig. 69 Remove burner tube and rear log support.
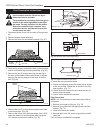
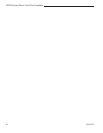
Orifice
Brass Elbow
FC111
Fig. 70 Remove orifice from brass elbow.
Air Shutter Adjustment
Screw
Slot Fully Open
FC112
Fig. 71 Adjust air shutter to fully open.
8. Install the new conversion orifice.
9. Loosen the adjusting screw that holds the air shutter
to the burner tube. Rotate the air shutter to the fully
open position. (Fig. 71)
10. Install the burner tube and secure with the two (2)
screws removed earlier.
11. Burner orifice installation complete.
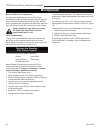
Pilot Conversion
NOTE: It is not necessary to remove the pilot tube for
conversion.
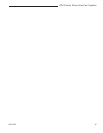
1. Remove pilot hood by lifting up. (Fig. 72)
2. Remove pilot orifice with the appropriate size Allen
wrench. (Fig. 73)
3. Install conversion pilot orifice.
4. Reinstall pilot hood. Be sure to align pilot hood with
index tab.
Pilot conversion installation is complete.
The procedure for converting from one gas to
another is the same regardless of the initial
gas used. The only variation is in the orifice
sizes and component part numbers. Your
authorized service provider will ensure the
correct parts are used.
6. Remove the two (2) screws securing the burner tube
to the burner pan. (Fig. 69)
7. Remove the orifice from the brass elbow. Use a 9/16”
open end wrench to hold the elbow while using the
1/2” wrench to remove the orifice. (Fig. 70)