


C–14 16023522 ©2004 Maytag Services
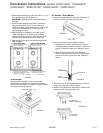
Conversion Instructions (Models AGR4400AD*, AGR4412AD*,
MGR4451AD*, MGR4452AD*, PGR4420LD*, CGR1425AD*, CGR1415AD*,
CGR1110AD*, CP31600AD*)
3
Surface Burner Conversion
(Conventional
Burner)
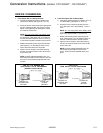
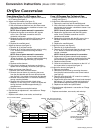
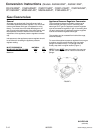
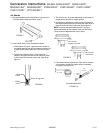
1. Remove main top.
2. Remove all (4) surface burners.
3. Remove all (4) orifice hoods (figure 6) from the valve
by using a 1/2 wrench or socket and turning the hood
counter-clockwise.
NOTE: Save all parts removed in conversion.
4. Replace with the hoods stamped .0335 for LP (.0571
for natural) by using a 1/2 inch wrench or socket and
turning the hood clockwise approximately (6) complete
turns.
5. Replace surface burners.
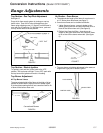
5. Place the corresponding orifice hood on the burner
fitting according to figure 4. Turn the orifice hood
clockwise by hand approximately one turn. Tighten the
orifice hood clockwise with a ½² socket wrench
approximately 2½ turns.
6. Replace the burner assembly in the main top and
rotate one-eighth turn clockwise using the burner
wrench until the burner locks in place with the igniter
aligned with the reference mark on the main top.
7. Repeat steps 3 through 6 until all orifice hoods have
been changed.
To Reassemble:
Replace burner assembly in main top and rotate
approximately one-eighth turn clockwise using burner
wrench until burner locks into position with ignitor aligned
with reference mark on main top.
FIGURE 6
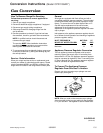
FIGURE 5
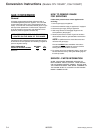
FIGURE 4
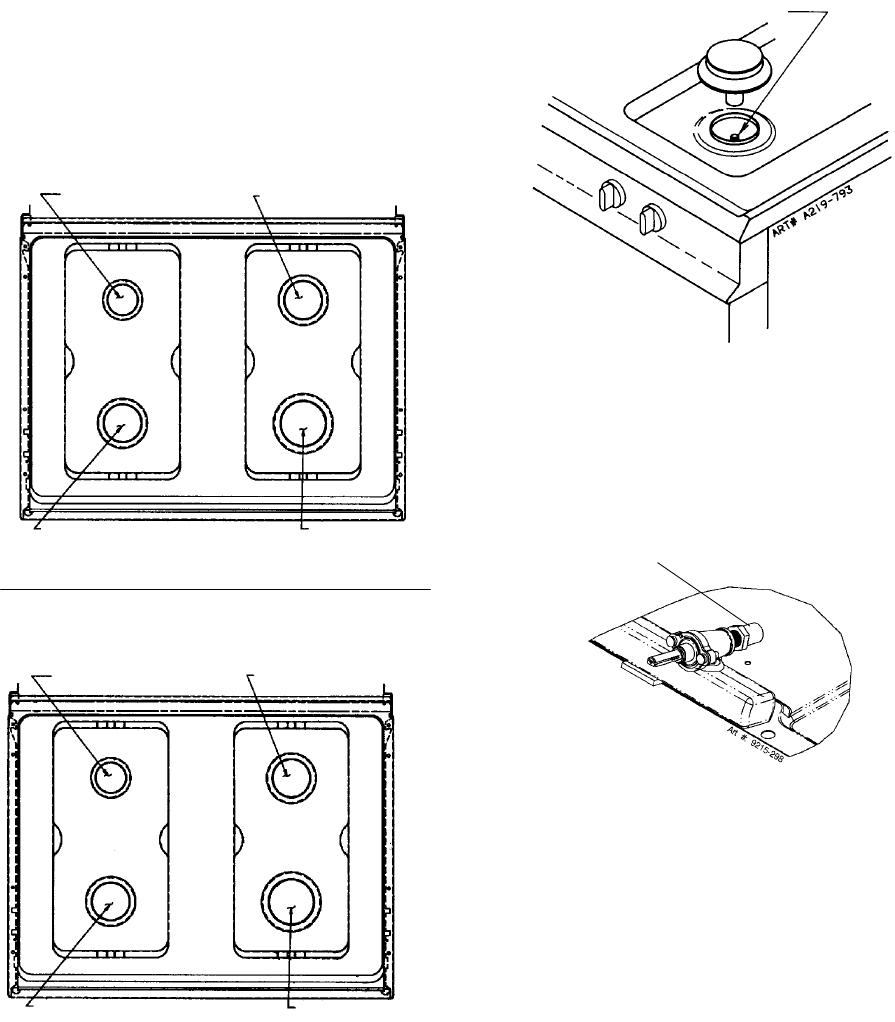
ORIFICE HOOD
ORIFICE - Nat.: Stamped .0571
LP: S tamped .0335
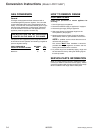
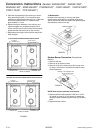
LP GAS SURFACE BURNER ORIFICE CONFIGURATION
6.5K BLUE
STAMPED.0310
8KNO COLOR
STAMPED.0335
8KNO COLOR
STAMPED.0335
8.5K RED
STAMPED.0350
FRONT OF RANGE
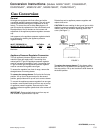
NATURAL GAS SURFACE BURNER ORIFICE CONFIGURATION
7.2K BLUE
STAMPED.0512
9.2K NO COLOR
STAMPED.0571
9.2K NO COLOR
STAMPED.0571
12K RED
STAMPED.0669
FRONTOFRANGE
ART.#9215-250-2
ART.#9215-250-2