


21
Installation
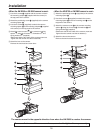
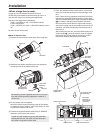
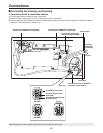
<When a regular lens is used>
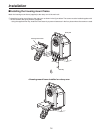
Sandwich the housing’s support rib between the camera
mount and plate nut of the camera on which the camera
mount has been installed, and provisionally secure it
using the camera mount screws.
Connect the camera with the lens to the interior of the
housing using the cable.
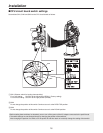
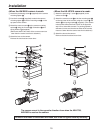
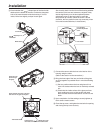
Upon completion of the connection, loosen the camera
mount screws, and move the entire camera so that the
front of the camera lens comes as close as possible to
the inside surface of the glass. Bear in mind the following
points.
(1)
Set to a position where the lens and glass will not
come into contact when the lens is maximally zoomed
out.
(2) Check that the inside surface of the glass and lens
glass surface are more or less parallel with each
other and that the thermostat sensor and lens do not
touch.
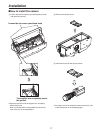
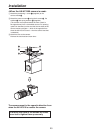
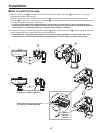
Upon completion of all the settings, move the plate nut
in the directions of the arrows, sandwich the housing’s
support rib tightly between the plate nut and camera
mount, and securely tighten up the 4 screws for installing
the camera mount.
Close the top cover, and tighten the two bolts for opening
and closing the top cover securely.
Housing’s
support rib
Camera mount
Plate nut
Camera mount
screws
Move the plate nut
in these directions.
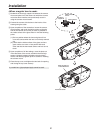
Thermostat sensor
A portable lens (grip equipped type) cannot be used.