


23
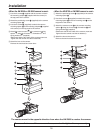
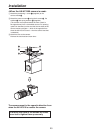
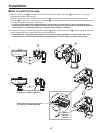
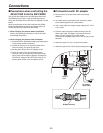
Check whether the “ ”-shaped part of the lens holder
attached to the bottom of the lens is inside the elongated
hole of the metal bracket inside the housing. If it is not
inside, lift the lens slightly, and put it back again.
Installation
Lens holder
-shaped part of
lens holder
Metal bracket
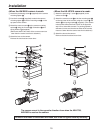
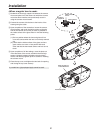
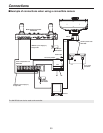
Also visually check from the front of the housing whether
the centers of the lens and camera are aligned. If they
deviate significantly, turn the lens up/down position
adjustment screw on the lens holder to move the
lens position up or down. (When the screw is turned
clockwise, the lens position moves up; conversely, when
it is turned counterclockwise, it moves down.)
Lens up/down
position adjustment
screw
Lens holder
Upward
Downward
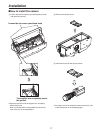
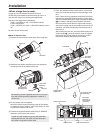
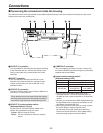
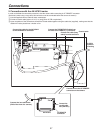
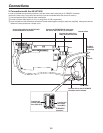
Connect the camera with the lens to the interior of the
housing using the cable.
(Refer to the section on the connections.)
Bring the front edge of the lens and inside of the glass
as close together as possible. Bear in mind the following
points.
(1)
Set to a position where the lens and glass will not
come into contact when the lens is maximally zoomed
out.
(2) Check that the inside surface of the glass and lens
glass surface are more or less parallel with each
other and that the thermostat sensor and lens do not
touch.
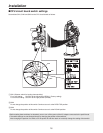
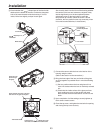
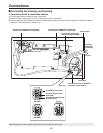
Upon completion of all the settings, securely tighten up
the 4 camera mount screws.
Close the top cover, and tighten the two bolts for opening
and closing the top cover securely.
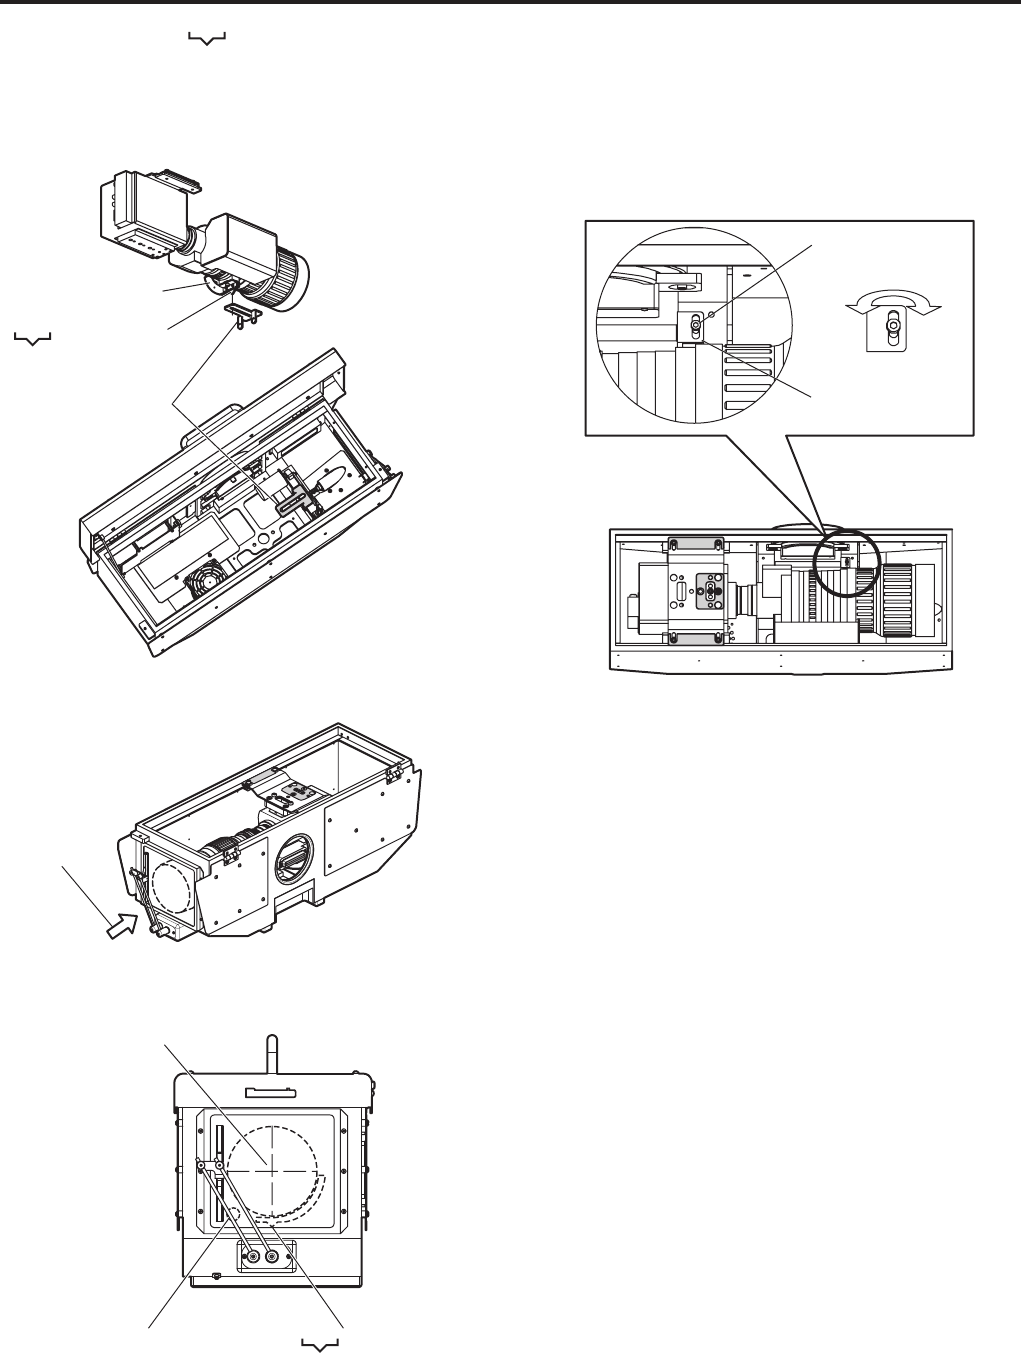
Check the front
panel through
the glass.
Check whether the center of the lens
and center of the glass are aligned.
Check that the “ ” -shaped part of the
lens holder is fitted into the metal bracket.
Thermostat sensor