


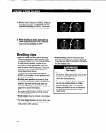
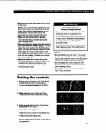

4. Move the Lock Lever to the right-the
Clean position. The Clean Indicator Light
will come on.
5. After the Self-Cleaning cycle is started,
the Lock Indicator Light comes on when
the oven temperature goes above normal
baking/roasting temperatures. The door
cannot be opened and the Lock Lever
must not be moved when the Lock
Indicator Light is on.
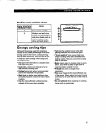
4. After the Self-Cleaning cycle is com-
pleted and the oven reaches normal
baking/roasting temperatures, the Lock
Indicator Light will go off. Move the Lock
Lever back to the left. DO NOT FORCE
IT. Wait until it moves easily. Turn the
Oven Selector and Oven Temperature
Control clockwise to OFF. The Clean
Indicator Light will go off.
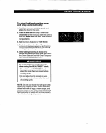
7. After the oven is cool, wipe off any
residue or ash with a damp cloth. If
needed, touch up spots with a soapy
steel-wool pad.
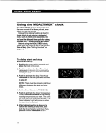
To stop the Self-Cleaning
cycle at any time:
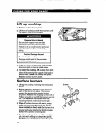
1. Push in and turn the Stop Time Knob
clockwise until it points to the correct
time of day.
3. Turn the Oven Selector and Oven
Temperature Control to OFF. When the
Lock Indicator Light goes off, move the
Lock Lever back to the left. DO NOT
FORCE IT. Wait until it moves easily.
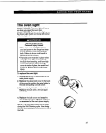
Special tips
l Keep the kitchen well ventilated during the
Self-Cleaning cycle to help get rid of heat,
odors and smoke.
l After the oven is cool, wipe up any
residue or ash with a damp cloth or
sponge. If any spots remain, clean with a
mild abrasive cleanser or cleaning sponge.
l Clean the oven before it gets heavily
soiled. Cleaning a very soiled oven takes
longer and results in more smoke than
usual.
l If the Self-Cleaning cycle does not get
the oven as clean as you expected, the
cycle may not have been set long enough
or you may not have prepared the oven
properly. Set the Self-Cleaning cycle
longer the next time and hand-clean areas
noted on page 20.
22