13
Heading
Note: Foraddedsafetywerecommendthat
youalwaysleavethefoodpusherinplace
whilstoperatingtheprocessor.
Whisk Attachment
1.Fittheprocessorbowlandspindleas
detailedpreviouslyinFigures2,3&6.
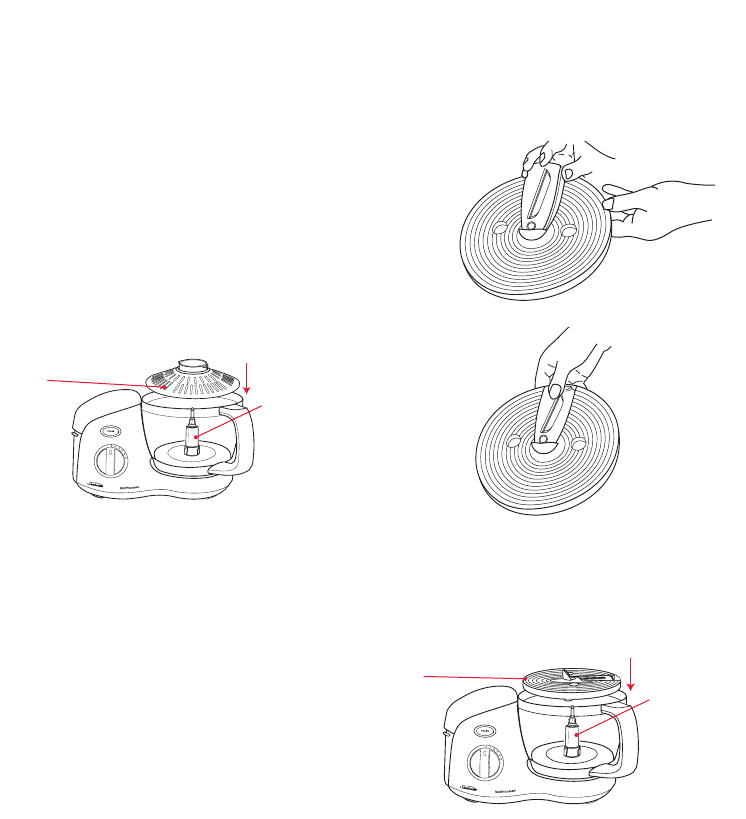
2.Fitthewhiskattachmentoverthespindle
andpressfirmlyintoplace,seeFigure10.
3.Addingredientsintotheprocessingbowl.
4.Fittheprocessingbowlcovertothe
processingbowlinFigures4&5andplace
thefoodpusherinthefeedtube.
5.Plugthepowercordintoa230-240VAC
poweroutletandturnthepower‘ON’.
6.Selecttherequiredspeed.
7.Whenprocessingiscomplete,removethe
spindleandwhiskfromtheprocessing
bowlbeforeremovingtheprocessedfood.
Slicing, Chipping, Grating and Shredding Blades
1.Placethebladeofyourchoiceintotheblade
holdingdisc.Holdthebladebytheholding
clipandinserttheotherendintotheblade
holdingdisc.Pressdownontheendofthe
bladewiththeholdingclipuntiltheblade
issittingflatinthebladeholdingdisc,see
Figures11&12.
2.Fittheprocessorbowlandspindleas
detailedpreviouslyinFigures2,3&6.
3.Fitthebladeholdingdiscoverthespindle
andpressfirmlyintoplace,seeFigure13.
Warning: Useextremecautionastheblades
aresharp.
4.Fittheprocessingbowlcovertothe
processingbowlinFigures4&5andplace
thefoodpusherinthefeedtube.
Fitting/using the tools on your MultiProcessor continued
Fig 11
Fig 12
blade
holding
disc
spindle
LC6250
Pictured
Fig 13
whisk
spindle
Fig 10
LC6250
Pictured


