18
Model 161Operating Procedures
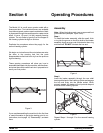
Disassembly
MAKE SURE THE POWE R SWITCH IS IN
THE “OFF” POSITION. Failure to follow this
instruction may result in severe personal injury to
fingers or hands f rom haz ardous m oving parts.
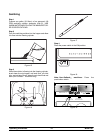
Step 1
Remove the handscr ews and the freezer door .
Remove the beater assemblies from the fr eezing
cylinders and take these parts to the sink for cleaning.
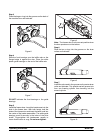
Step 2
Remove the front drip tray and the splas h shield from
the machine. Take them to the sink for cleaning.
Brush Cleaning
Step 1
Prepare a sink with an appr oved cleaning solution
(example: Kay-5r). USE WARM WATER AND
FOLLOW THE MANUFACTURER’S SPECIFI-
CATIONS.
IMPORTANT: Follow label dir ections, as t oo
STRONG of a solutioncan cause parts damage, while
too MILD of a solution will not prov ide adequate
cleaning.) Mak e sure all brushes provided with the
machine are available for br ush cleaning.
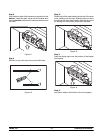
Step 2
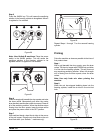
Remove the o-r ings from the d rive shaf ts of the beater
assemblies.
Note: To remove th e o-rings, use a single service
towel to grasp the o-ring. Apply pressure in an upward
directionuntil the o -ringpops out of its groove. With the
other hand, push the top of the o-ring forward, and it
will roll out of the groove and c an be easily removed.
If there is more than one o-ring to be removed, always
remove the rear o-ring first. This will allow the o-ring to
slide over theforward rings without falling into theopen
grooves.
Step 3
Fromthe freezer door, remove design caps, pivot pins,
draw handles, and draw valves. Remove all o-rings.
Step 4
Remove th e large o-rings, front bearings, and guide
bearings from the back of the f reezer door.
Step 5
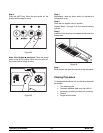
Return to the machine with a smallamount of cleaning
solution. With the black bristle brush, brush clean the
rear shell bearings at the back of the freezing
cylinders.
Step 6
Remove the rear drip pan from the side panel and take
it to the sink for cleaning.
Note: If the drip pan isfilled withan excessiveamount
of mix, this is an indication that the drive shaft o-ring of
the beater assembly should be replac ed or proper ly
lubricated.
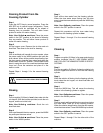
Step 7
Thoroughly brush clean all disas sembled par ts in t he
cleaning solution. Make sure all lubricant and mix film
is removed. Take parti cular care to brush clean the
draw valve cores in the freezer door. Place all the
cleaned parts on a clean, dry surface to air dry
overnight.
Step 8
Wipe clean all exterior surf aces of the machine.


