English 10
11. Remove junction box channel covering the wires.
12. Remove circular knockouts behind junction box
channel.
13. Before hanging hood, install transition per Figure 10 or
Figure 11. Fasten transition with (2) 3/8” sheet metal
screws (supplied) and aluminum tape per all applicable
codes.
Note:
Screws must not hinder damper operation.
14. Using two people to lift, rest the hood on the screws in
the wood bracket. Use the keyholes labeled "F" in
Figure 13. Make sure the wood bracket fits into the
recess on the back of the hood.
15. Tighten the screws in keyholes. Check hood levelness
and adjust if necessary.
16. From inside the hood, drive 5/8” (16 mm) screws
through holes in hood into wooden bracket. See holes
labeled “J” in Figure 13.
17. Connect additional ducting.
Duct Covers Assembly &
Installation
(optional)
Optional duct covers shown in Figure 14 may be used to fill
the space between the hood and ceiling in wall mount
installations. 6" (152 mm) and 12" (305 mm) high duct
covers are available and may be ordered separately (see
page 4)
1. If multiple duct covers are used, connect the pieces
together using sheet metal screws provided with the
duct cover accessories.
2. Attach the duct cover(s) to the hood using sheet metal
screws as shown in Figure 14.
3. From inside of hood, insert 5/8” (16 mm) screws
supplied through the holes indicated on each side and
along the front, into bottom of the cover.
Figure 12: Junction Box Channel
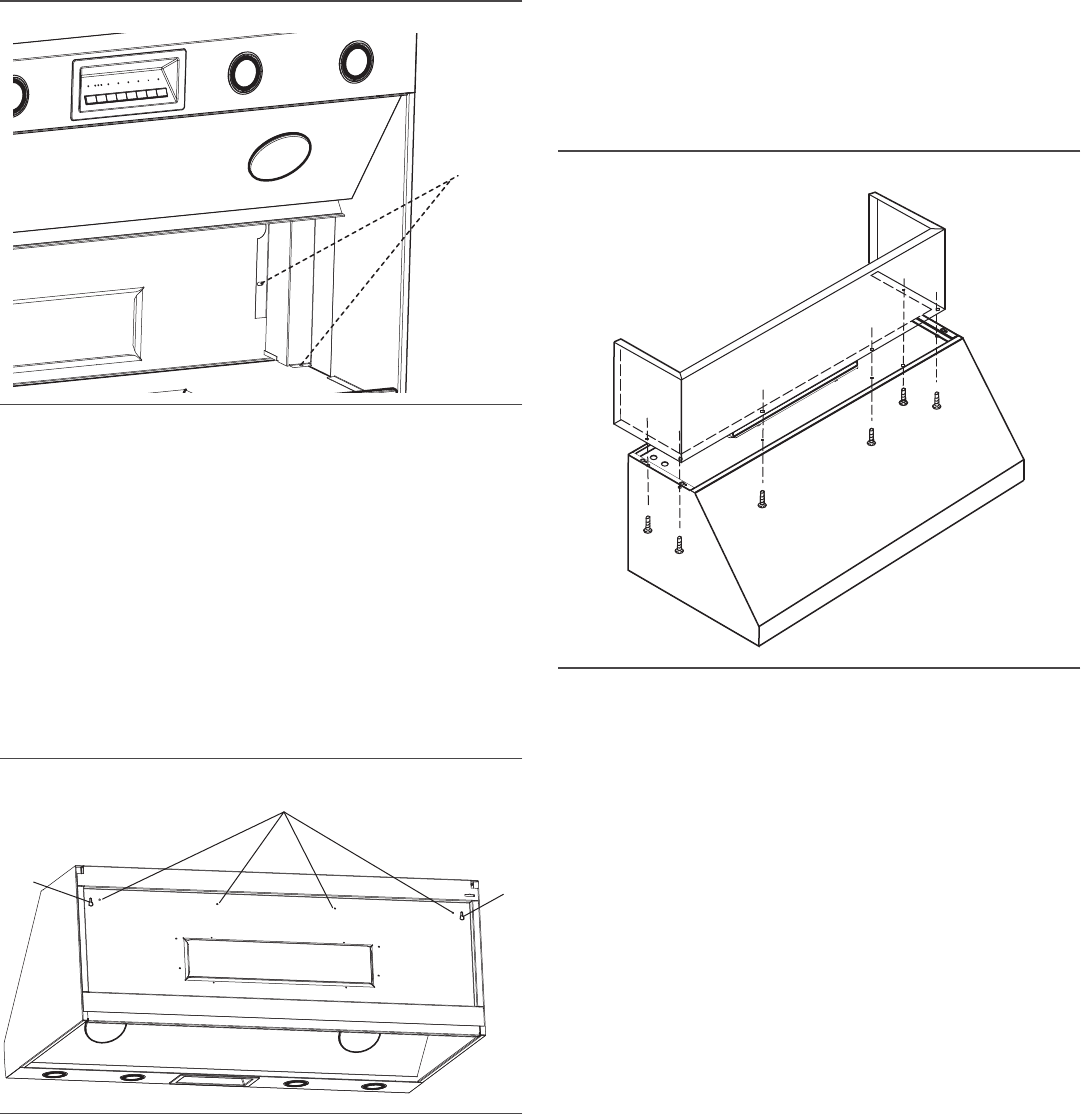
Figure 13: Location of Screw Keyholes
Remove
2 screws
J
F
F
Figure 14: Attachment of Duct Cover(s) to Hood
Screw quantity
dependent on
hood size.


