


Installation
7
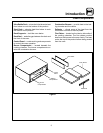
Oven Assembly
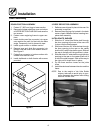
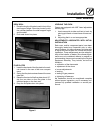
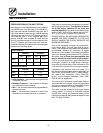
DECK SEAL
1. Place the long lip of the deck seal in front of the
shelf support angle. Place the shorter lip with
the notches between the shelf support angle
and the shelf.
2. Push seal down into place.
Figure 4
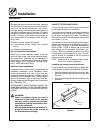
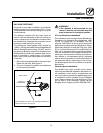
FLUE PLATES
1. Insert the back end of the flue plate in the verti-
cal channel in the rear of the oven compart-
ment.
2. Swing the flue plate outward toward the oven
side wall.
3. Raise the front end of the flue plate about 1/2”.
slip the tw o tabs on the flue plate in the
matched angle on the front wall.
4. Drop the flue plate down into place.
Figure 5
LEVELING THE OVEN
Ovens are equipped with NSF listed adjustable
sanitary legs.
1. Level ovens side to side and front to back by
placing spirit level on base frame of lower sec-
tion.
2. Adjust leg feet in or out as appropriate.
ADJUSTMENTS ASSOCIATED WITH INITIAL
INSTALLATION
Each oven, and its component parts, have been
thoroughly tested and inspected prior to ship-
ment. However, it is often necessary to further test
or adjust the oven as part of a normal and proper
installation. These adjustments a re the responsi-
bility of the installer, or dealer. Since these a djust-
ments are not considered defects in material or
workmanship, they are not covered by the Original
Equipment Warranty. They include, but are not
limited to:
D calibration of the thermostat
D adjustment of the doors
D burner adjustments
D leveling
D testing of gas pressure
D tightening of fasteners
No installation should be considered complete
without proper inspection, and if necessary, ad-
justment by qualified installation or service per-
sonnel.