


14
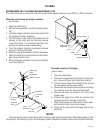
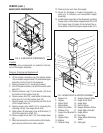
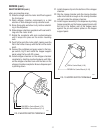
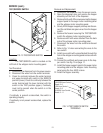
FIG. 4 AUGER MOTOR
P1922
AUGER DRIVE MOTOR
Location:
The auger motor is located on the right rear of the
motor assembly mounting panel.
Test procedures:
1. Disconnect the dispenser from the power source.
2. Check the voltage across the positive (red wire)
terminal and the negative (black wire) terminal on
the auger motor with a voltmeter. With the dis-
penser door open and the product level in the CDS
hopper lower than the probe, press and hold the
SERVICE switch. Connect the dispenser to the
power supply. The indication must be 4.0 to 26.5
volts dc.
If voltage is present as described, the auger motor
drive is operating properly. If auger does not turn,
replace the auger motor.
If voltage is not present as described, refer to wiring
diagrams and check wiring harness.
Removal and Replacement:
1. Remove hopper assembly and set aside for reas-
sembly.
2. Remove six #8-32 screws securing the rear cover
and remove the rear cover.
3. Remove the four #8-32 screws located inside the
dispenser housing on the lower right front of the
auger motor mounting panel, securing the auger
motor mounting bracket and auger motor to the
rear of the auger motor mounting panel.
4 Disconnect the wires from the auger drive motor.
5. Remove the auger motor mounting bracket, auger
motor and dust seal as an assembly.
6. Remove the dust seal from the auger motor and
discard the motor.
7. Install dust seal on the new auger motor shaft and
align the notch in the seal with the motor casting.
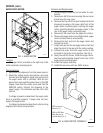
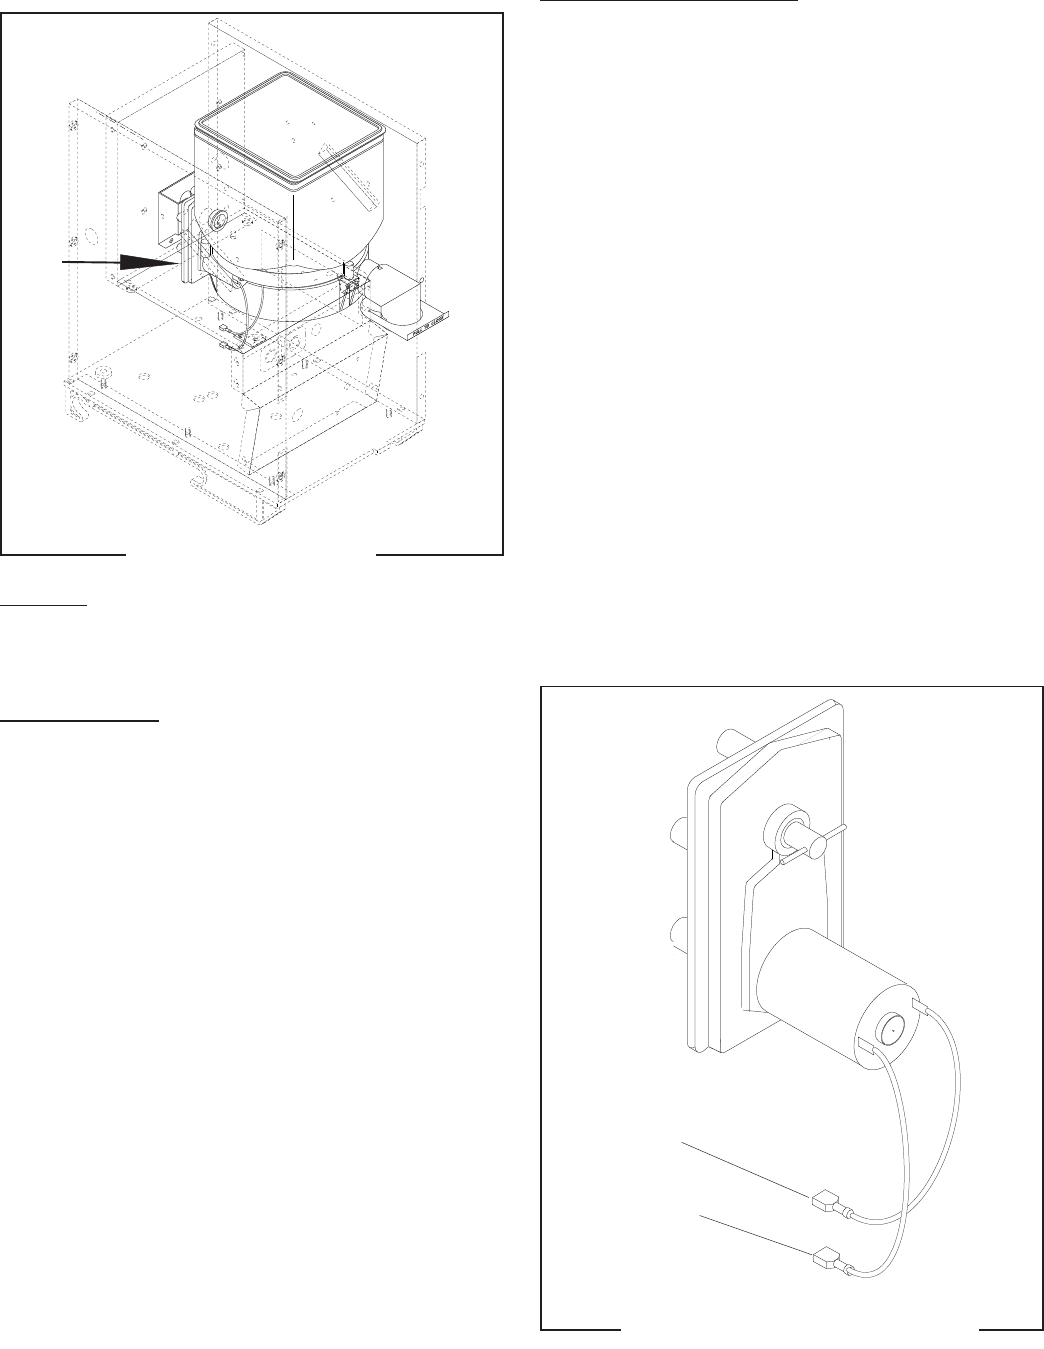
8. Connect the wires from the auger motor to the
terminals in the main wiring harness. See Fig. 5.
9. Using four #8-32 screws, install the auger motor,
dust seal and mounting bracket to the rear of the
auger motor mounting panel.
10. Install the hopper assembly.
11. Install the rear cover with six #8-32 screws.
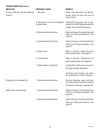
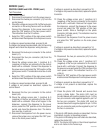
P1902
FIG. 5 AUGER MOTOR TERMINALS
SERVICE (cont.)
RED to Control
Board (J1-1)
BLK to GRN Wire
Main Harness to
Control Board (J1-7)
29793 061599