23
Models QS12 & QS24 Operating Procedures
CAUTION: Release material sheets must be
replaced if:
S Release material is torn.
S Release material substance is worn from the
release material sheet.
S Product sticks to the release material.
Cooking Procedures
Step 1
Make sure the r elease material i s installed.
Step 2
Place the power switches in the ON position. The
screen will scroll through information messages and
then advance to the first cook screen.
Figure 21
Note: If there is no upper cook surface, the words
“NO CLAM” will appear on the screen prior to the
software version number.
Step 3
Press the UP arrow until the desired item number
appears on the display.
MENU
UF
TIME
TEMP
UP
DOWN
EXIT
UM
UR
LR
LM
LF
MANUFACTURED BY THE TAYLOR COMPANY
ROCKTON, ILLINOIS U.S.A.
I
0
14293
Figure 22
Step 4
Allow the grill to heat for approximately 15 minutes or
until all indicating lights are no longer illuminated.
DO NOT begin cooking until the grill has reached set
temperature. If the g rill is not at cook temperature, the
display will alternate between the item number and the
words, “TOO COOL”. If the grill is too hot to cook the
selected product, the display will alternate between the
item number and the words “TOO HOT”. When the
words “TOO COOL” or “TOO HOT” stop appearing on
the display, and all indicator lights have cycled off, the
grill is ready to cook product.
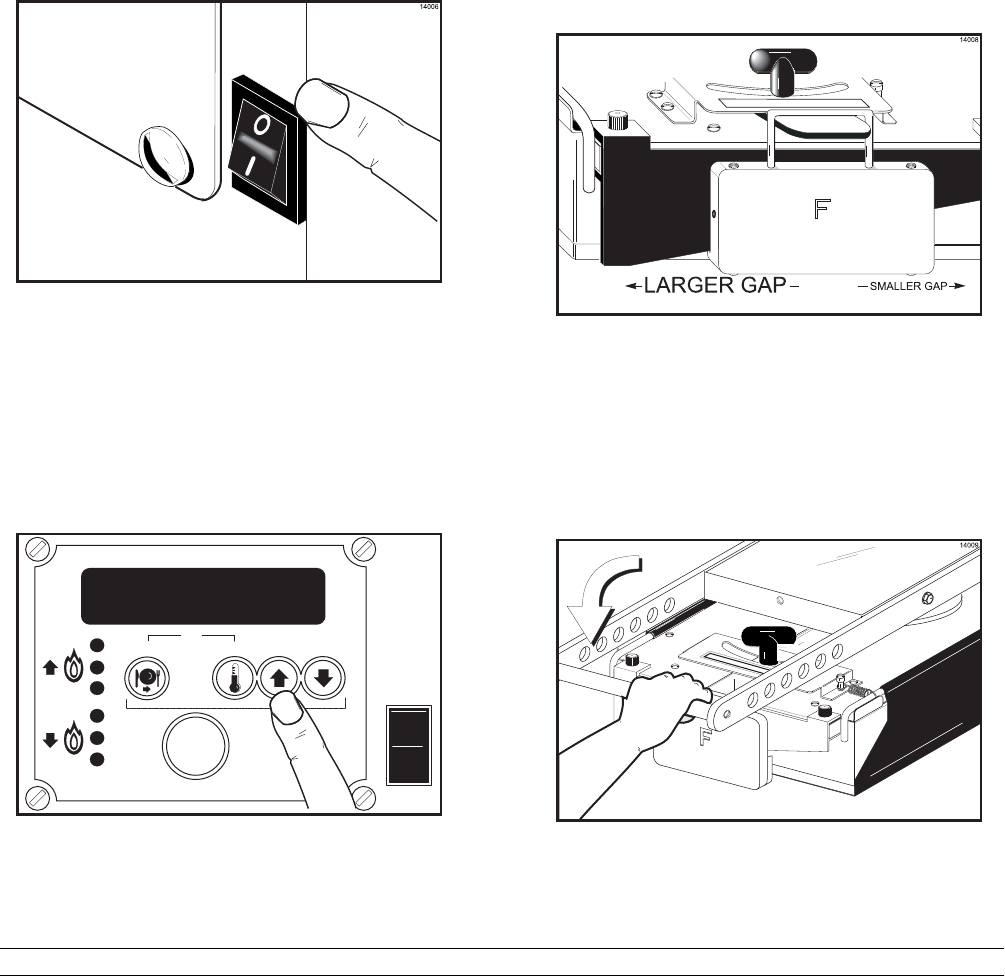
Step 5
To adjust the gap between the upper cook surface and
lower cook surface, loosen the “T” handle and slide the
gap adjusting bar to the right for a smaller gap or to the
left for a larger gap.
Figure 23
Step 6
While the upper cook surface is in the raised position,
place the product on the lower cook surface. Lower the
upper cook surface, and press the TIME key. A tone
will sound for two seconds, alerting the operator that
the cook cycle has been initiated.
Figure 24


