


36
Replacing a Blower (62EB and 62E7 Units)
EXHAUST OR SUPPLY SIDE — Turn off the power to the
unit. Remove all of the screws from the top panel. Pry the top
panel up from its gasket seat, being careful not to bend the lid.
Disconnect plug from the blower. Remove all of the P-clips,
wire ties and hoses that will keep the blower assembly from
lifting out. Remove all of the screws holding the blower in the
ERV unit and remove the blower. Follow these instructions in
reverse order to install the new blower.
MAINTENANCE
Routine maintenance of the energy recovery cassettes
includes periodic cleaning of the energy recovery wheel as well
as inspection of the air seals and wheel drive components as
follows:
Cleaning — The need for periodic cleaning of the energy
recovery wheel will be a function of operating schedule, cli-
mate and contaminants in the indoor air being exhausted, and
the outdoor air being supplied to the building.
The air exchange wheel is “self-cleaning” with respect to
dry particles due to its laminar flow characteristics. Smaller
particles pass through; larger particles land on the surface and
are blown clear as the flow direction is reversed. Any material
that builds up on the face of the wheel can be removed with a
brush or vacuum. The primary need for cleaning is to remove
oil-based aerosols that have condensed on energy transfer
surfaces.
A characteristic of all dry desiccants, such films can close
off micron sized pores at the surface of the desiccant material,
reducing the efficiency by which the desiccant can adsorb and
desorb moisture and also build up so as to reduce airflow.
In a reasonably clean indoor environment such as a school
or office building, measurable reductions of airflow or loss of
sensible effectiveness may not occur for several years.
Measurable changes in latent energy transfer can occur in
shorter periods of time in applications such as moderate occu-
pant smoking or cooking facilities. In applications experienc-
ing unusually high levels of occupant smoking or oil-based
aerosols such as industrial applications involving the ventila-
tion of machine shop areas for example, annual washing of en-
ergy transfer may be necessary to maintain latent transfer effi-
ciency. Proper cleaning of the energy recovery wheel will re-
store latent effectiveness to near original performance.
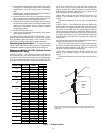
To clean, gain access to the energy recovery wheel and
remove wheel. Brush foreign material from the face of the
wheel. Wash the wheel in a 5% solution of non-acid based coil
cleaner or alkaline detergent and warm water.
Soak in the solution until grease and tar deposits are
loosened.
NOTE: Some staining of the desiccant may remain and is not
harmful to performance.
Before removing, rapidly run finger across surface of wheel
to separate polymer strips for better cleaning action. Rinse
dirty solution from wheel and remove excess water before
reinstalling.
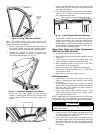
Air Seals — Diameter seals are provided on each cassette
to minimize transfer of air between the counter flowing
airstreams.
To adjust diameter seals, loosen diameter seal adjusting
screws and back seals away from wheel surface See Fig. 39.
Rotate wheel clockwise until 2 opposing spokes are hidden
behind the bearing support beam. Using a folded piece of paper
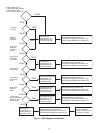
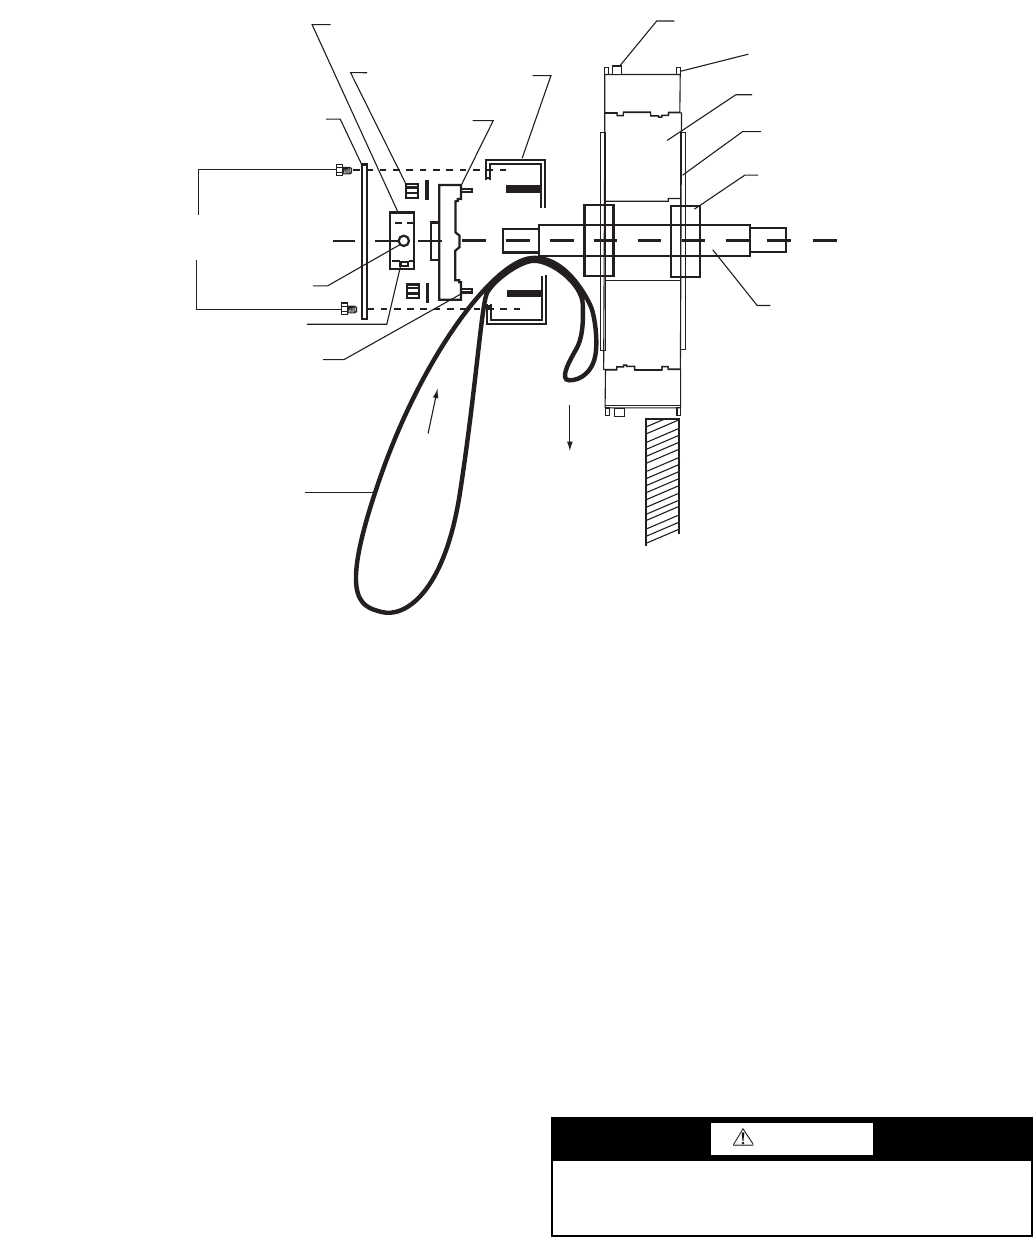
Bearing
Access Plate
Locking
Collar
Locking
Nut (2)
Bearing
Housing
Bearing
Support
Beam
Belt (Shown in
Place)
Wheel Rim
Wheel
Hub (2)
Taper - Lock
Hub Collar (2)
Shaft
PULL
FEED
Pulley
Side
Motor
Side
Belt
Locating Pin
Drift Hole
Set Screw
Retaining
Screws
Fig. 38 — Belt Replacement (Diameter Seals Removed)
A62-285ef
CAUTION
Do not use acid based cleaners, aromatic solvents, steam or
temperatures in excess of 76.7 C (170 F); damage to the
wheel may result.