


32
V1.10
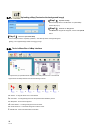
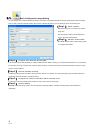
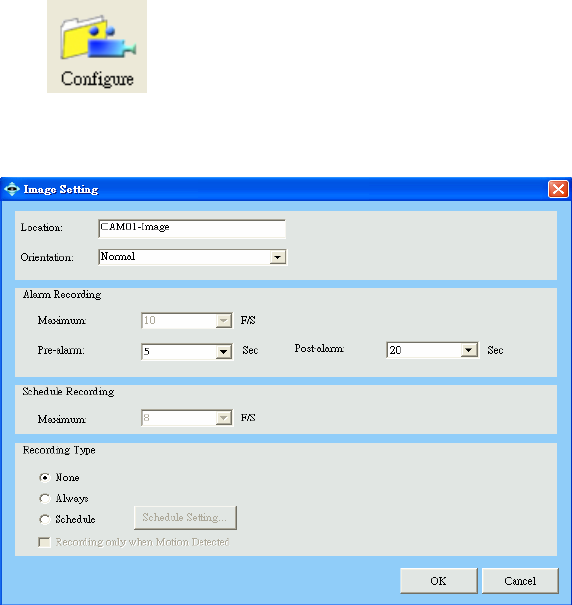
8.1. Basic Configuration: Image Setting
You can configure FPS of alarm/scheduled recording in this window, and activate schedule recording by specifying time period on weekly
basis, as well as activate schedule recording when motion is detected. By this way you can effectively reduce the recording size.
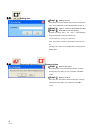
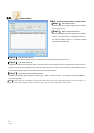
【Step1.】 Select a Camera
Select the Image icon of a camera in the System
Setup area
and click Configure button from the Menu Bar to
bring up the Image setting window.
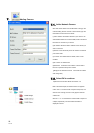
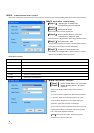
【Step2.】 Edit the Location Name.
The default Location name is CAMxx-image, where
xx is 2-digits serial number.
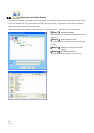
【Step3.】 Configure the Frames Per Second (FPS)
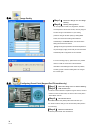
If the camera’s video format is MJPEG (ex: camera models DCS-900, 900W, or G900), you may define this field based on your requirement.
For example, you can give a higher FPS number for alarm recording, or a lower FPS number for scheduled recording to save the storage
space in normal conditions.
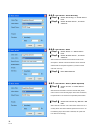
【Step4.】 Activate schedule recording
Schedule recording could be activated by clicking to select “Always” or “Schedule”, and check “Recording only when Motion Detected” to
significantly reduce the storage of schedule recording.
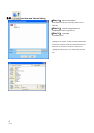
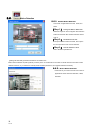
【Step5.】 Configure the number of seconds in before and after event
D-ViewCam can record the image before and after an event. This is vital to event tracking.
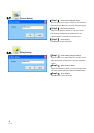
【Step6.】 Save the Setting
Select OK to save the settings. When a “Successfully Saved” message appears, scheduled recording will start automatically and
immediately.