


5-1
H50 SERIES GAS FRYERS
CHAPTER 5: PREVENTIVE MAINTENANCE
5.1 Fryer Preventive Maintenance Checks and Service
DAILY CHECKS AND SERVICE
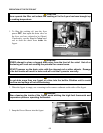
Inspect Fryer and Accessories for Damage
Look for loose or frayed wires and cords, leaks, foreign material in frypot or inside cabinet, and any
other indications that the fryer and accessories are not ready and safe for operation.
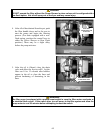
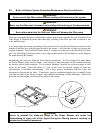
Clean Fryer Cabinet Inside and Out
Clean inside the fryer cabinet with dry, clean cloth. Wipe all accessible metal surfaces and compo-
nents to remove accumulations of oil or shortening and dust.
Clean the outside of the fryer cabinet with a clean, damp cloth soaked with dishwashing detergent,
removing oil/shortening, dust, and lint from the fryer cabinet.
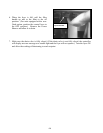
DANGER
Never attempt to clean fryer during the cooking process or when the frypot is filled
with hot oil/shortening. If water comes in contact with oil/shortening heated to
cooking temperature, it can cause the oil/shortening to splatter and severely burn
nearby personnel.
WEEKLY CHECKS AND SERVICE
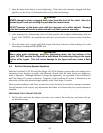
Drain and Clean Frypot
During normal usage of your fryer, a deposit of carbonized cooking oil or shortening will gradually
form on the inside of the frypot. This deposit must be periodically removed to maintain your fryer’s
efficiency.
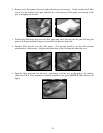
DANGER
Allow oil/shortening to cool to 100ºF (38ºC) or lower before draining to an
appropriate container for disposal.
If your fryer is not equipped with a built-in filtration system, the cooking oil or shortening must be
drained into another suitable container. (For safe, convenient draining and disposal of used cooking
oil or shortening, Frymaster recommends using our Shortening Disposal Unit (SDU). The SDU is
available through your local distributor.)
1. Place the fryer power switch in the OFF position. Screw the drainpipe (provided with your
fryer) into the drain valve. Make sure the drainpipe is firmly screwed into the drain valve and
that the opening is pointing down.