


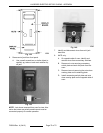

Fig. 143
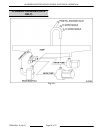
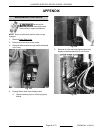
F. From rear of oven, remove plug and re-
install on the opposite side of where
removed.
1) Install bushing in-place of plug.
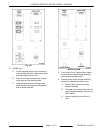
Fig. 144
2) Insert threaded end of drain control
linkage assembly through bushing.
3) Install drain control lever to drain valve.
Secure with mounting nut.
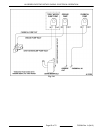
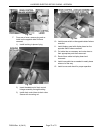
Fig. 145
10. Install power switch on the opposite side of where
removed.
11. Install display panel with display board on the
opposite side of where removed.
12. Cut cable ties as necessary and route wires to
their appropriate parts then reconnect.
13. Route ribbon cable to display board and
reconnect.
14. Install new cable ties as needed to neatly dress
wires out of the way.
15. Install covers and check for proper operation.
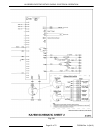
KA SERIES ELECTRIC ROTARY OVENS - APPENDIX
F25294 Rev. A (0412) Page 72 of 72