


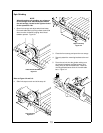
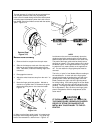
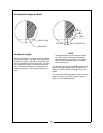

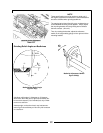
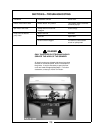
4. The cupped grinding stone should not extend be-
yond the guard. Adjust the wheel head vertically
on the pedestal mount so the inside edge of the
cupped grinding stone is slightly below the top
edge of the bedknife. This will insure an even
wear pattern on the grinding face of the stone.
Figure 3-22
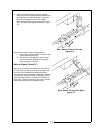
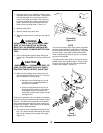
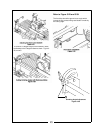
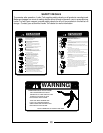
INJURY COULD OCCUR TO THE OPERA-
TOR IF THE CUPPED STONE CHIPS OR
BREAKS APART. MAKE SURE THE OUT-
SIDE EDGE OF THE CUPPED WHEEL
DOES NOT MAKE CONTACT WITH
OUTHER PARS OF THE BEDBAR OR
MOUNTING BRACKET.
Figure 3-23
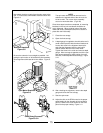
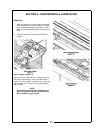
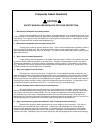
5.
Once the adjustments in step 4 are complete, tighten
the knob, making sure it seats into the groove of the
pedestal. Figure 3-24
CAUTION
6. Set the limit stops so the wheel head clears each
end of the bedknife by one (1) inch or more.
7. Manually move grinding carriage left to right to
insure that all points are clear.
8. Start thee pump on full flow. The nozzle should
direct the coolant to the point of cupstone and the
bedknife.
9. Start the wheel head motor.
10. Manually infeed the wheel head until there is
slight contact with the bedknife. Traverse the
wheel head the full length of the bedknife to in-
sure there are no “high spots” and that the bed-
knife is equal distance from the cupstone.
11. Engage and start the traverse. Continue to grind
until the bedknife has a straight, sharp edge.
12. Disengage the traverse and manually back the
wheel head away from the bedknife. Stop the
grinder.
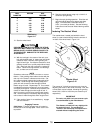
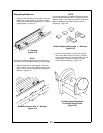
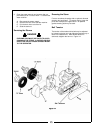
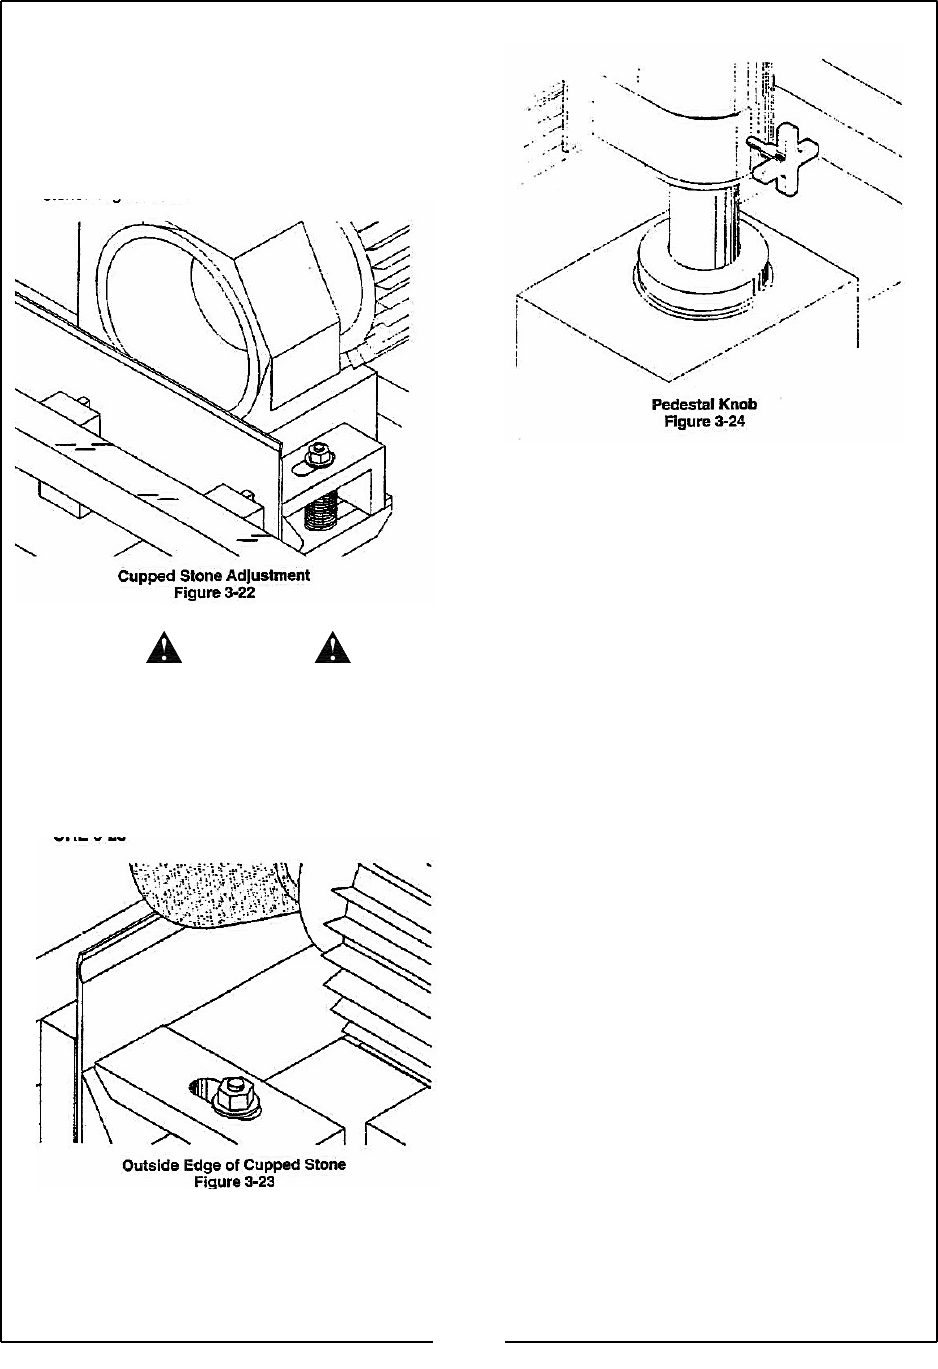
13. Loosen the handles on the sides of the tool bar
and rotate the bedknife ±90 degrees from its pre-
sent position. (This is easiest form the back of
the grinder, but it can be accomplished from ei-
ther side.) Assuer that when the bedknife is ro-
tated the “top face” of the bedknife will be “down
under.” Figure 3-25
Repeat steps 6 through 12 and remove your
sharpened bedknife.
21