


Installation Instruction
16021668 Rev. 0 A–4 ©2002 Maytag Appliances Company
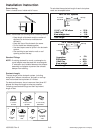
Parts, Tools, and Materials
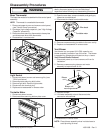
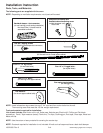
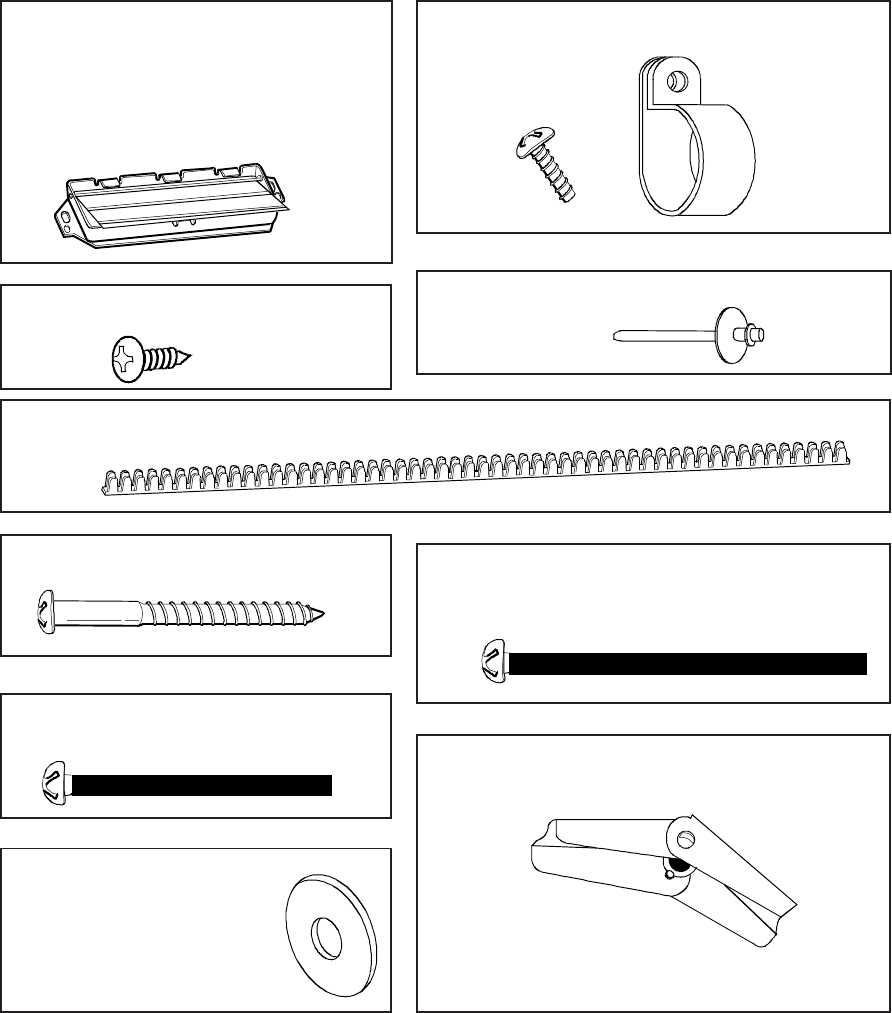
The following parts are supplied with the oven:
NOTE: Depending on ventilation requirements, not all parts will be used.
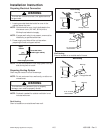
Backdraft damper / duct connector
(for roof-venting or wall-venting installation)
Not Actual Size ( 2 pieces must be
assembled as shown )
Two self - tapping screws
(for attaching the damper duct connector)
One lock pin and one washer-
One power cord clamp and
One dark-colored mounting screw
One power cord clamp bushing -
(for the cord hole in a metal upper cabinet)
F
our 1/4" x 2" lag screws -
(for wall stud holes)
Two 1/4" x 2" bolts -
(for securing to the upper cabinet)
Two washers -
(for the two upper cabinet bolts)
Four spring toggle heads -
(for the toggle bolts)
Four 1/4" x 3" toggle bolts -
(for drywall holes)
(to hold the power cord)
Actual Size
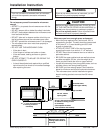
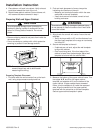
NOTE: Install at least two lag screws into one 2” X 4” stud and four anchor bolts into the wall.
The mounting area must meet the 150 lbs. weight requirement.
Tools and materials required for installation:
List of tools include: Stud finder or thin nail, Saber saw, Keyhole saw, Electric drill, Phillips and Flat blade
screwdriver, Pencil, Tape measure (metal), Plumb line, Tin snips, Caulking gun, Duct tape, Clear tape, Wood and
Metal drill bits.
NOTE: Use the carton or heavy material for covering the counter top.
NOTE: Ductwork required for installation is not included. All wall and roof caps must have a back-draft damper.