Testing Procedures
WARNI NG
!
To avoid risk of electrical shock, personal injury or death;
disconnect power to unit before servicing.
14 16021875 Rev. 0 ©2003 Maytag Appliances Company
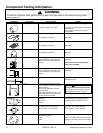
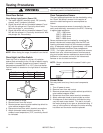
Oven Door Switch
Clean Safety/Light Switch (Power Off)
1. The switch has NO (normally open), NC (normally
closed), and C (common) contacts.
2. Check the switch with an ohmmeter between C and
NC with the plunger out. Continuity should exist.
With the plunger in, no continuity.
3. Check the switch with an ohmmeter between C and
NO with the plunger in. Continuity should exist. With
the plunger out, no continuity.
N
C
NO
C
NOTE: When facing the range, the switch is on the left.
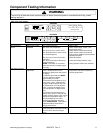
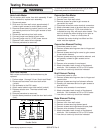
Oven High Limit/Fan Switch
Oven high limit is located on the rear of insulation
retainer and connecting to the L2 side of electric supply,
this switch is normally closed but will open if external
temperature exceeds 260°F or 115°F, see chart below.
Fan limit switch is located on the right side of insulation
retainer.
Part Number Open Close
31751801 260°F 220°F
308417 115°F 155°F
1. Turn off power to range.
2. Remove oven from wall cutout.
3. Remove screws securing outer cabinet top shield to
outer cabinet wrapper shield.
4. Disconnect wires from switch terminal connections.
5. Attach ohmmeter leads to switch terminals. At
ambient room temperature (70°F.) continuity should
be indicated.
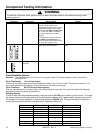
Oven Temperature Sensor
The oven temperature sensor can be checked by using
the "Quick Test Mode" covered in this section of
manual or detail testing can be accomplished as
follows.
The oven temperature sensor is mounted in the oven
cavity and electrically connected to the ERC. Following
is approximate resistance.
75°F—1082 ohms
350°F—1656 ohms
550°F—2056 ohms
880°F—2686 ohms
Sensor resistance can be checked by removing the
sensor interconnect harness plug from the ERC and
inserting ohmmeter leads into the harness connector
plug. A resistance reading of approximately 1100 ohms
should be indicated at ambient room temperature
(75°F.). If a higher resistance is indicated then remove
sensor from oven, disconnect sensor from harness at
plug, and recheck sensor resistance to assure that the
problem is in the sensor and not in the interconnect
harness or due to a bad connection.
NOTE: Sensor resistance will increase if held in your
hand.
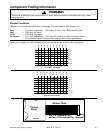
Blower Motor
Fan may come on at any time to cool components
down.
1. Turn off power to oven.
2. Remove oven from wall cutout.
3. Remove screws securing outer cabinet top shield to
outer cabinet wrapper shield.
4. Disconnect wires from motor terminal connectors.
5. Attach ohmmeter leads to terminal tabs on motor.
6. A resistance of ohms should be indicated but may
vary with each motor tested. This test is to check
the motor winding for an open or shorted winding. If
zero or infinite ohms is indicated, the motor winding
has failed and the motor must be replaced.


