


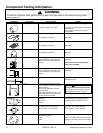
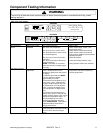

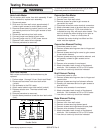
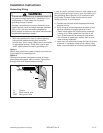

WARNI NG
!
To avoid risk of electrical shock, personal injury, or
death, disconnect power to unit before servicing.
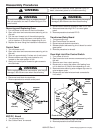
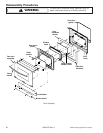
Disassembly Procedures
18 16021875 Rev. 0 ©2003 Maytag Appliances Company
Oven Light Bulb/Oven Light Socket
1. Turn off power to unit.
2. Open oven door to gain access to oven light.
3. Unscrew (counterclockwise) glass knurled dome.
4. Using a glove, unscrew (counterclockwise) oven light
bulb.
NOTE: Proceed with the following steps for oven light
socket removal.
5. Remove screws securing unit to the wall.
6. Remove oven from cutout opening.
7. Disconnect or unplug the power cord leading from
unit to fuse box or junction box depending on unit.
8. Remove screws securing outer wrapper top cover
and remove.
9. Carefully displace fiberglass insulation away from rear
of light socket.
10.Push inner assembly of light socket towards rear of
range.
11.Disconnect wires from light socket.
12.Reverse procedure to reinstall light socket.
Reposition insulation around lamp socket. Do not
overtighten.
NOTE: Reposition fiberglass insulation around oven
light socket to eliminate possibility of heat
related problems.
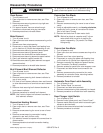
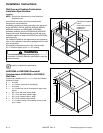
Oven Tank Removal
1. Turn off power to unit.
2. Open oven door and remove screws securing unit to
the wall.
3. Remove oven from cutout opening.
4. Disconnect or unplug the power cord leading from
unit to fuse box or junction box depending on unit.
5. Remove broil reflector/element, convection fan cover,
convection element, convection fan blade, oven light
cover, light bulb, oven light socket,heat sensing
element, smoke eliminator screws, and disconnect
ground wire from oven light bracket.
6. Remove screws securing outer wrapper top cover,
and outer wrapper cover.
7. Remove screws securing chip cover and remove
chip cover.
8. Remove screws securing tank hooks, located on the
outside rear of the unit.
9. Using both hands, press upward in the back of oven
cavity to release tank hooks.
10.Grasp either the right or left corners of oven cavity
to manuver cavity outward. If problems arise getting
cavity started outward, use a small thin plastic or
wood prying device in the corners of the cavity to
start cavity moving outward.
11.Transfer oven light bracket to replacement tank.
12.Reverse procedure to assemble.
NOTE: Unit should be run through at least one clean
cycle to set insulation.
Oven Door Removal
1. Open oven door and remove screws securing door
to hinge assembly.
2. Place oven door in first stop position, then grasp
both sides and lift up off the hinges.
3. Reverse procedure to assemble.
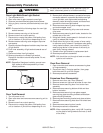
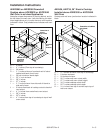
Frameless Door Disassembly
1. Remove oven door, see “Door Removal”.
2. Remove screws on right and left sides of oven door.
3. Remove screws securing door liner to door face
assembly
4. Remove screws securing bottom shield and door
bottom insulation.
5. Remove screws securing inner glass support
securing top glass mounting brackets and bottom
glass mounting brackets.
6. Remove glass mounting bracket and glass window.
7. Remove screws securing heat door liner shield and
remove.
8. Remove screws securing door handle.
9. Reverse procedure to reassemble.
NOTE: When reassembling door, verify HB II marking
on the glass is facing towards the heat (in side
of the oven).