


WARNI NG
!
To avoid risk of electrical shock, personal injury, or
death, disconnect power to unit before servicing.
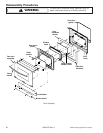
Disassembly Procedures
©2003 Maytag Appliances Company 16021875 Rev. 0 19
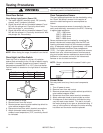
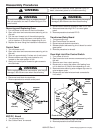
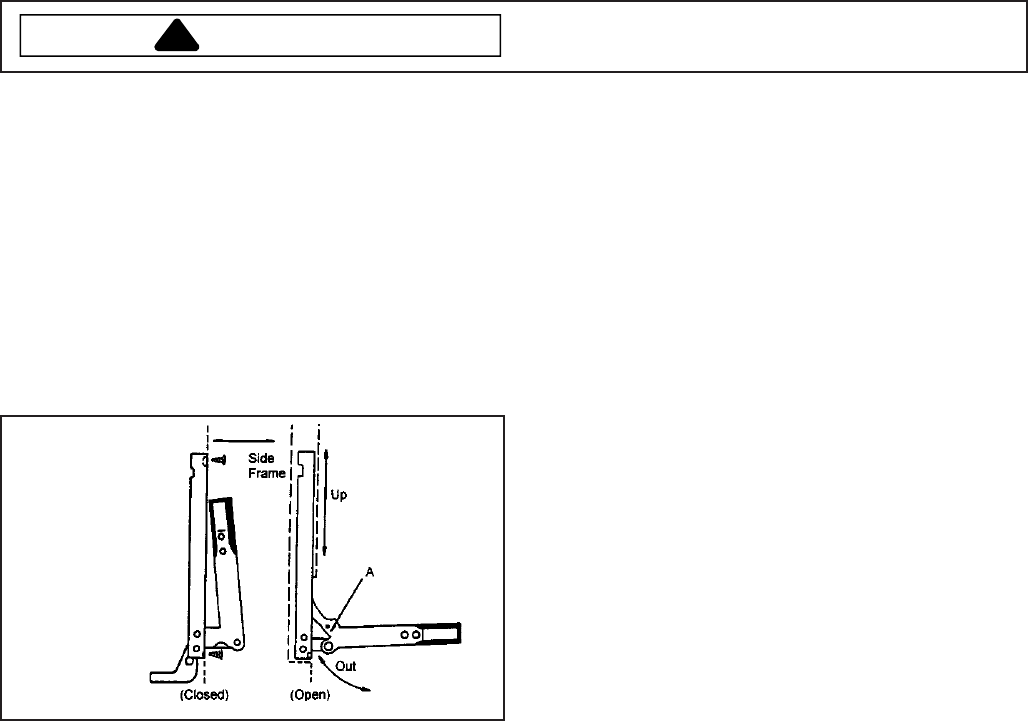
Oven Door Hinge
1. Turn off power to unit.
2. Remove oven door, see “Door Removal”.
3. Carefully open the hinge fully, and insert a wooden
dowel or screwdriver bit into opening marked A on
the following diagram.
4. Remove the top and bottom screws securing hinge
assembly to the front frame.
5. Slide the hinge assembly up and move top of hinge
towards rear of the range. Withdraw hinge
assembly through the frame opening.
6. Reverse procedure to reinstall oven door hinge
assembly.
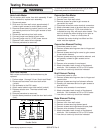
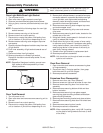
Blower Motor
1. Turn power off to unit.
2. Open oven door and remove screws securing unit to
the wall.
3. Remove oven from cutout opening.
4. Disconnect or unplug the power cord leading from
unit to fuse box or junction box depending on unit.
5. Remove screws securing outer wrapper top cover to
outer wrapper cover.
6. Remove screws securing blower vent bracket to
outer wrapper cover and blower motor assembly.
7. Disconnect and label wire terminals connected to
blower motor.
8. Remove screws securing blower motor assembly to
vent assembly.
9. Reverse procedure to reinstall.
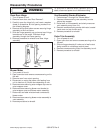
Vent Assembly/Smoke Eliminator
1. Perform steps 1 through 8 of “Blower Motor”.
2. Remove screws securing vent assembly to outer
cabinet top wrapper.
3. Raise back of vent assembly and slowly maneuver
vent assembly away from unit.
4. Remove screws securing smoke eliminator, located
inside oven on top of oven cavity.
5. Reverse procedure to reinstall.
Outer Trim Assembly
1. Turn off power to unit.
2. Open oven door and remove screws securing unit to
the wall.
3. Slide unit approximately 6 inches out of wall cutout
being carefull to not damage control panel.
4. Remove screws securing outer trim assembly to unit.
5. Reverse procedure to reinstall.