


INITIAL CLEANING:
Before filling any Pitco Frialator with oil, it is advised that it be thoroughly cleaned to remove any foreign particles
from the cooking area. The machine should be filled with water to at least, the minimum level. Add the sample
packet of Fryer Cleaner and set the temperature control between 90º and 100º C. Using the available cleaning brush
and the appropriate protective clothing, brush the inside of the fry tank until clean. When finished, turn the machine
OFF and drain, rinse the tank with fresh water and dry carefully. The machine should be filled with oil at this time
and all exposed surfaces coated with a small amount of cooking oil to prevent surface rust.
OPERATION:
COVERS:
In case of an oil fire in the fryer the cover can be used to place on top of the fryer to extinguish the flames. It should
be kept in a nearby location that is uncluttered and easy to reach.
FILLING THE FRY TANK WITH SHORTENING:
When using solid shortening, it must be cut into approximately 3 cm cubes and loosely packed under the above the
Element Rack.. Be careful not to obstruct the optional float switch. If installed, it will be located in the bottom of the
fry tank at the front, as it must be allowed to float freely. Check that the oil level is at the minimum level when the oil
has melted.
RUNNING THE FRYER UP TO OPERATING TEMPERATURE:
Digital Thermostat Equipped: Turn the power switch to the ON position and press the ON/OFF switch on the
Display. The Digital control will illuminate and bring the shortening up to the desired temperature. You may now
cook with your Pitco fryer.
Computer Equipped: Press the Power Switch to the START position and release to the ON position. The computer
display will come on and automatically bring the temperature up to the desired level and display READY. You may
now cook with your Pitco fryer.
NOTE: On machines equipped with Digital Controls or Computers that are programmed with a melt cycle, the
Heating Elements will pulse on and off to slowly heat the oil. When the oil temperature has reached a preset level the
Heating Elements will run constantly until the set temperature has been reached.
FILTERING:
Filtering is recommended on a daily basis to keep the oil in as good a condition as possible. Old oil has a lower
inflame point (Flash point) and foams faster than cleaned oil. Follow the instructions below and refer to the appropri-
ate Figure for your machine.
1. Turn the fryer OFF as described in the “SHUTTING THE FRYERS DOWN FOR AN EXTENDED TIME” section.
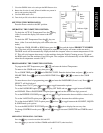
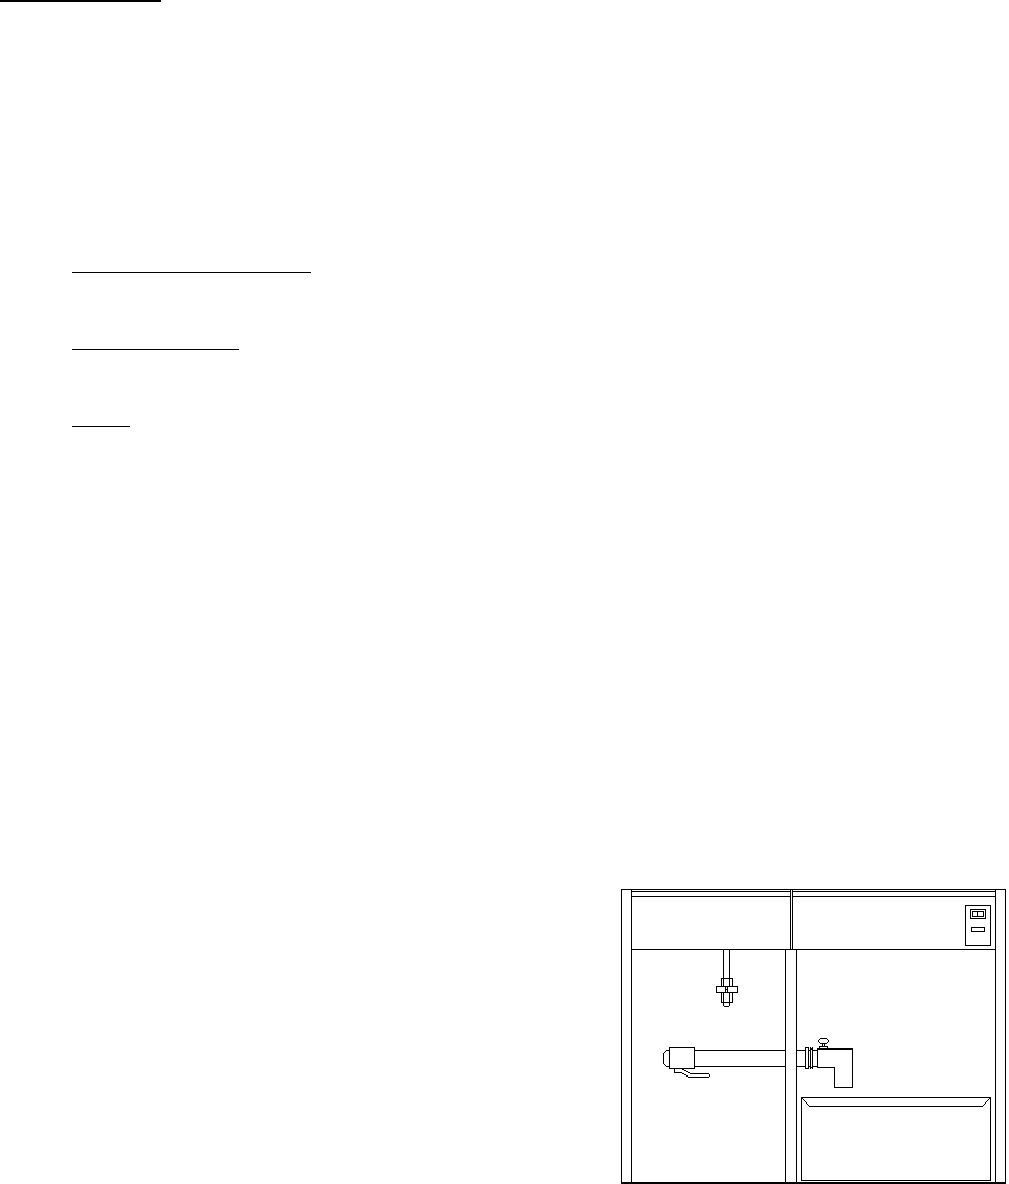
2. For Built In Filters (Filters located in a separate, but attached cabinet. Figure 1): Detach the Quick Disconnect at the
end of the Return Hose and slide the tank outward. Pull the front and rear Hold Down handles from their locked
position, and lift the Retaining Frame out. Lift the old filter paper out and replace with a new paper. Install the Hold
Down Rack and replace the handles in a locked position. Push the pan back into place and attach the hose.
3. For UFM (Filters that are stored under the actual fryers. Figure 2): Detach the Quick Disconnect at the end of the
Return Hose and pull the filter unit out from under the fryers. Pull the White handle apart on the Pickup. Unscrew the
Pickup tube from the filter screen and lift the Clip Screen from
the Support Screen and Paper. Remove the Support Screen from
the Paper envelope and place it in a new Paper envelope. Fold the
open end of the paper over twice and place the Clip Screen over
the folded end of the paper. Screw the Pickup onto the screen and
place it in the pan. Push the Pickup into its receptacle and push
the filter under the fryer. Attach the Return Hose.
4. Open the GREEN drain valve for the fryer to be filtered. Allow
the oil to drain from the fry tank. NEVER - Open more than ONE
drain valve at the same time as the filter will NOT hold more than
one (1) tank.
5. Open RED return valve for the tank being filtered.
6. Turn the pump ON and use a Cleaning Brush, Crumb Scoop and
Cleaning Rod as needed to remove the debris from the fry tank.
Turn the pump OFF when the fry tank is clean.
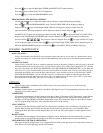
Figure 1.
Filter Pan
Indicator Light
Pump Switch
Green Drain
Valve
Red
Return
Valve
3