


30 TASCAM CD-RW402 Owner’s Manual
5 – Recording
Before you start recording using the CD-RW402,
make sure that you understand the following key
points:
• Once you have recorded on a CD-R disc, the data
cannot be erased from it.
• You can add tracks to an unfinalized recordable
disc. Once finalized, a CD-R disc is “fixed” and
behaves in the same way as a pre-recorded disc.
Finalized CD-RW discs, however, can be erased,
refreshed and re-recorded.
NOTE
As well as recording, the CD-RW402 also provides copy
facilities. You may want to look at “Copying discs” on
page 44 before starting recording, as sometimes a copy
operation may be more appropriate than a record oper-
ation (for instance, if you want to record a whole disc
and make no changes to the contents, a copy operation
is almost always preferable).
Input selection
To select the input to be recorded, press the INPUT
SELECT
key on the main unit.
Repeated presses of the key cycle through the follow-
ing options:
In the case of the coaxial or optical inputs being
selected, the boxed
DIGITAL
indicator shows on the
display, and the appropriate indicator:
COAXIAL
or
OPTICAL
, lights on the display.
If the analog signal is selected the boxed
ANALOG
indicator lights on the display.
NOTE
There is no way of changing the selection between the
balanced and unbalanced analog inputs. If signals are
present at both inputs, they will be mixed.
No indicator lights if INTERNAL is selected.
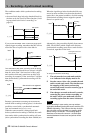
Signal volume
• The analog signals received at the ANALOG IN
jacks are controlled with the
INPUT and BALANCE
controls.
• Digital signal levels (from whatever the source) as
well as the level of analog signals once they have
passed through the
INPUT and BALANCE controls
are adjusted in the following way:
1 Press the
RECORD key to place the unit in
record ready mode (or monitor mode, if a
recordable disc is not loaded—see below).
2 Press the
MENU key (2) and turn the MULTI
DIAL
to display REC MENU 1 ?.
3 Press the
MULTI DIAL.
4 Turn the
MULTI DIAL until DIG VOLUME ? (digi-
tal volume) is shown.
5 Press the
MULTI DIAL.
6 Turn the
MULTI DIAL to adjust the volume
between
–60dB and +18dB. There is also a -- set-
ting (below the lowest level) which represents
a total signal cut.
While you are adjusting the level, it is proba-
bly a good idea to play the signal source, and
watch the meters, making sure that the
OVER
segments do not light.
7 Press the
MULTI DIAL to leave the menu.
Input monitoring
When the unit is in record ready, or record mode, the
input signal is output from the
OUT jacks (digital and
analog), allowing you to hear the input signal.
The meters also show the current signal level.
However, it is only possible to record, or to enter
record ready mode, when a recordable disc is
inserted. To allow monitoring of the input signal at
other times, or when the unit is stopped, use the
RECORD key to enter monitor mode from stop mode
when there is no recordable disc in the unit (when
there is a recordable disc in the unit, pressing the
RECORD key enters record ready mode).
The word
MONITOR appears on the display to show
that the output signal is an echo of the input signal(s).
The meters show the current input level.
Exit the monitor mode by using the
STOP key.
ANALOG Analog inputs
OPTICAL Optical digital
COAXIAL Coaxial digital
INTERNAL Drive 1