


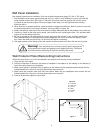
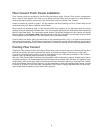

Installation of floor panels secured for seismic and wind - exterior applications
After the floor is installed per the instructions above, obtain the hardware and tools for the application of “Tapcon”
anchors.
1. 1/4" “Tapcon” Phillips flat head anchors or equal
2. “Tapcon” drill bit; 3/16" x 6 1/2" (No. 790-1036 or equal)
Drill through the female cam lock located in the floor panel into the concrete pad to a depth of 2" or more to insure
the anchor does not bottom out. (If leveling shims are required, locate shims close to the location of the anchors)
Space holes around the perimeter of the floor system at each cam lock location (eliminate anchors when space
is less than 15" from previous anchor) spaced no further than 24". Insert and tighten the “Tapcon” anchors into
each hole. DO NOT OVER TIGHTEN. Recheck floor for level and square prior to installation of walls.
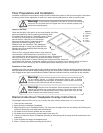
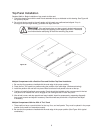
PVC Panel Track Installation for Floorless Walk-In
Warning! When W. A. Brown does not provide the insulated floor, check
carefully before installing the walk-in for appropriate thermal breaks. Severe floor
heaving problems occur when floors are not adequately insulated. Consult the
W. A. Brown Working Data Catalog for details.
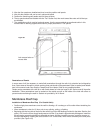
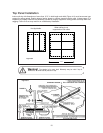
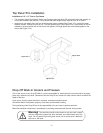
PVC Panel Track Layout (Required where no insulated floor is ordered from Brown)
1. Mark the exact area the walk-in will occupy on the building floor.
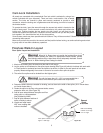
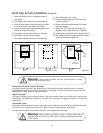
2. Field cut 12' pieces of the PVC panel track to size for your particular walk-in. Cut ends on a 45 degree
angle to accommodate corner panels. A hack saw will work well for this cut. (See Figure #4)
3. Mark and cut door opening location.
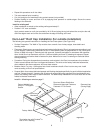
4. Fasten track to the floor using ramset studs, screws or other fasteners (not supplied by WAB.) (See Figure #5)
5. Determine where shims are needed for leveling, cut them so they will fit in the channel of the track.
The wall panels are leveled during the installation process.
6. Seal all open areas around the track using silicone sealant (not provided by WAB.)
7. The wall panels do not lock to the track in this application.
Figure #4
Figure #5
4