


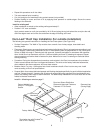
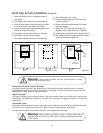

3. After the floor panels are installed and level, erect the partition wall panels.
4. After this the partition wall can be set in place and locked.
5. Position the remaining wall panels and lock them all down.
6. The top panels should be installed with the “Tee” Section first, then work toward the ends until all the tops
are installed.
7. The combination walk-in must be level and square. Use the same methods as mentioned earlier in this
manual.Refer to drawing supplied with order for proper placement of “Tee” panels.
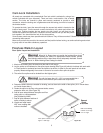
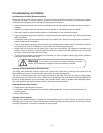
Penetrations of Panels
In some cases it will be necessary to make field penetrations through the walk-in for electrical and refrigeration
lines. Some areas of the walk-in contain working parts and should not be penetrated. Refer to special panel details
later in this manual under Door Section Cutaway and Door Heater Cable for any possible hazards.
Panels can be penetrated with a drill bit or with metal shears for holes too large to drill. Seal around all lines after
installation. These penetrations must be sealed on the outside as well as the inside of the hole with silicon to
prevent moisture entering the walk-in. Sealant not provided by W. A. Brown.
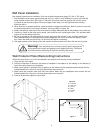
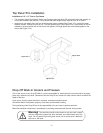
Membrane Roof Cap
Installation of Membrane Roof Cap (For Outside Units)
• Position single piece membrane over the walk-in allowing a 6" overhang on all four side without stretching the
membrane.
• Allow membrane to relax for 1/2 hour prior to any splicing, cutting, or flashing.
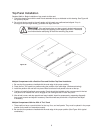
• Beginning with the long side of the box at the center, layout the 2x6 flashing provided for that side. Start the first
piece 2 1/2" from the corner. Apply hand pressure until the 2" top break is approximately 90 degrees. Install the
#6 self tapping screws (provided) into sidewalls as shown. Working toward the corners, continue pressure to
the top of the flashing. Flashing will come to within 2 1/2" of the corner, which will be covered by the corner piece
provided. (See Figure #13)
7
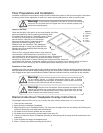
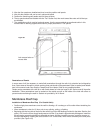
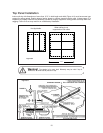
Figure #9
Lock access holes on
reverse side