


14
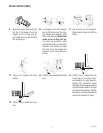
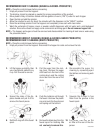
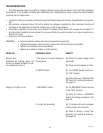
FAUCET HANDLES
Dispensing from the hoppers will occur when the faucet handles are
installed with the handles in the upright position. (shown, left hopper)
Dispensing from the hoppers will not occur when the handles are in-
stalled upside-down. (shown, right hopper) You may consider this handle
position when the product in the hoppers is not yet ready to serve. Just
spread the handles or disassemble them as shown, and install them upside
down.
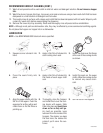
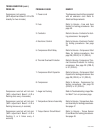
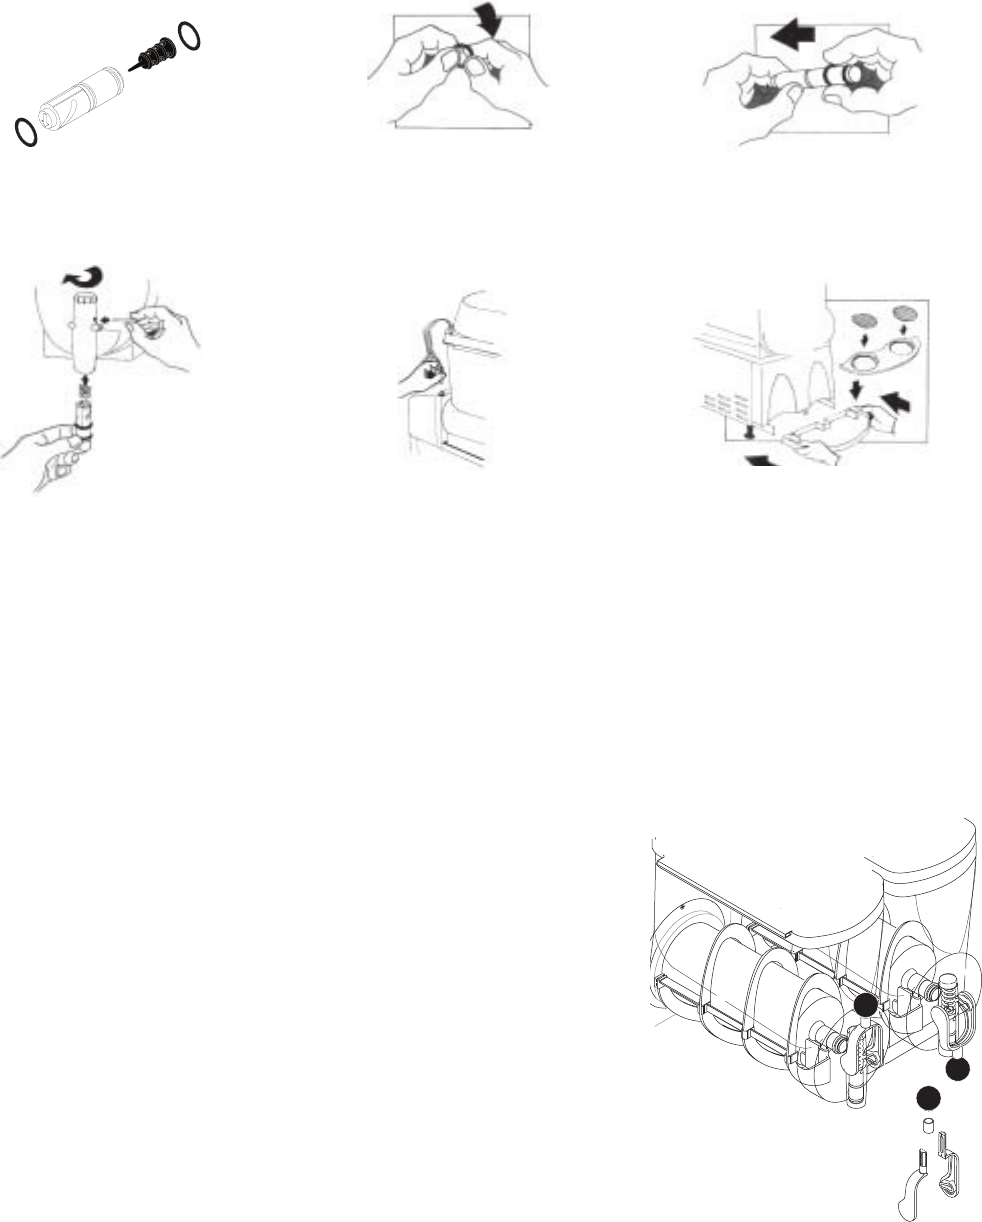
DISASSEMBLY
1. Unscrew the balls from the handle assemblies. Turn them in a counter-
clockwise direction until they are no longer attached to the handles.
2. Remove the metal sleeves from the assemblies.
3. Separate the two halves of the handles and remove them from the
faucet bodies.
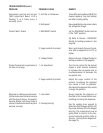
14. Plug in the hopper lid lamp
cables.
15. Assemble the drip tray.
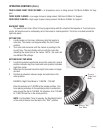
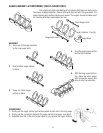
LUBRICATION (cont.)
12. Slide the O-rings onto the
spools.
10. Reinstall the black plug into the
faucet spool. Do not lubricate
the plug.
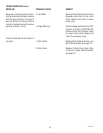
13. Reinstall the plastic caps,
springs, spools, and metal
pins. Spread the dispense
handles and reinstall them.
NOTE – When reinstalling the faucet
caps, they MUST be twisted as
far as they will go. (Past the
point where it clicks.)
NOTE – The faucet spool plugs, faucet O-rings, cooling drum hopper seals,
and auger shaft seals are to be replaced whenever they appear worn
or damaged. Bunn-O-Matic recommends their replacement at least
every six-months. Refer to page 24 for replacement instructions.
11. Apply a thin film of lubricant to
each faucet spool O-ring.
27646 122200
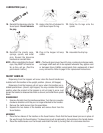
ASSEMBLY
1. Place the two halves of the handles on the faucet bodies. Check that the faucet dowel pins are in place all
the way through the faucet bodies. The dowel pins must be captured by the keyholes in the handle halves.
2. Place the metal sleeves over the threads and install the balls by turning them in a clockwise direction.